 Today is my middle sister’s birthday, and if there is one thing my sister loves (more than me obviously) it would have to be bananas. Well, fruit in general, but bananas are up there in the top two category. Second to cantaloupe, but I still haven’t figured out a cantaloupe cake and something tells me…maybe I don’t want to? So until then, banana cake it is. I don’t think anyone will complain too much about it, let’s be real. It’s all going to work out though, as one of my sister’s favorite desserts happens to be banana pudding because it has all the things she loves, bananas, whipped cream, and vanilla pudding. She could give or take the wafers, if I’m being honest, but it wouldn’t be a banana pudding without them so I’m keeping them in. Sorry, Nick. This Banana Pudding Cake is classic southern dessert meets birthday layered cake. It’s over the top, it’s completely out of this world, but it’s most definitely necessary. Don’t let anyone tell you differently. Whether it just so happens to be your birthday today as well, or you’re wanting to celebrate summer, or want to party along with us in order to celebrate my sister’s birthday, this cake needs to make an appearance in your kitchen as soon as humanly possible. Don’t let summer pass you by without having made this cake, you promise? If this doesn’t convince you, then maybe last year’s Vanilla Birthday Sprinkle Cupcakes will. You can’t go wrong with cupcakes and sprinkles.

We’re going to start by whipping up the cake batter. We need it to cool completely, so it’s important to get it out of the way as soon as possible. This is a standard yellow cake recipe, which first debuted in this Yellow Cake with Chocolate Buttercream post. In a small bowl, sift or whisk together the cake flour, baking powder and salt.
**Tip: Cake flour is a lighter textured flour than AP flour and it’s great for this cake because it gives it a light and fluffy texture. If you don’t have any on hand or just can’t find it, you can make it yourself with this DIY.**
 In a large bowl, cream together the butter and sugar until light and fluffy. Add the eggs and egg yolks, one at a time, mixing well after each addition. Stir in the vanilla extract. Then add the dry ingredients, alternately with the buttermilk, starting and ending with the dry ingredients.


Divide among two 8-inch round cake pans that have been buttered and floured. Give the pans a few taps to dislodge any air bubbles.
**Note: Real talk: For some reason I only have one 9-inch round cake pan, so I baked in batches. If you’re lucky enough to have two, then use both!!**
 While the cakes bake, let’s turn our attention to the pudding. This is banana pudding after all, so it’s important to have the pudding present. In a medium saucepan, whisk together the sugar, cornstarch, and salt. Then whisk in the milk, and egg yolks until well combined.
 Set over medium high heat and cook until the mixture has come to a bubble and thickened. You’ll know that it’s done if you stick a wooden spoon in and run your finger in a solid line on the back. If the line stays, then you’re good to go.
**Note: Make sure you keep stirring so that the pudding doesn’t stick to the bottom and burn. You’ll get tired stirring but believe me, it’s a must.**
 Remove from the heat and add in the butter and vanilla extract. Stir until the butter has melted. Then pour into a large bowl, though a fine-mesh sieve to remove any lumps. Cover with plastic wrap, making sure the plastic wrap touches the surface of the pudding directly. Place in the fridge and chill at least 1 hour or overnight.
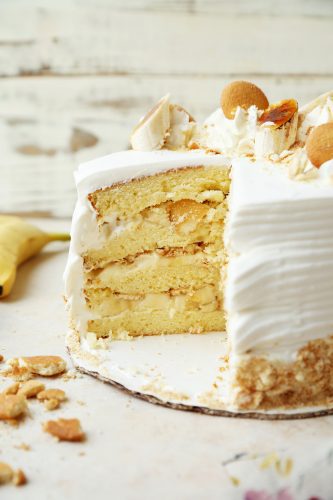
 Once the cake layers have cooled complete, trim of the very top to even the layers out. Then cut each in half so you end up with four even and thin cake layers. To assemble this cake, place one piece on a cake plate or cake stand. Then pipe out the whipped cream around the edge of the cake.
**Note: This whipped cream action will act as a wall or barrier if you will. This will help keep the pudding from spilling out and contain it.**
**Note, also: I just made basic whipped cream for this cake because whipped cream is a classic banana pudding ingredient. To make this beat the heavy cream with powdered sugar and vanilla extract until soft peaks.**
 Pour a third of the chilled vanilla pudding in the center and spread out into an even layer. Then top with sliced fresh bananas and crushed up nilla wafers. Again, all classic banana pudding ingredients.
 Top with another layer of cake and repeat with another border of whipped cream, a third of the pudding, and more fresh bananas and nilla wafers. Repeat with the remaining cake layers.
**Note: The nilla wafers will get soft, just like a banana pudding, which happens to be my favorite part. If you don’t like them to get soft, then you can just hold off and just sprinkle them on top of the cake at the end to keep them crunchy.**
 Once you’ve layered the cake, cover the entire thing roughly with a crumb coating of whipped cream. This doesn’t have to be perfect. Once done, place it in the fridge or freezer and allow it to set, about 30 minutes. This will prevent the layers from sliding.
**Tip: A crumb coating in cake just means that you cover the thing roughly with the frosting. It’s a rough coat so it doesn’t have to be perfect. Later on we’ll cover it nicely with more whipped cream.**
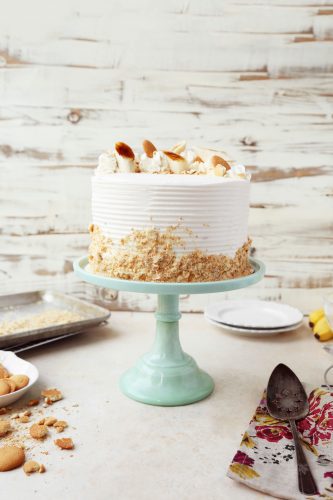
 Add some more whipped cream and frost it as smooth as possible. I have a cake comb that I ran around the edges to create that lined texture on the sides. I got this one from online and it’s great! Coat the bottom of the cake with crushed up nilla wafer crumbs. This adds texture but also a bit of color.
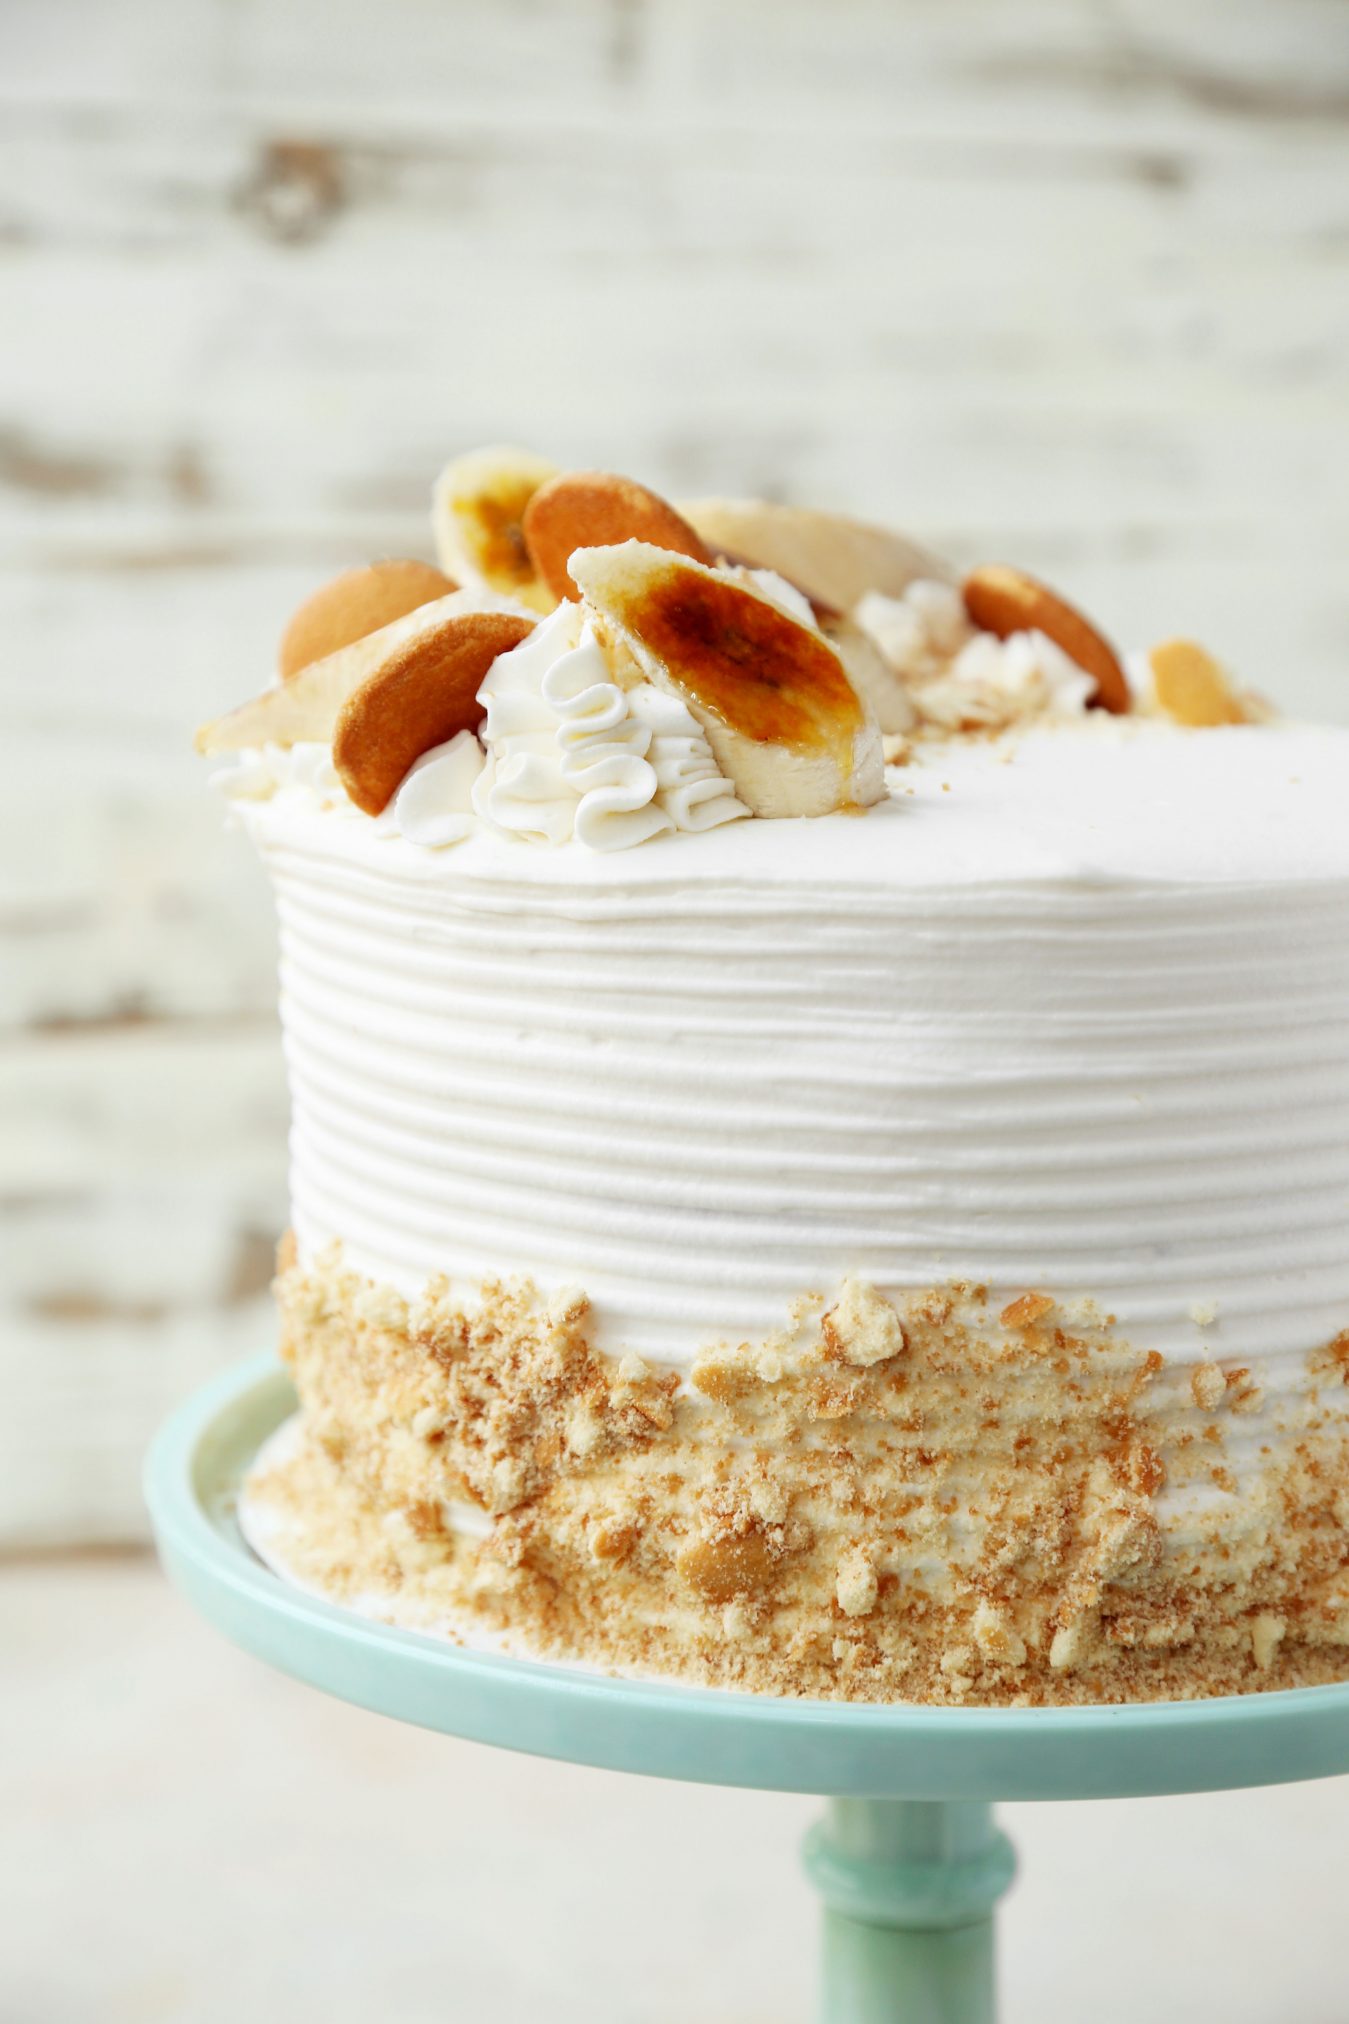
 To decorate the top of the cake, pipe out the whipped cream on top, in any kind of decoration pattern you’d like. You can run a border around the edges or pipe it out onto one side like I did.
 Then place a few nilla wafer cookies on top, maybe even a bit of the crushed up cookie crumbs if you’d like and some banana slices. I caramelized the bananas by sprinkling the slices with granulated sugar and then torching it with a kitchen blowtorch.
**Tip: That part is completely optional, so if you don’t have a blowtorch, then just place fresh banana slices on top. Just keep in mind that the bananas will get brown the longer it sits. You can place them on top right before serving.**
It’s important for the cake to chill in the fridge for at least 1 hour before cutting and serving. This will allow it all to firm up and set, making it easier to slice. If you try to slice it right away, the cake layers might shift.
 Whipped cream isn’t as stable as something like a buttercream, but if you let it set in the fridge as much as possible and keep it chilled until right before cutting then you’ll be good to go. Don’t be afraid.

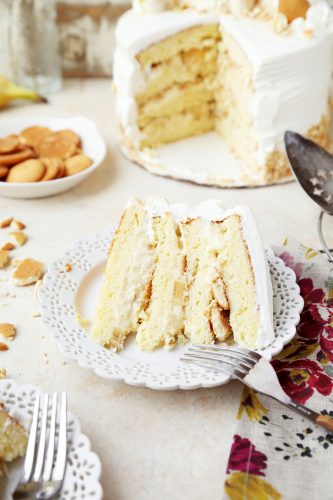
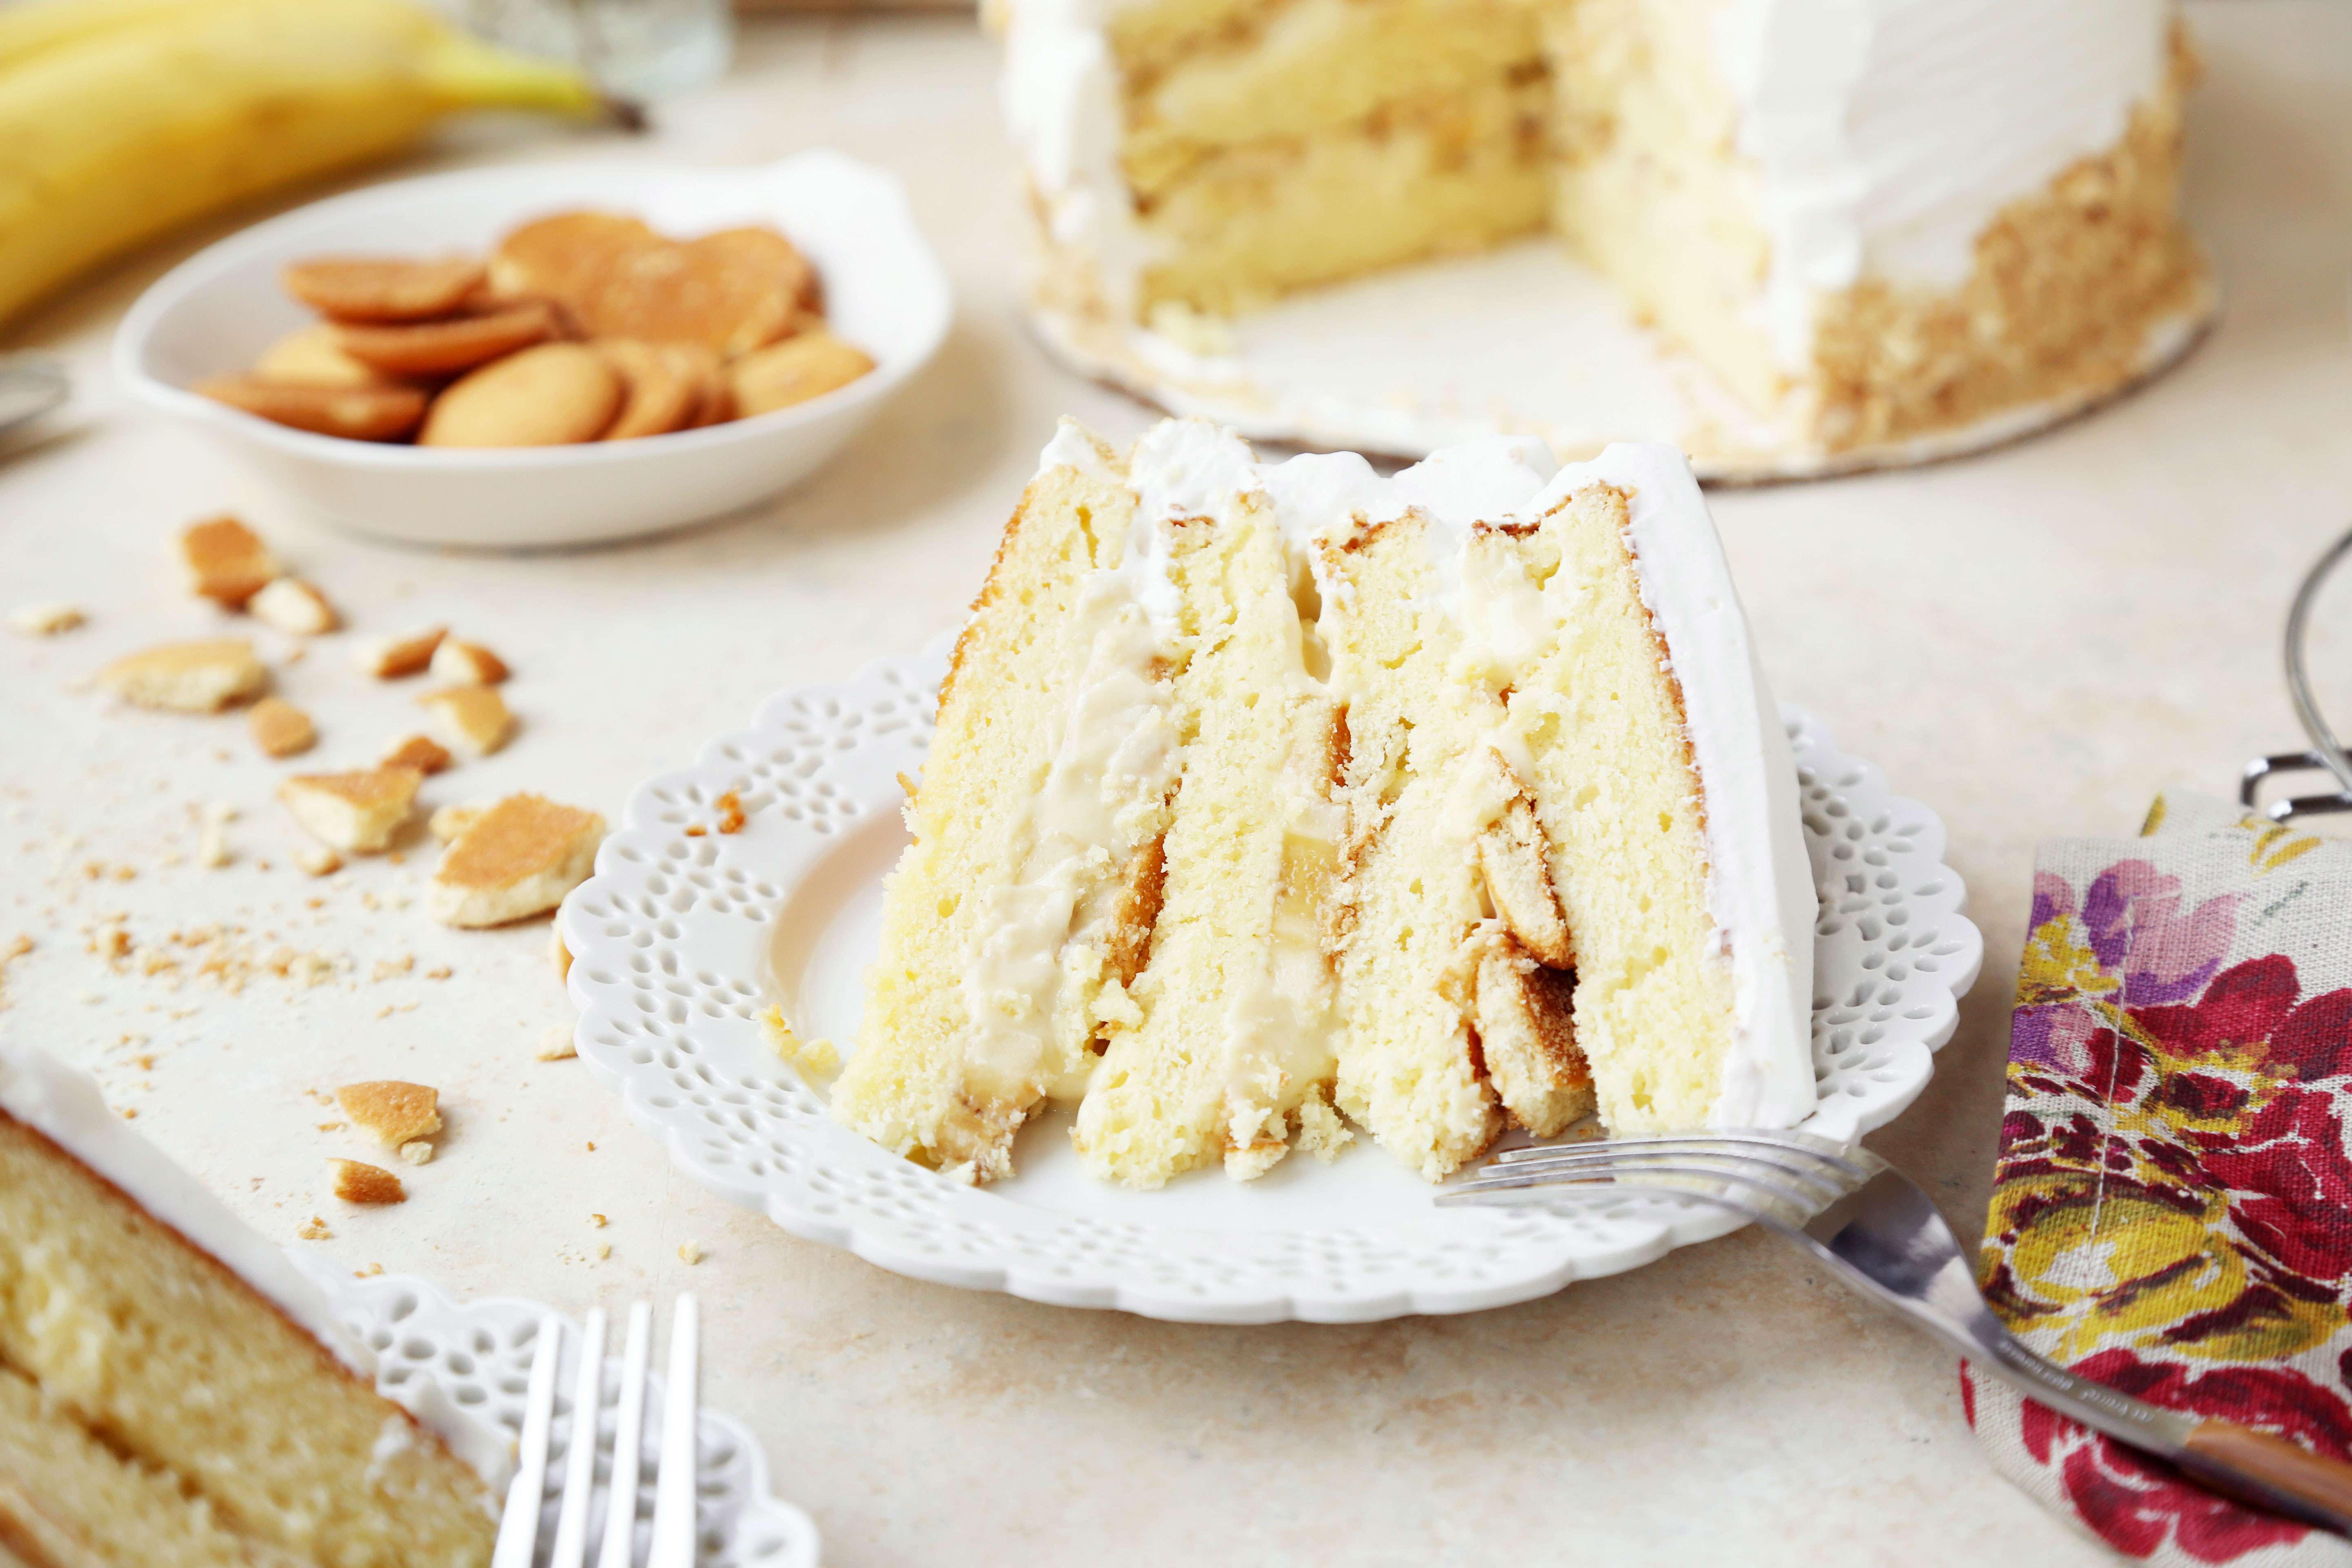
This cake tastes JUST, help me say just, JUST like banana pudding. I feel like with any layered cake, it takes a lot of time, but it’s well worth the effort. Make this cake and you won’t be sorry. It’s the perfect summer showstopper.

Good news is that today will be the last time you have to endure me bothering you about this, but Saveur Magazine is hosting their annual Food Blog Award nominations right now as we speak. If you have a few minutes to spare, head on over to their site, and nominate your favorite food blogs. If one of your favorite food blogs happens to be mine, and you enjoy the work I put out, I’d be ever so grateful if you nominated The Candid Appetite for either the “Most Inspired Weeknight Dinners” category or “Best Photography.” I promise I won’t harp much longer on this, but I figured why not give it a go?! Thank you so much to all those who have voted! Today is the last day to nominate!
Banana Pudding Cake
Ingredients
Cake:
- 3¼ cups cake flour
- 2½ teaspoons baking powder
- 1 teaspoon salt
- 1 cup 2 sticks unsalted butter, at room temperature
- 2 cups granulated sugar
- 4 large eggs at room temperature
- 2 large egg yolks at room temperature
- 2 teaspoons vanilla extract
- 1¼ cups buttermilk
Vanilla Pudding:
- 1/3 cup sugar
- 2 tablespoons cornstarch
- 1/8 teaspoon salt
- 2 cups milk
- 2 large egg yolks
- 2 tablespoons butter
- 2 teaspoons vanilla
Whipped Cream:
- 1 pint heavy whipping cream
- 1/2 cup powdered sugar
- 1 tablespoon vanilla extract
Cake filling and topping:
- 4 medium bananas
- 1 1/2 cups lightly crushed vanilla wafer cookies
- 3/4 cup finely crushed vanilla wafer cookies
Instructions
- Preheat oven to 350℉. Grease and flour two 9-inch round deep cake pans. Set to the side.
- To make the cake, in a large bowl, combine the flour, baking powder, and salt. Set aside. In a separate large mixing bowl, cream together the butter and sugar on high for about 5 minutes or until light and fluffy. Add the eggs and egg yolks, one at a time, mixing well after each addition. Stir in the vanilla extract and scrape the bottom and sides of the bowl with a rubber spatula to ensure everything gets evenly combined. Add the dry ingredients and the buttermilk to the batter, alternating between the two. Begin and end with the dry ingredients. So add a bit of dry, mix until just combined, buttermilk, mix, dry, mix, milk, mix, and dry, until it's all incorporated. Divide the batter between the prepared cake pans. Give them a few raps on the counter to dislodge any air bubbles.
- Bake for about 25 to 30 minutes or until golden brown and a toothpick inserted in the middle comes out clean. Remove from oven and allow to cool for about 10 minutes. Run a knife along the edge of the cake and then invert to remove the cake from the pan. Allow to cool completely on a wire rack.
- To make the pudding, in a medium saucepan, whisk together the flour, sugar and salt. Slowly whisk in the milk until evenly combined. Stir in the egg yolks and place over medium-high heat. Cook, stirring often, until the mixture bubbles and has thickened, about 5 to 8 minutes. Remove from heat and stir in the butter and vanilla extract. Pour into a bowl, through a fine mesh sieve to remove any lumps. Cover the surface directly with plastic wrap and chill for at least 1 hour or over night.
- To make the whipped cream, beat the heavy cream on high with the powdered sugar and vanilla extract until soft peaks form, about 8 to 10 minutes.
- To assemble the cake, trim the tops of the cooled cakes to even them out, and then cut them each in half so you end up with four thin layers. Place on layer on a cake stand or plate. Then pipe out a border of whipped cream along the edge. Pour a third of the vanilla pudding into the center and spread out into an even layer. Top with sliced bananas and crushed cookies. Top with a cake layer and repeat twice more. Once the last cake layer as been place, cover the cake roughly with whipped cream. Allow to chill in the fridge for about 30 minutes to set. Cover the cake with more whipped cream, only this time, make sure to really coat it and smooth it as best you can. Decorate the top and sides with whipped cream, wafer cookies, crumbs and banana slices. Let rest in the fridge for about 1 hour before slicing and serving! Enjoy!
Beautiful Cake, Jonathan. I have to find the ultimate coconut cake recipe for my daughter’s birthday in August. I’ve made her Italian cream cake. which is a favorite of hers, but I want to do something with Italian Meringue Frosting. I’ve never tried that type of frosting and I hear it can be a little temperamental at times. I’ll have to read up on it. Your sister is lucky to have such a great brother. Wish I had a taste of your cake.
Love it!!!!!
By the way, I’ve seen cantaloupe pies pop on Pinterest. I haven’t tried them yet.
Hi Jonathan. I am thinking of making this for a birthday party and I wouldn’t be able to get it chilled to withstand the whipped cream. Would a buttercream frosting work? If so, can you recommend a buttercream recipe? Thank you.
I’m going to try to make this cake this weekend! Quick question – do you think 9″ cake pans will work?
Hi Paige! I’m so glad you’re going to give it a try! You’ll have to let me know what you think. Yes, I used 9″ inch cake pans in the recipe!
Is the recipe for 8inch or 9inch pans? In the blog you mentioned using 8inch but the recipe mentions 9inch. I just want to make sure so I know whether or not to adjust proportions for 8inch pans.
Hi Kelly! Thank you so much for catching that. I will fix that right now! It’s definitely 9-inch pans!
Hi there! I was going to try this with a 7 inch pan, do you think the oven timing will change a lot?