 I’m obsessed with all things black forest cake. It’s one of my favorite flavors and that’s why I’ve turned it into fudge and tres leches in the past. Both are great options if you’re a fan of black forest as much as I am. This year, however, I wanted to give my holiday cookies the same mash-up treatment. These Black Forest Thumbprint Cookies are my new favorite cookie, much like last year’s babka cookies were. But those were last year’s IT cookie for me and now, these thumbprints are here to make your holidays a little bit brighter and a lot more delicious.
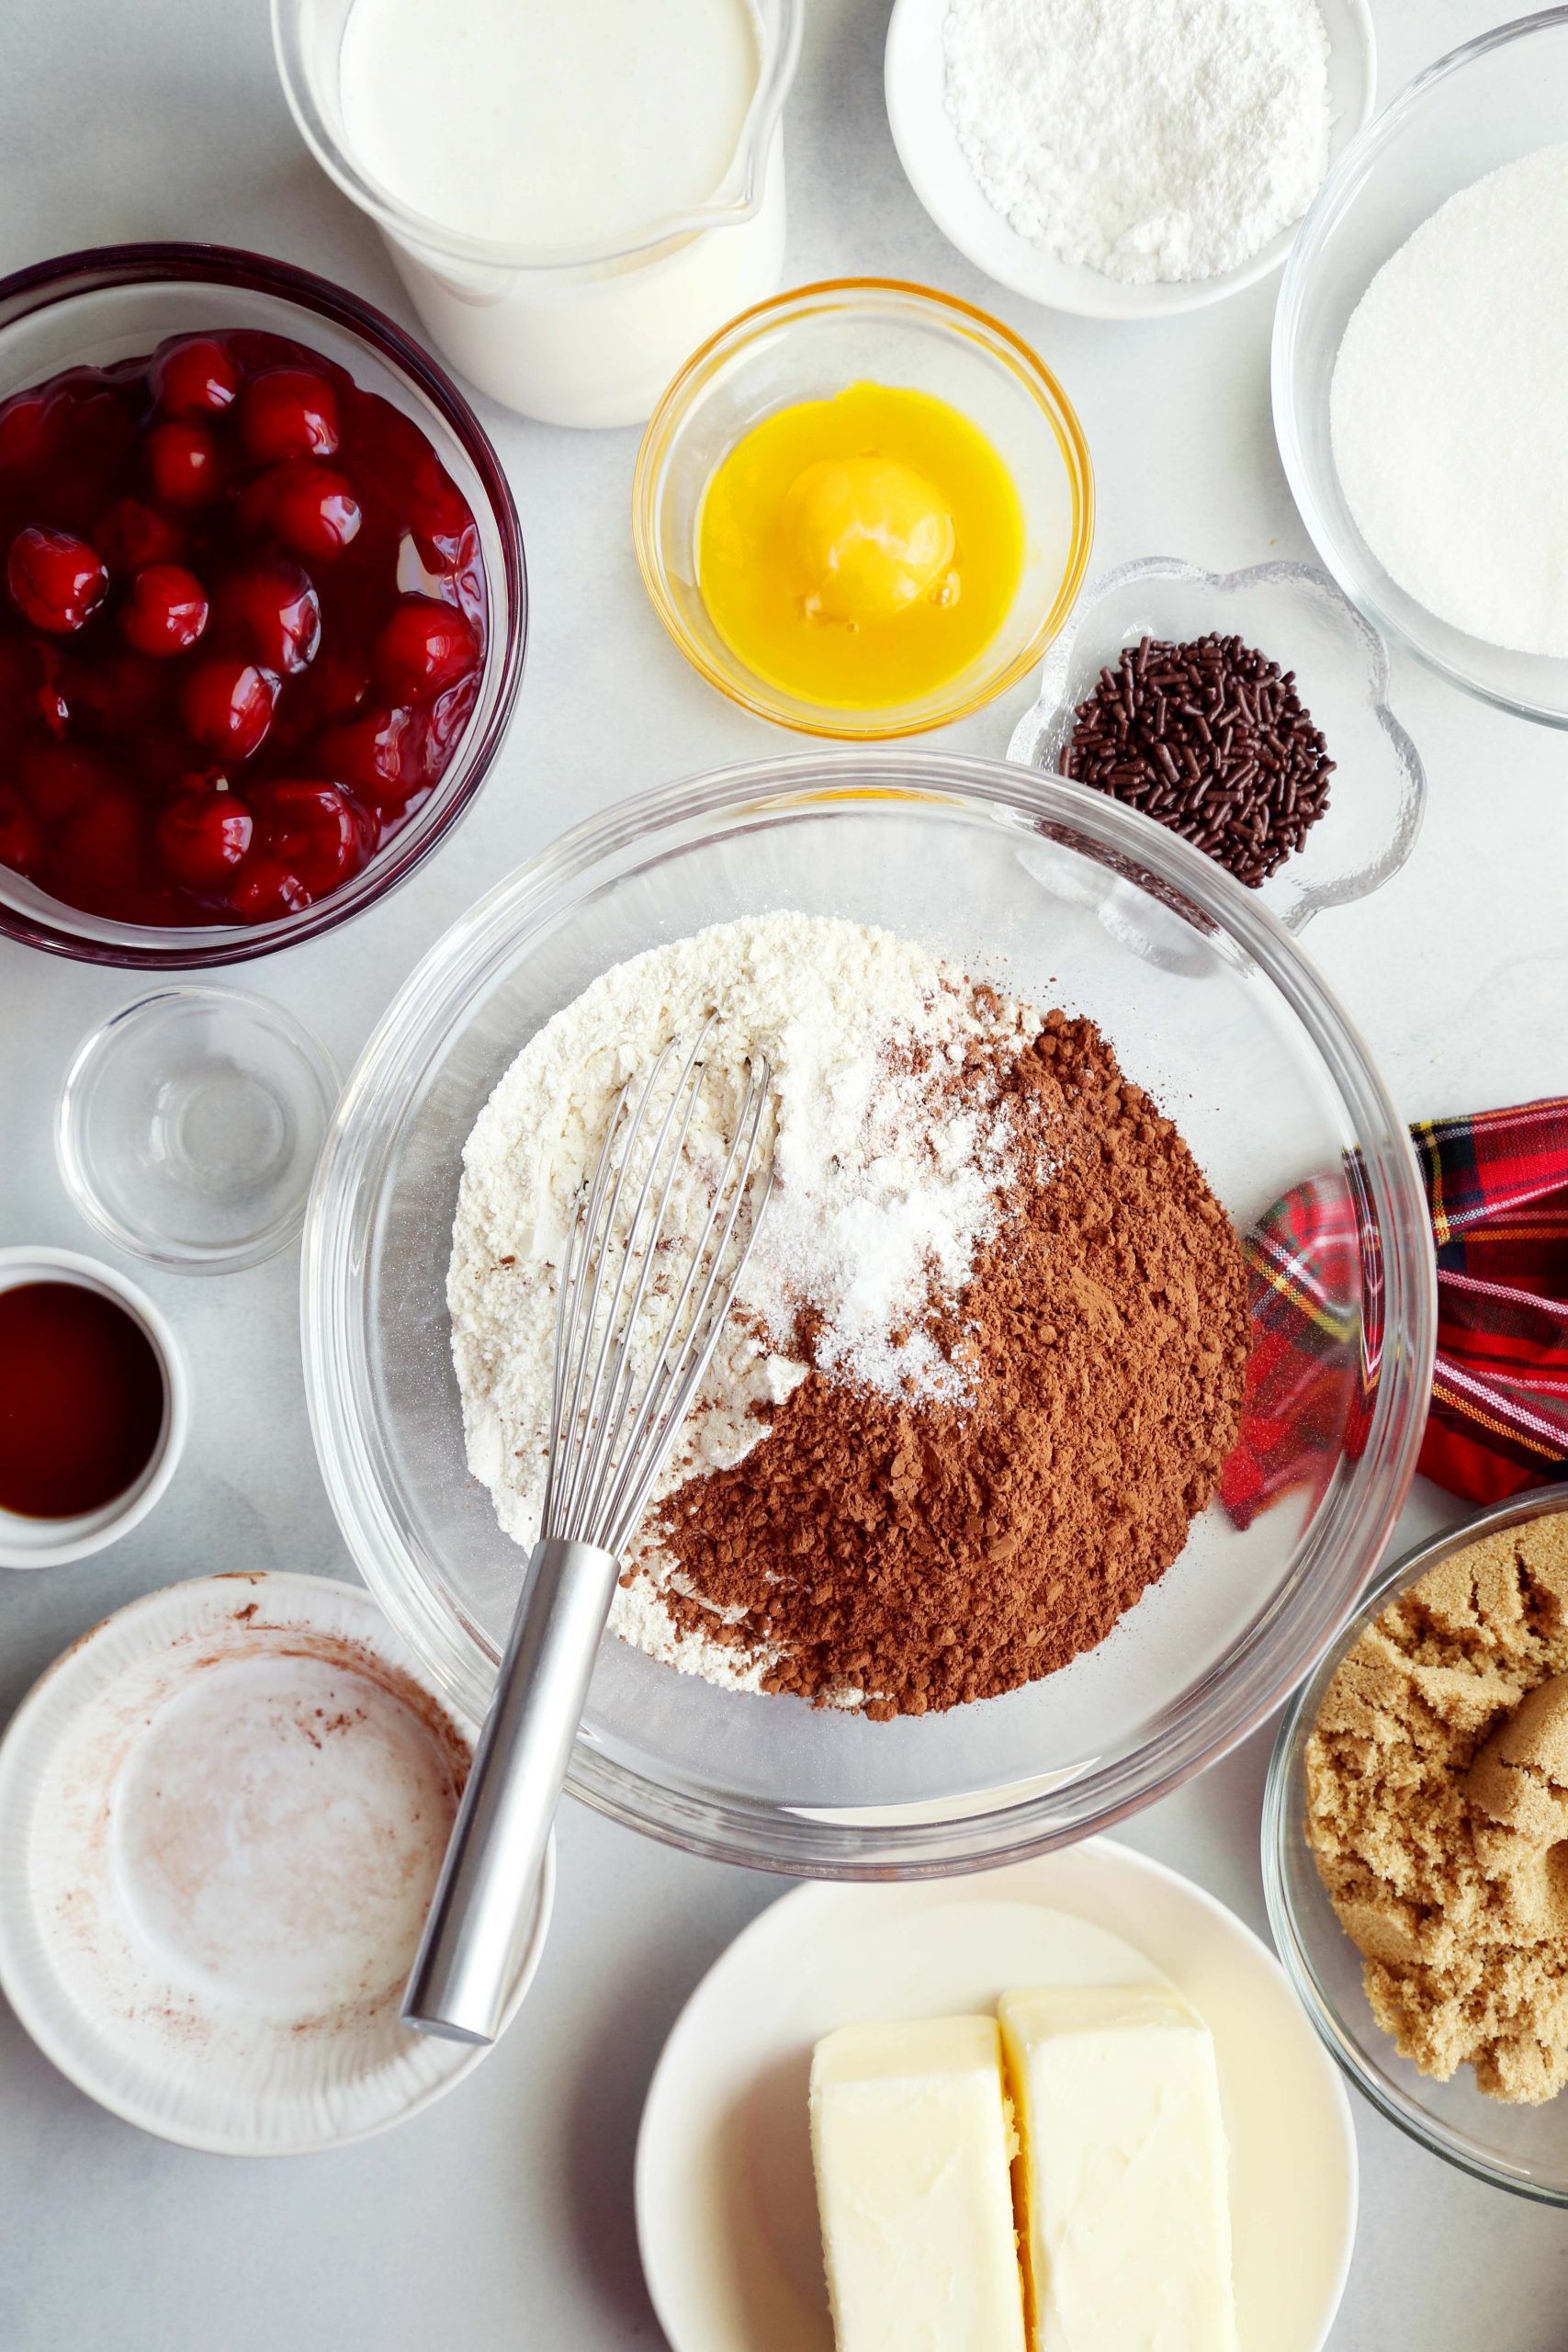
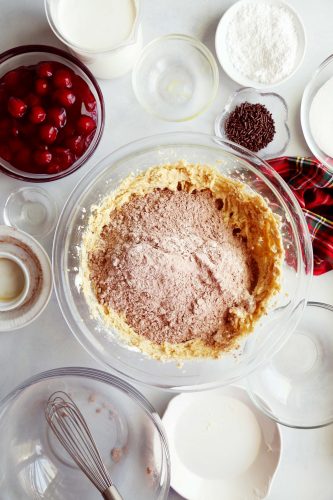
In a medium bowl, whisk together the flour, cocoa, salt and baking powder. Set aside.
**Note: I’m normally against sifting, mostly because I’m lazy, but when using cocoa powder I’d recommend sifting because cocoa tends to be lumpy. I still whisked because again…lazy!**
 In the bowl of a stand mixer, fitted with the paddle attachment, beat together the butter and sugar until light and fluffy, about 2 minutes.
**Note: Because of these photos, I didn’t want to shoot into a dark bowl, and so I just used a hand mixer and it turned out just fine. I like to offer you guys options here.**
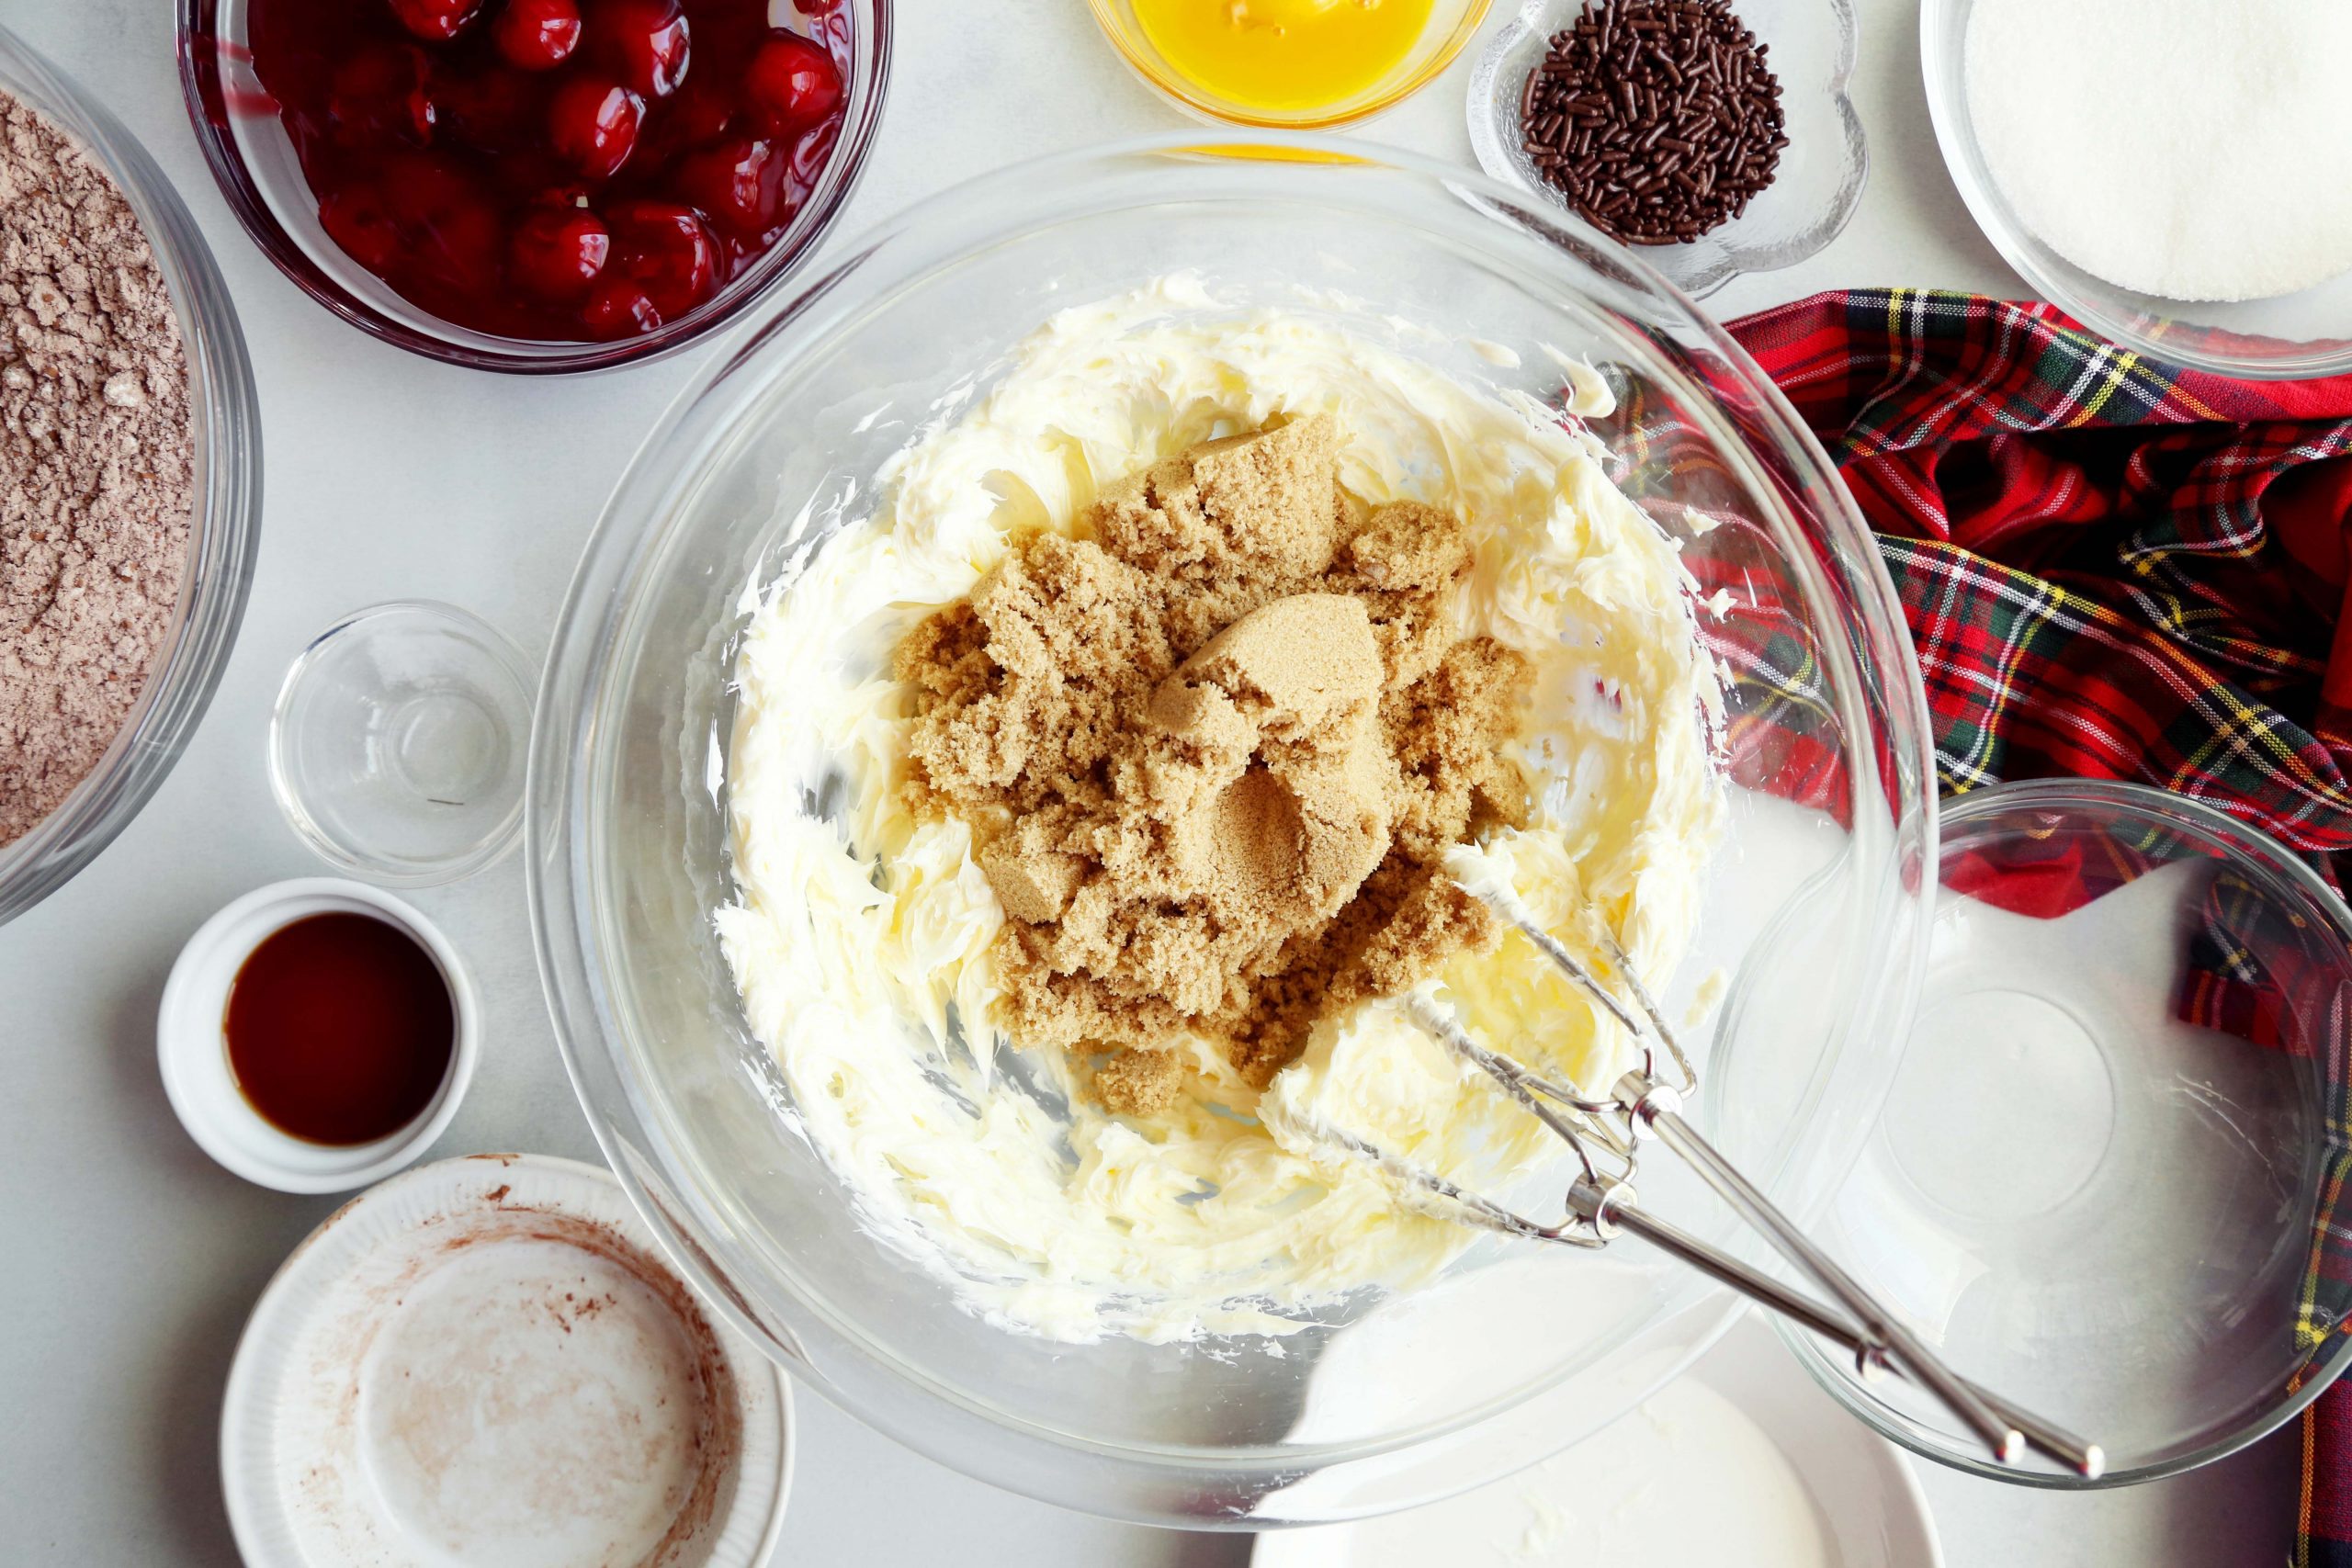 Add the egg yolks and vanilla and mix until combined. Use a rubber spatula to scrape the sides and bottom of the bowl just to ensure that it’s all mixed well.
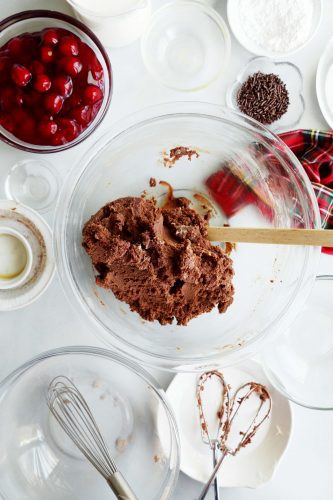
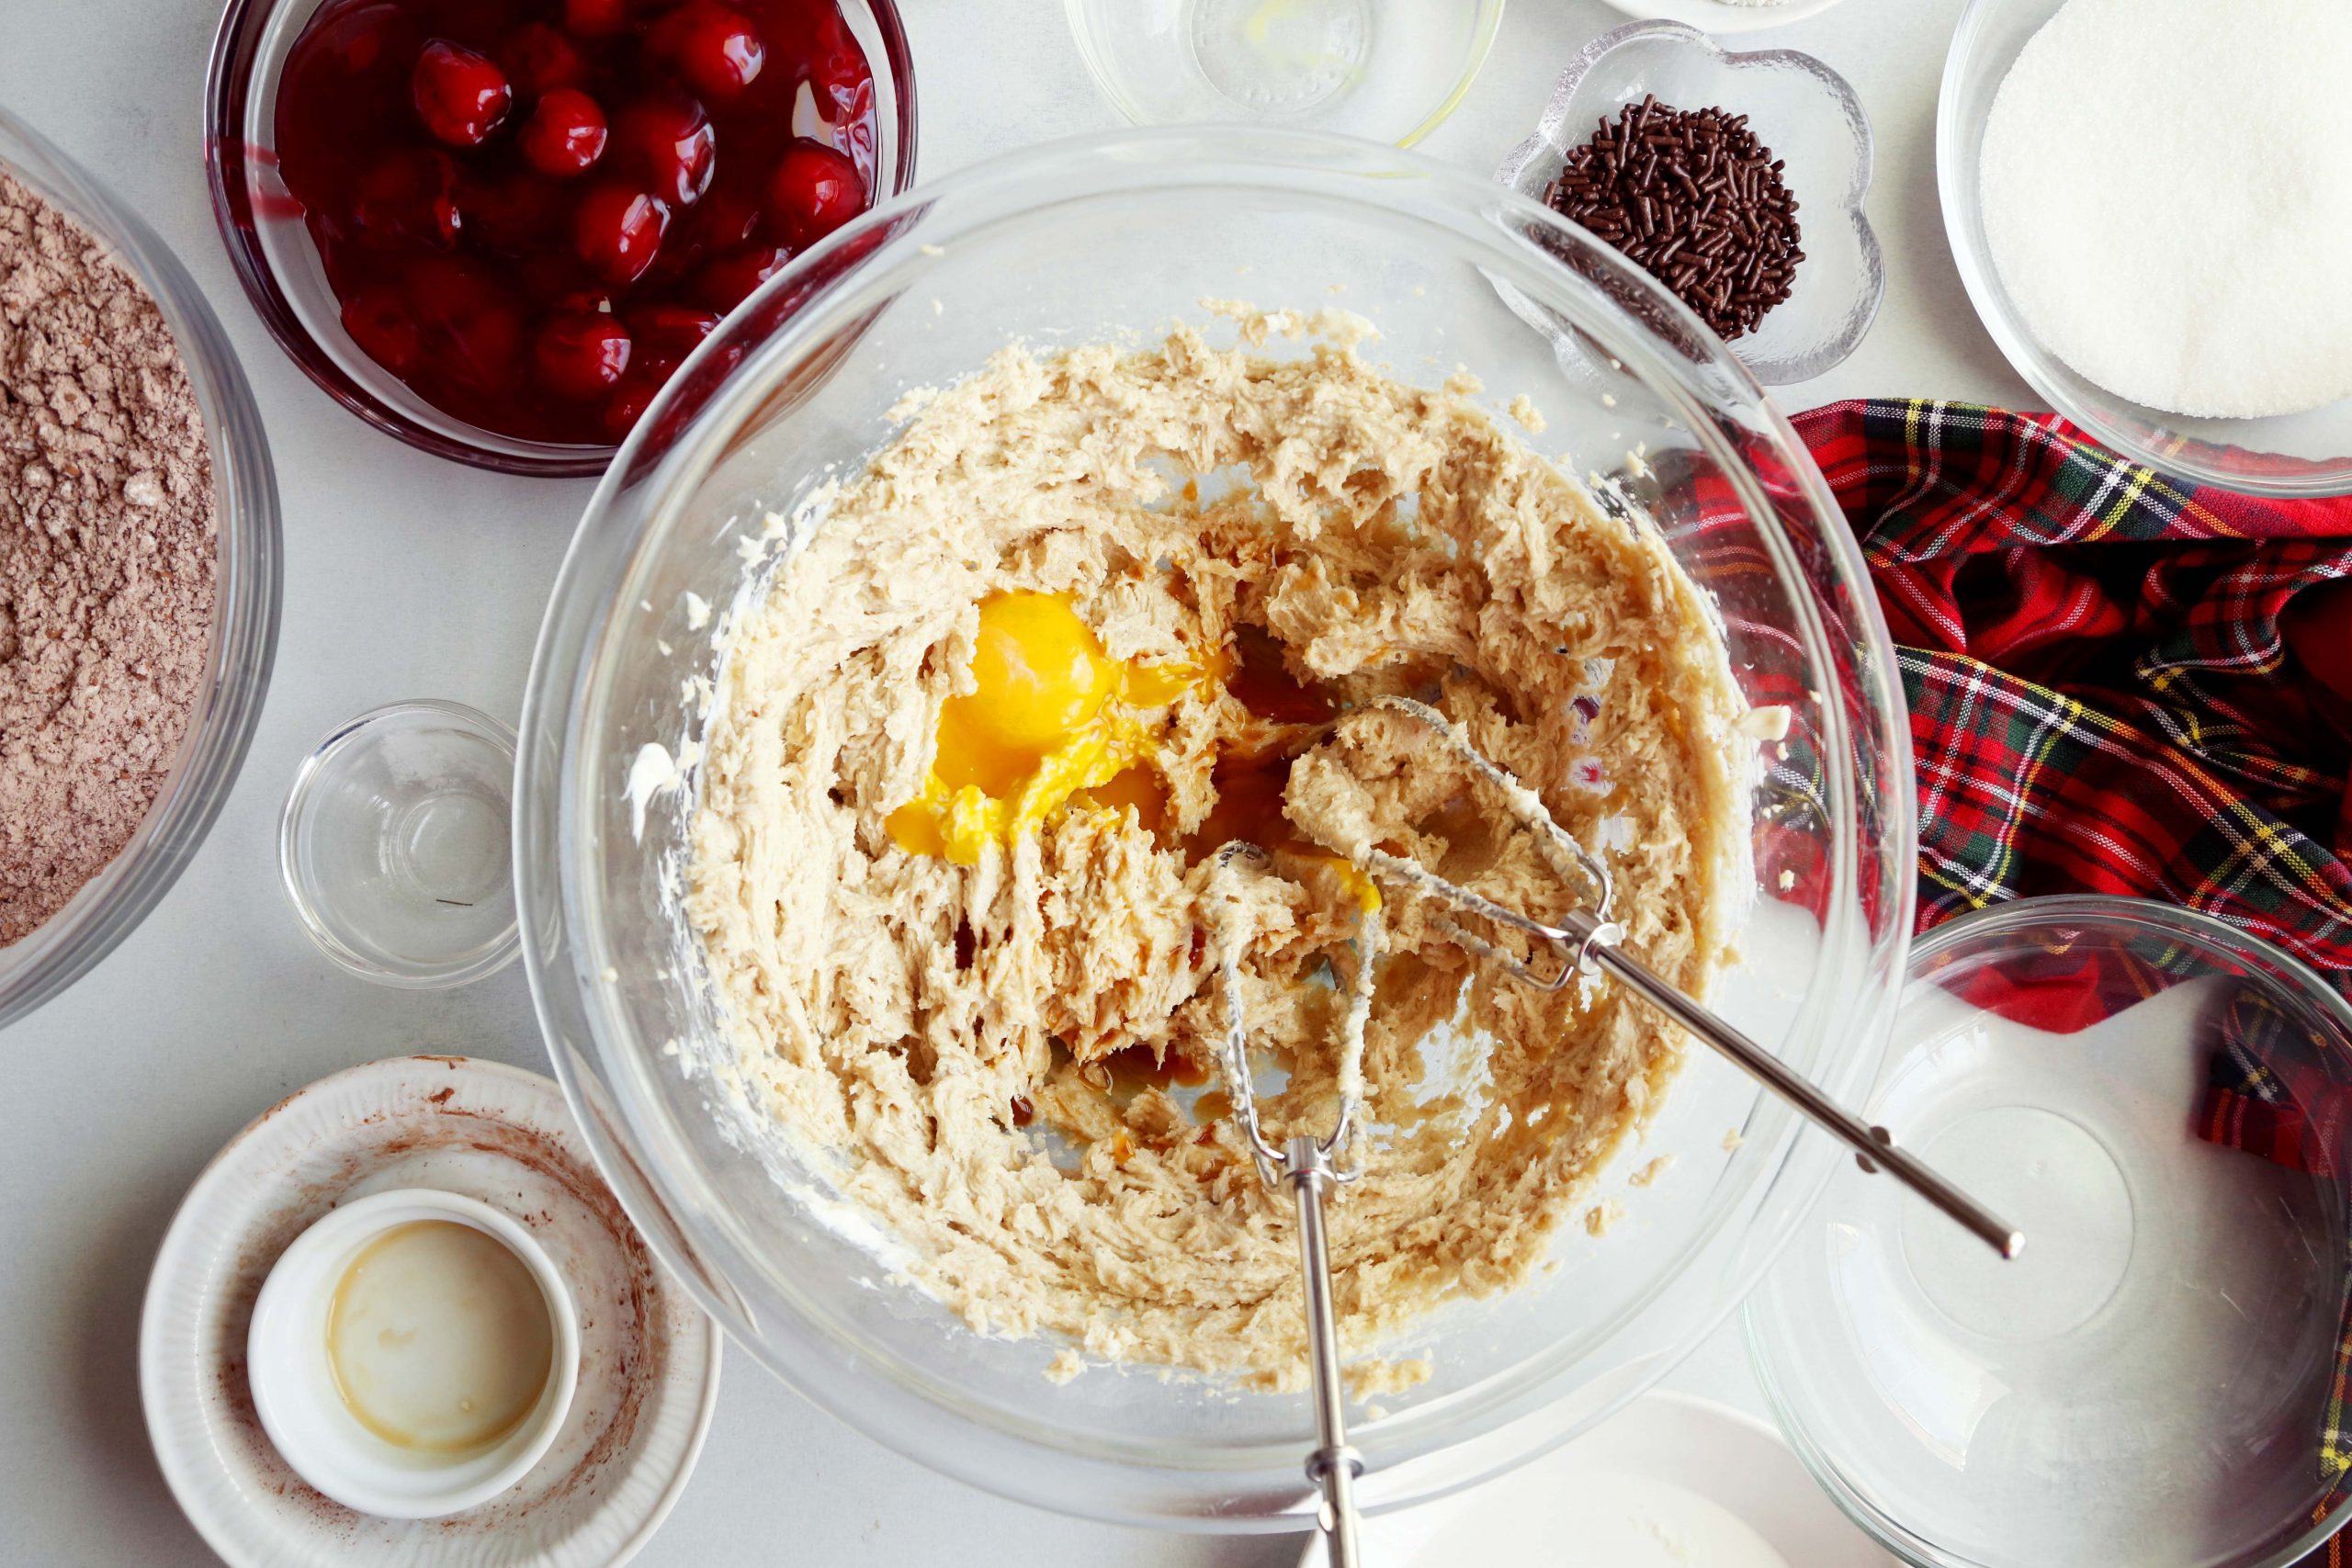 Gradually add the flour mixture to the butter mixture, beating until combined and it comes together to from a soft dough.
Shape the dough into 1-inch balls and coat in the granulated sugar. Place onto the prepared baking sheets, about 2 inches apart. Use a ¼ teaspoon measuring spoon to gently make an indentation in the center of each ball.
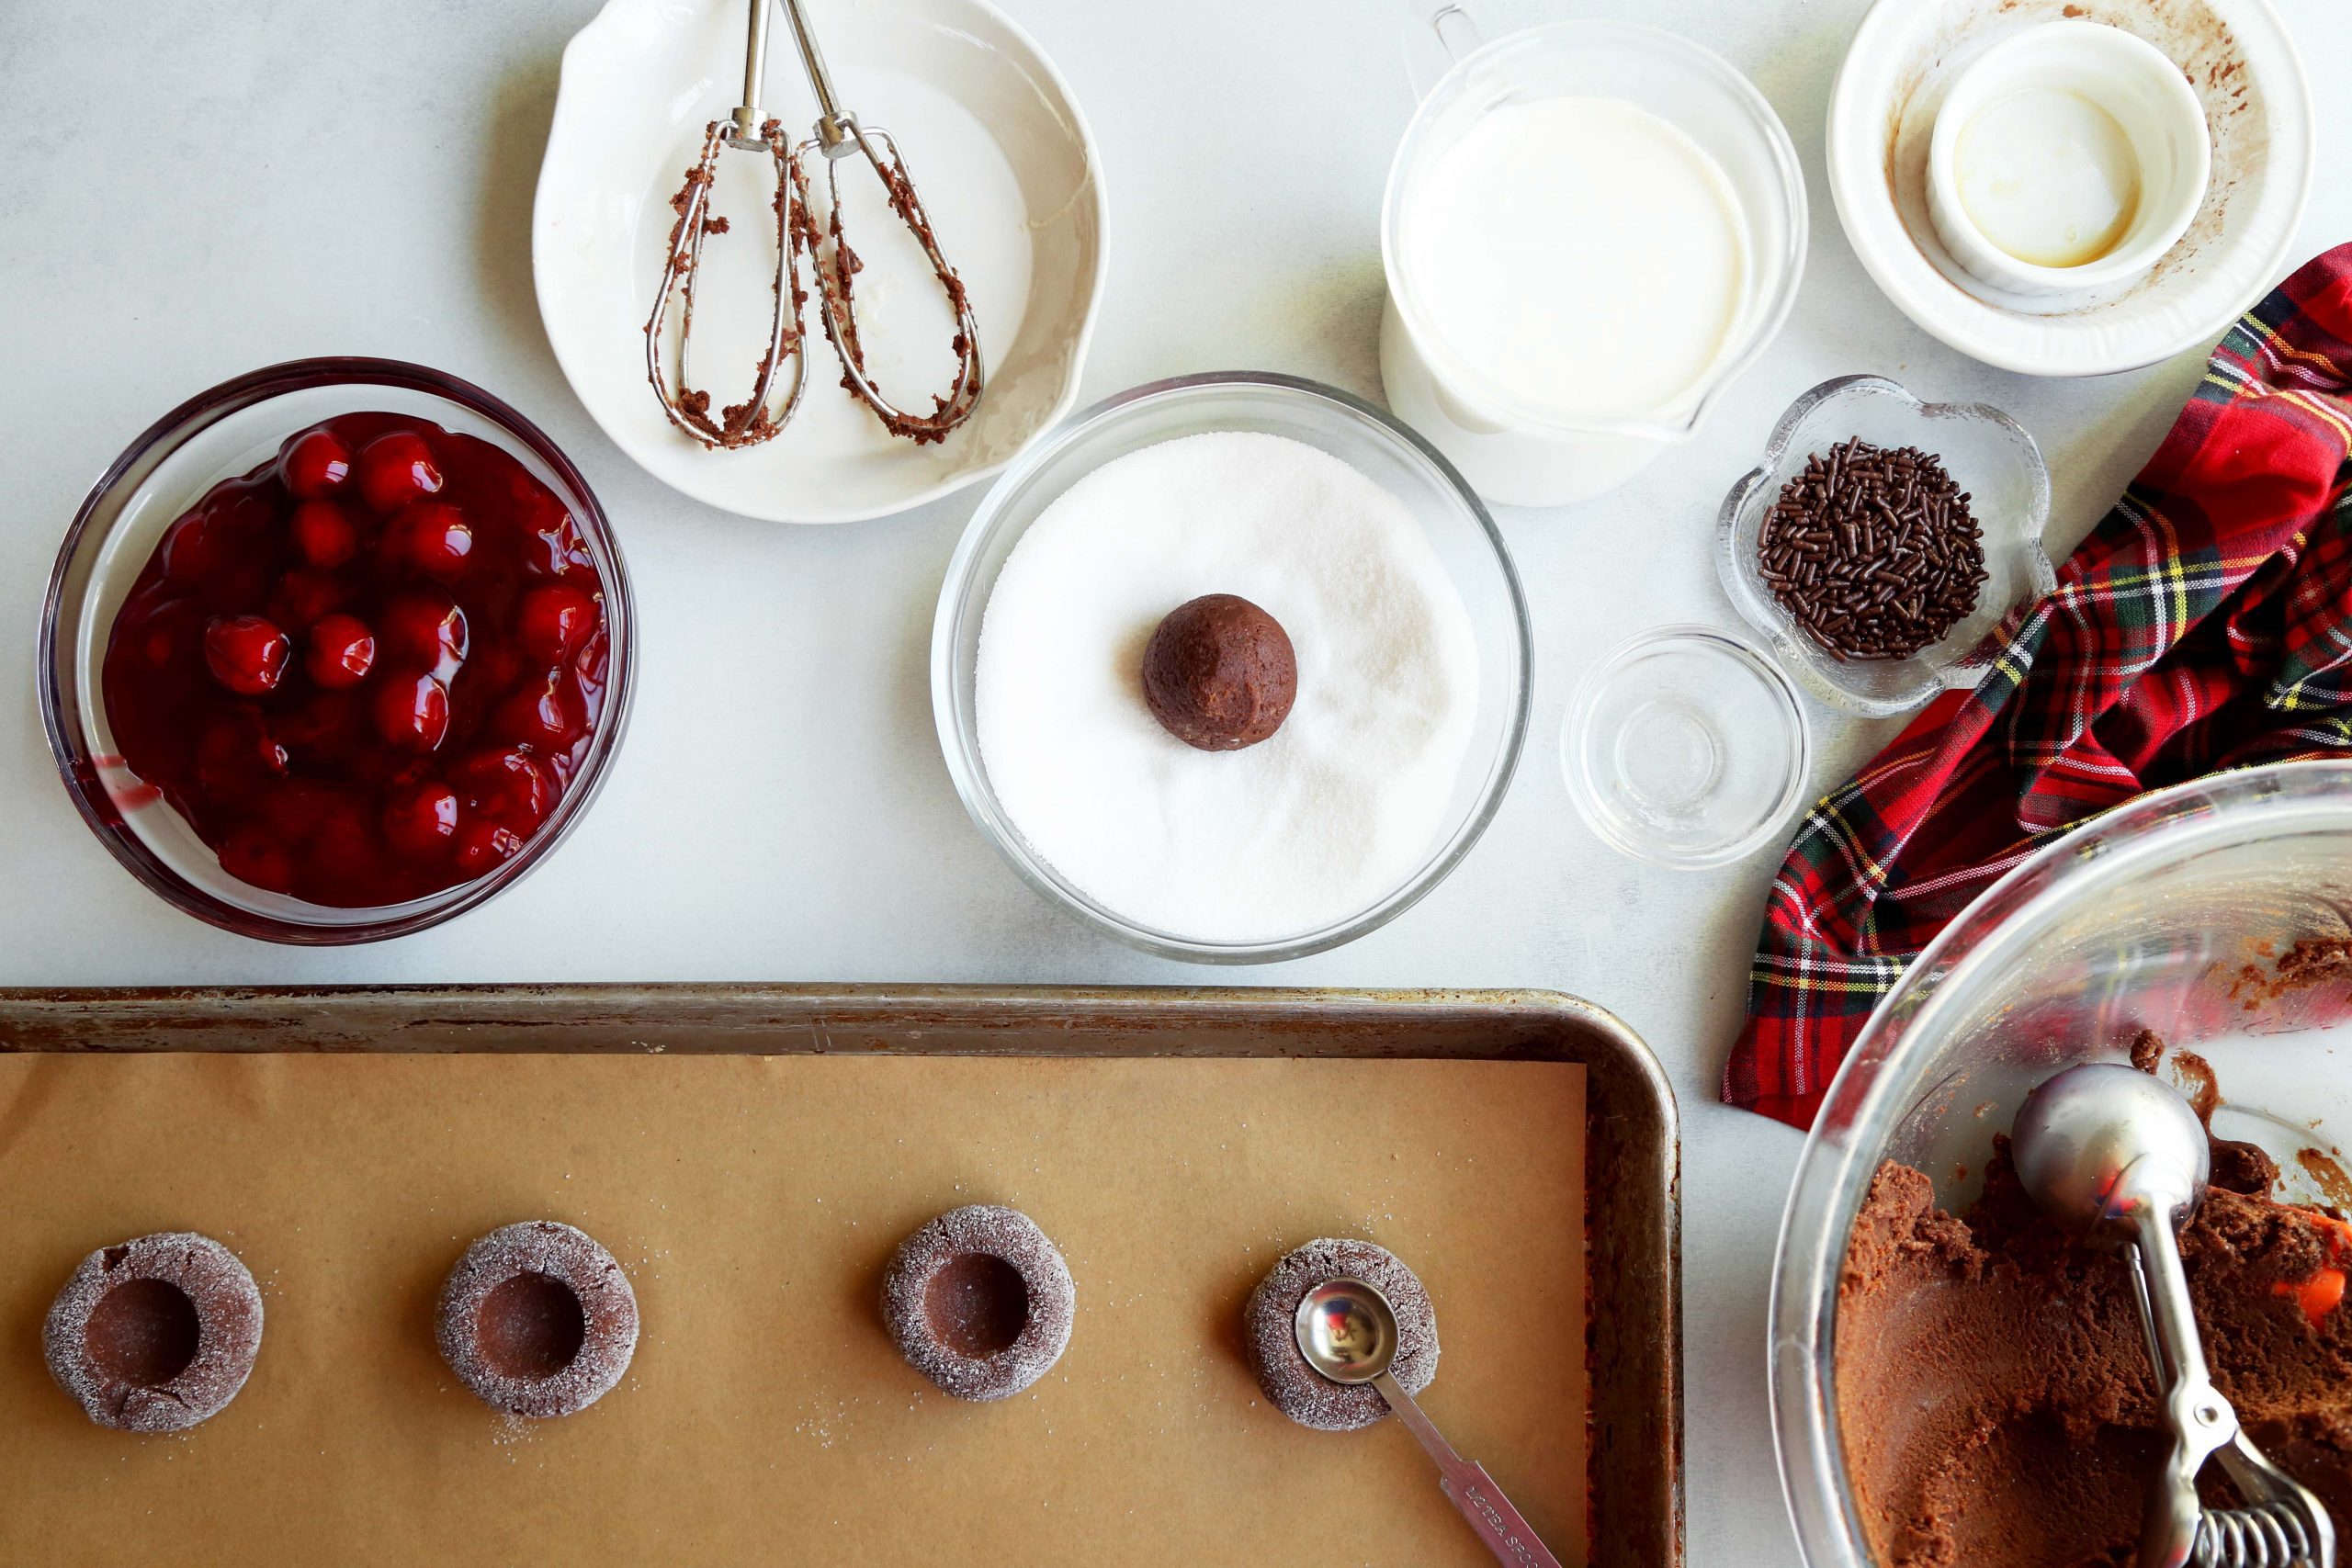 Bake until the cookies feel set, about 9 to 11 minutes. Remove pans from the oven, and press down centers again. Allow to cool on the pans for 10 minutes before transferring to a wire rack to cool completely. To make the topping, beat the heavy cream with the sugar and vanilla until soft peaks form. Transfer to a piping bag, fitted with a small star tip.
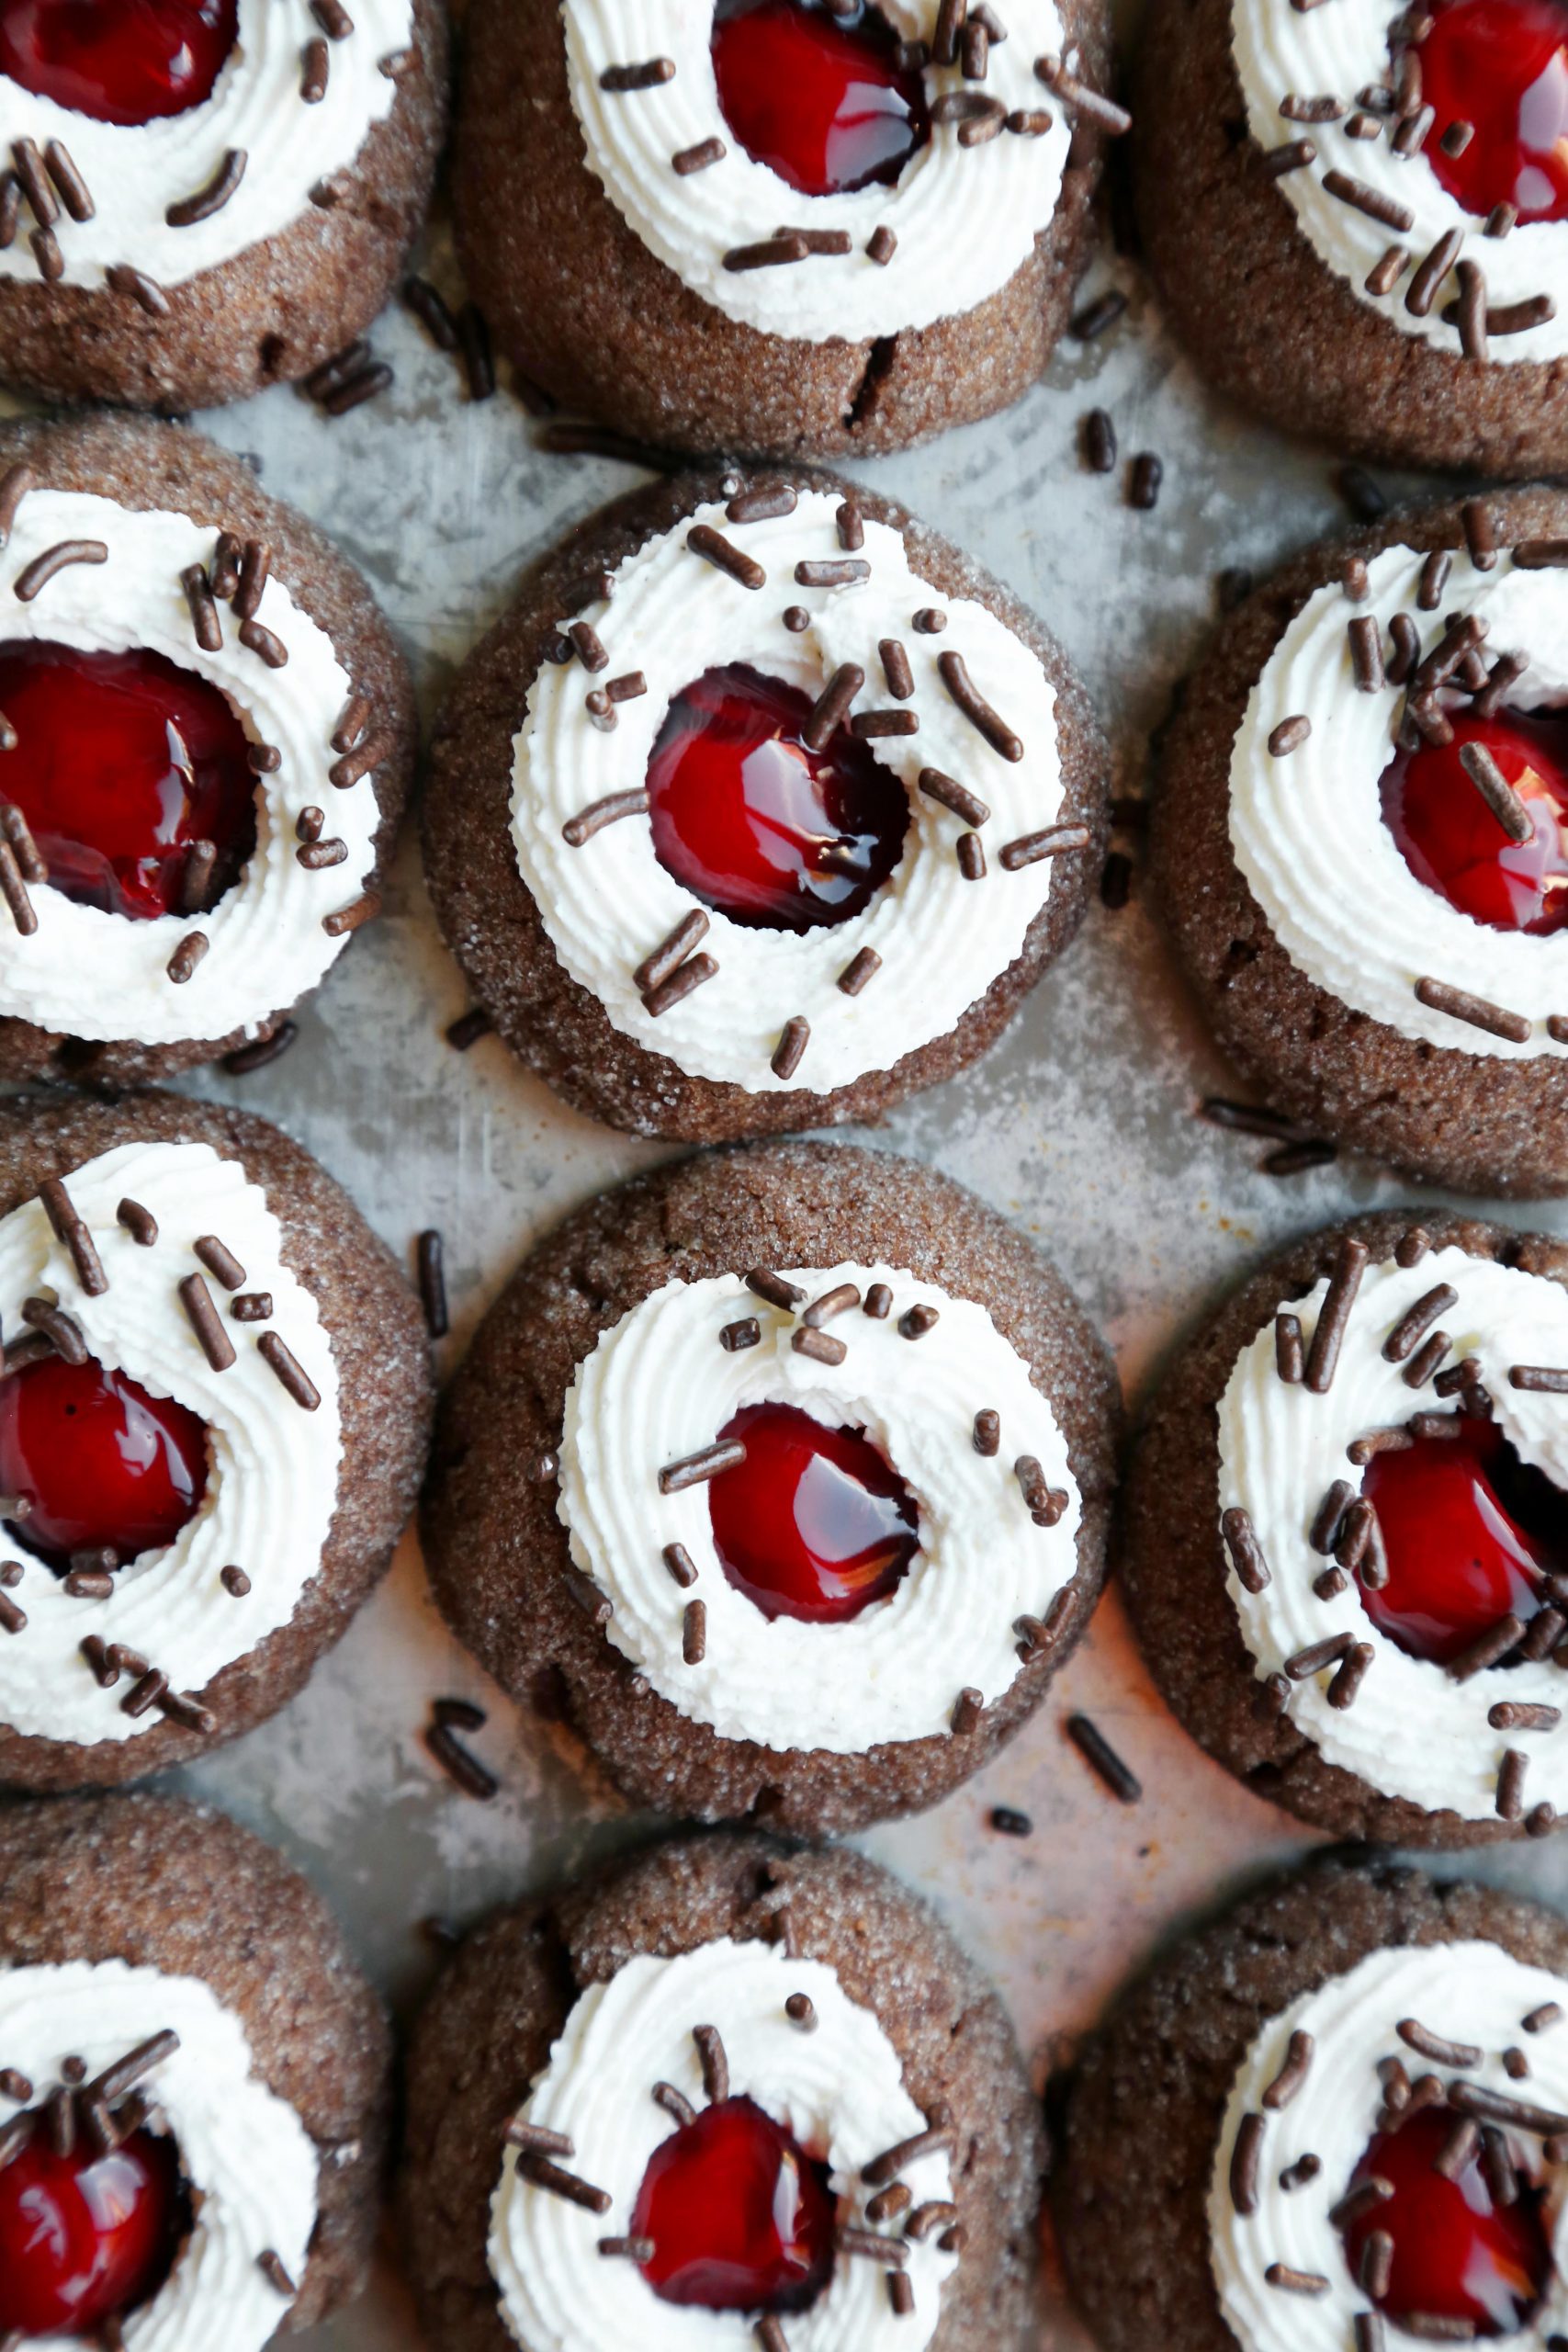
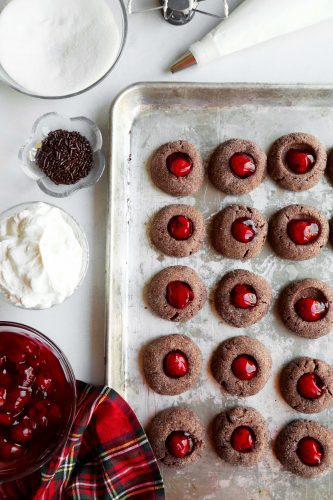
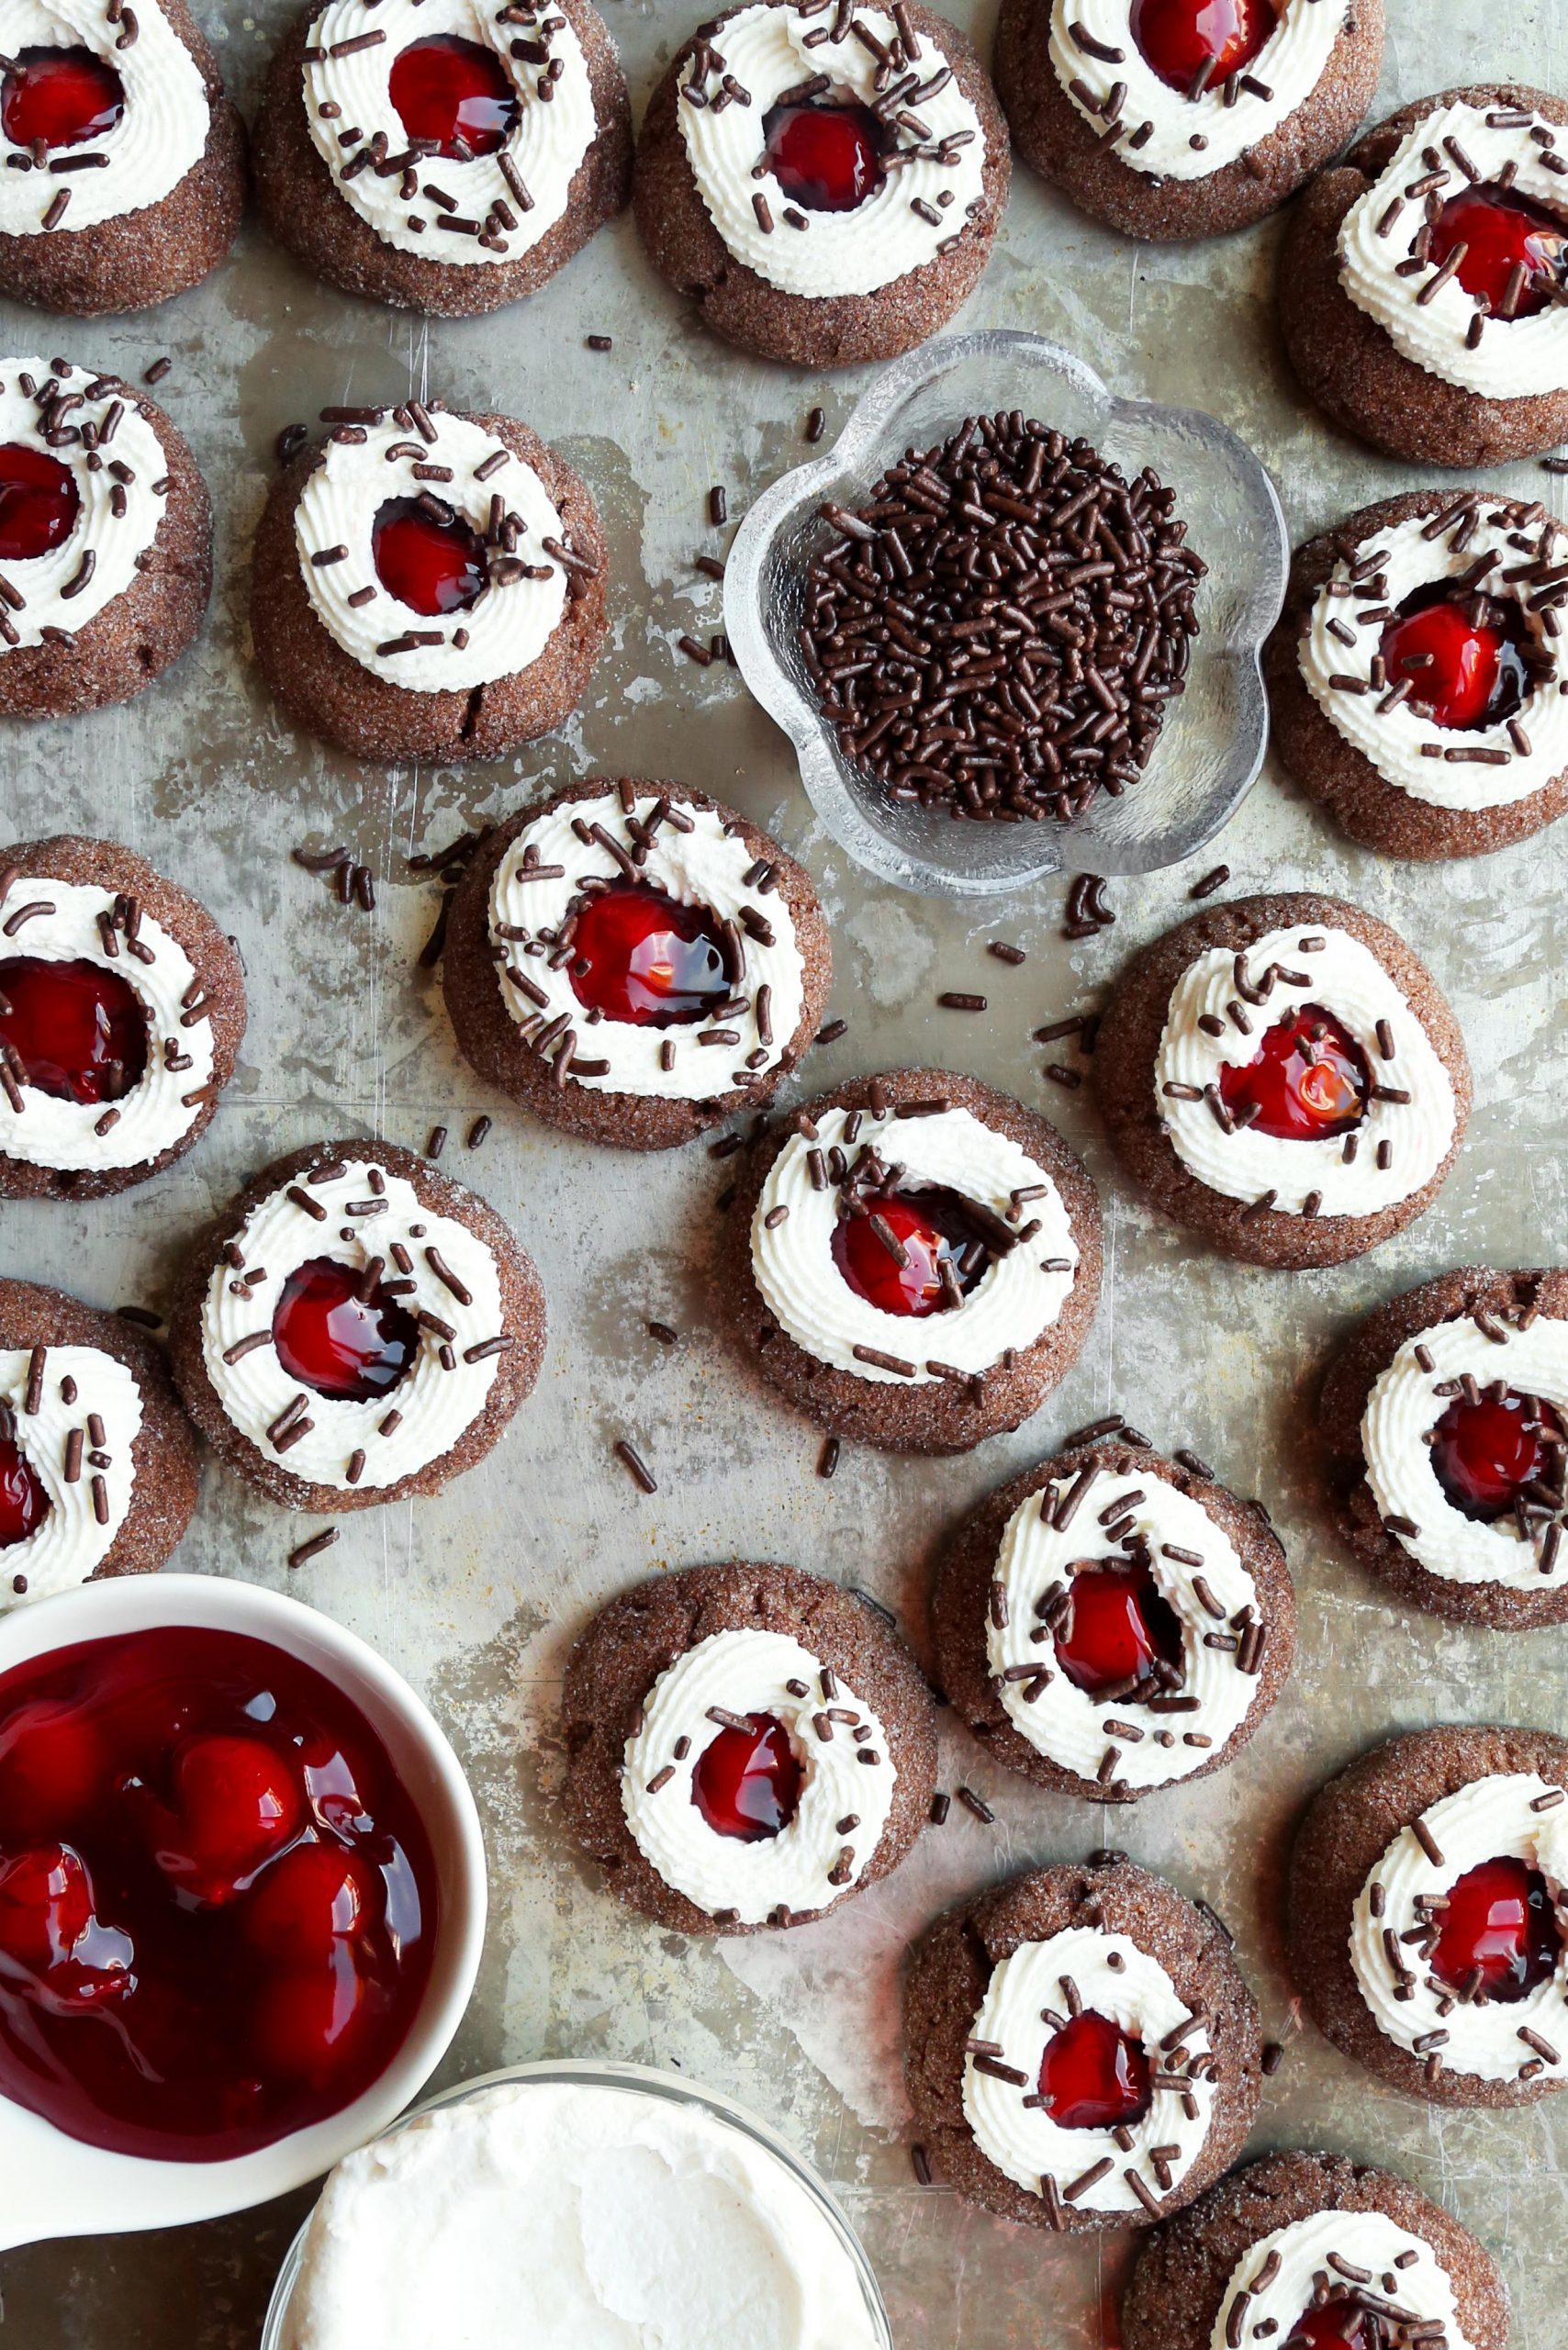
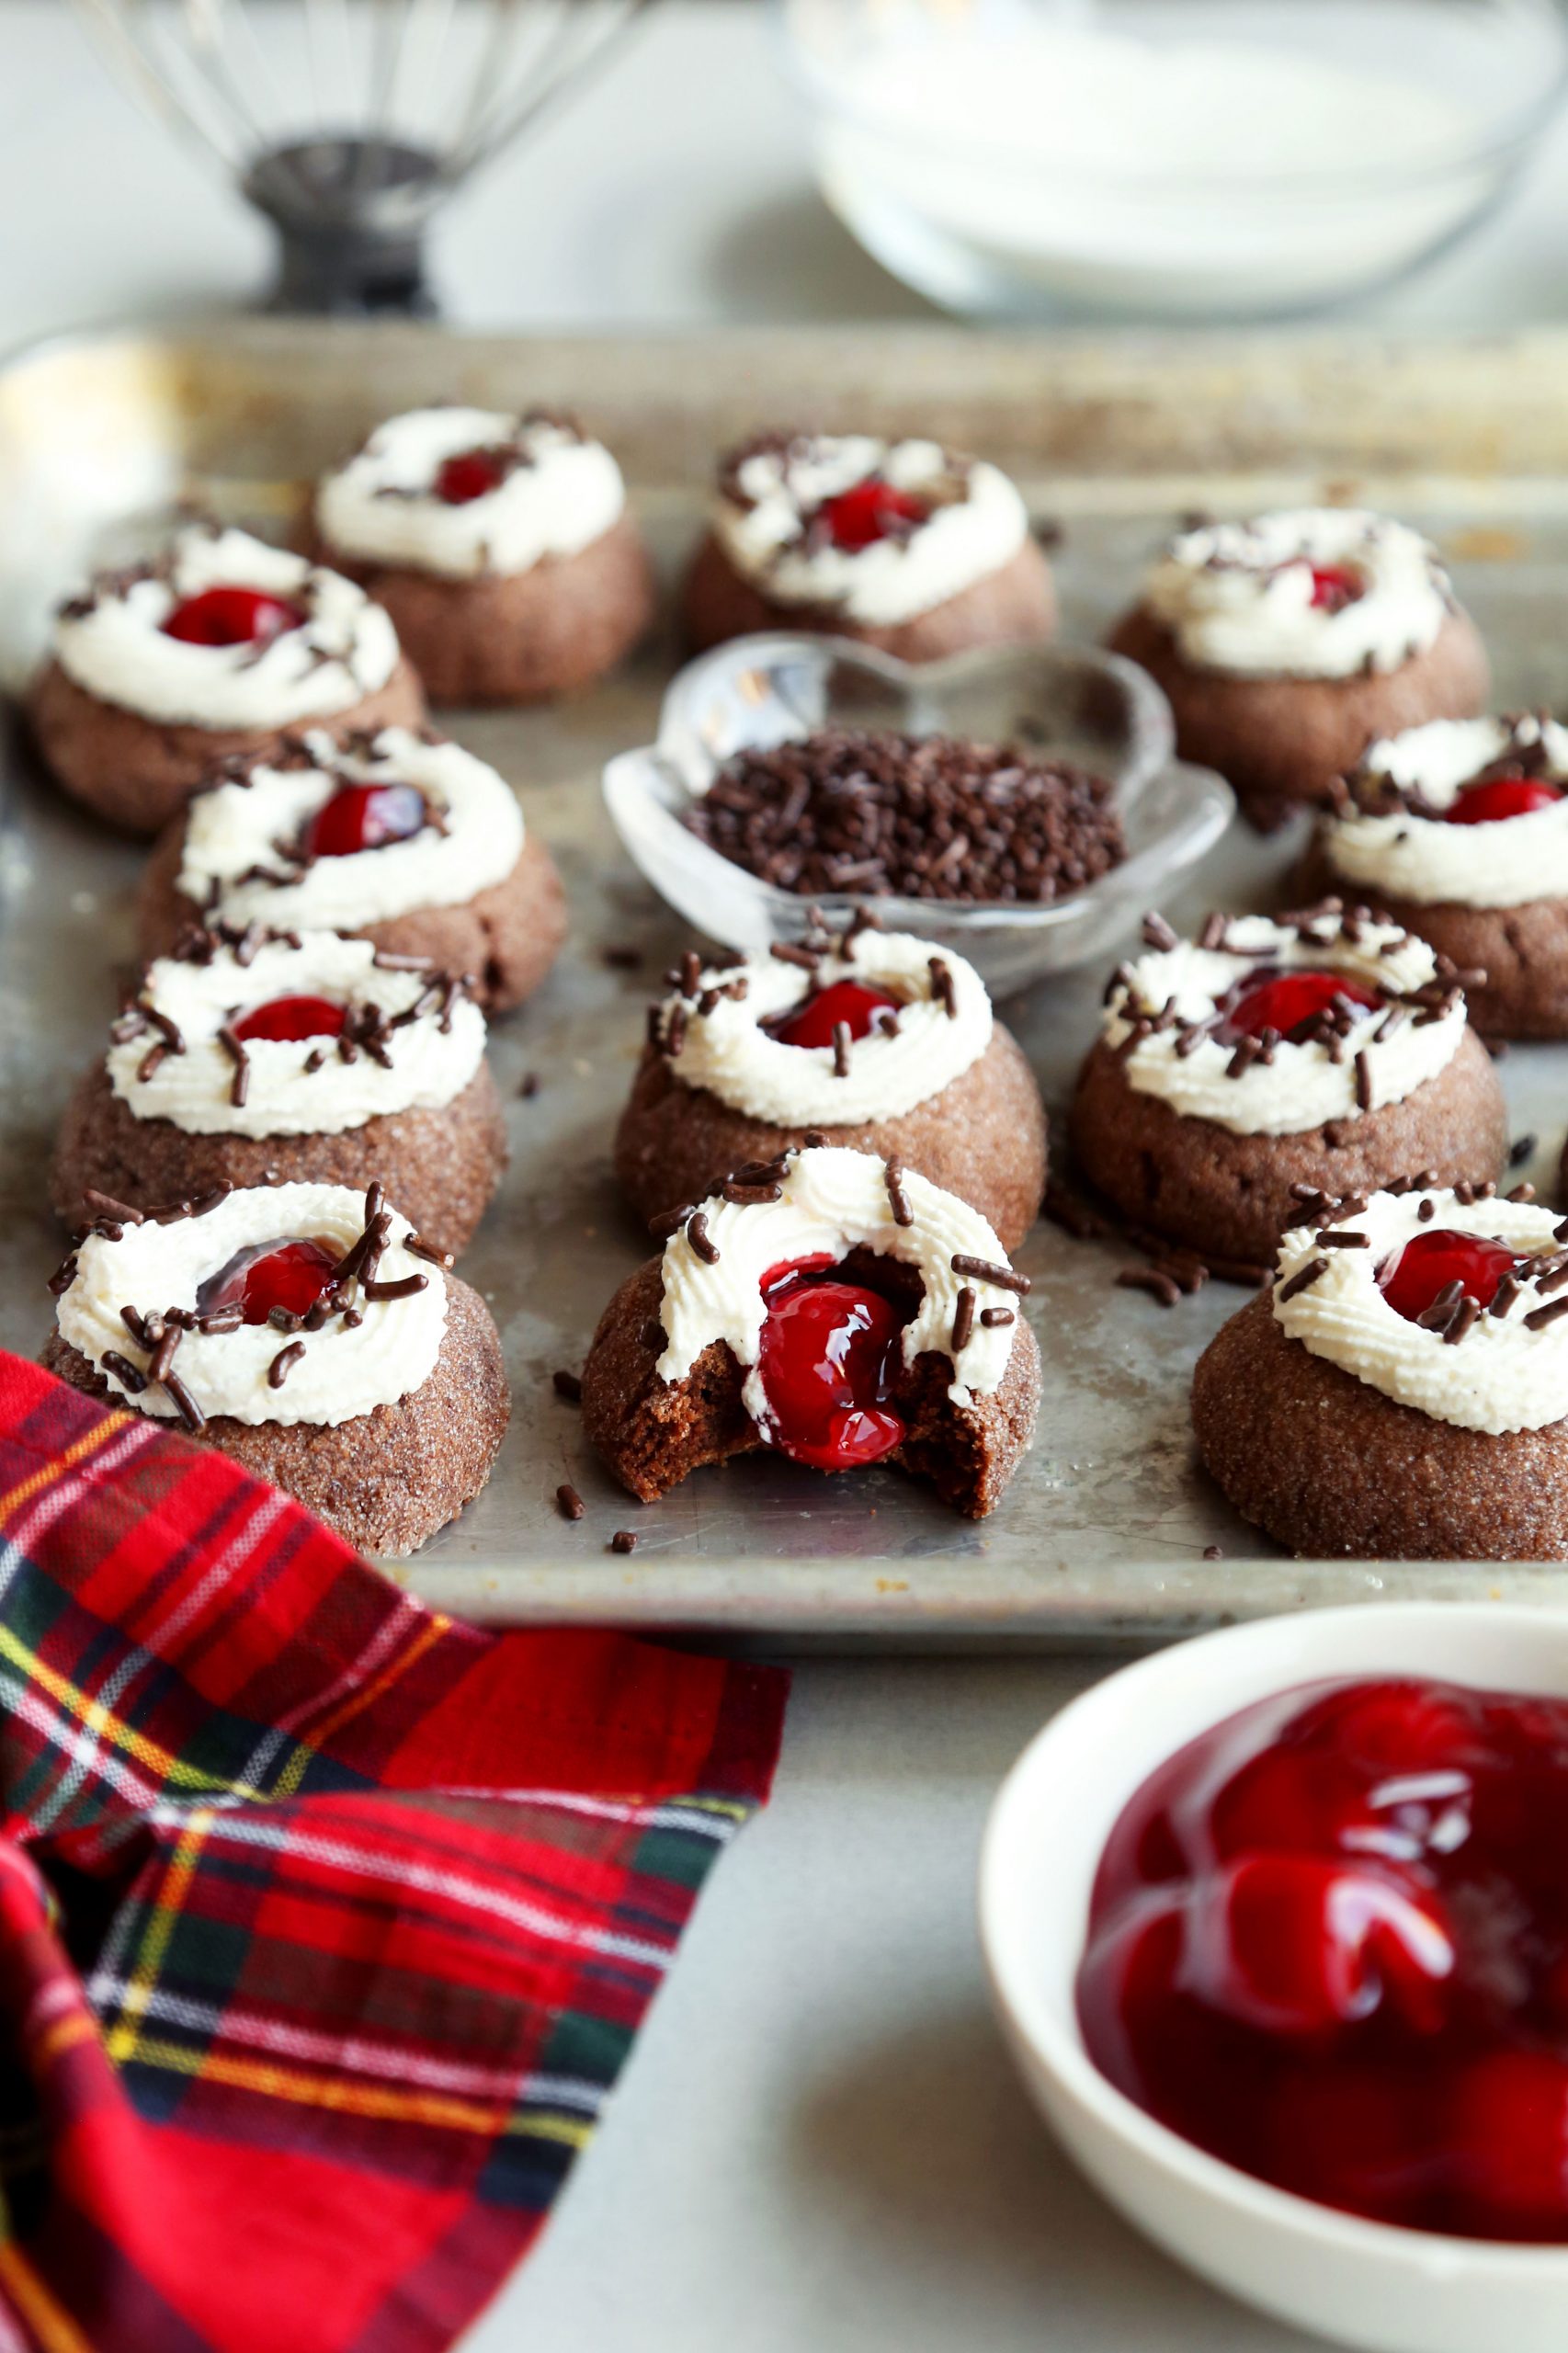
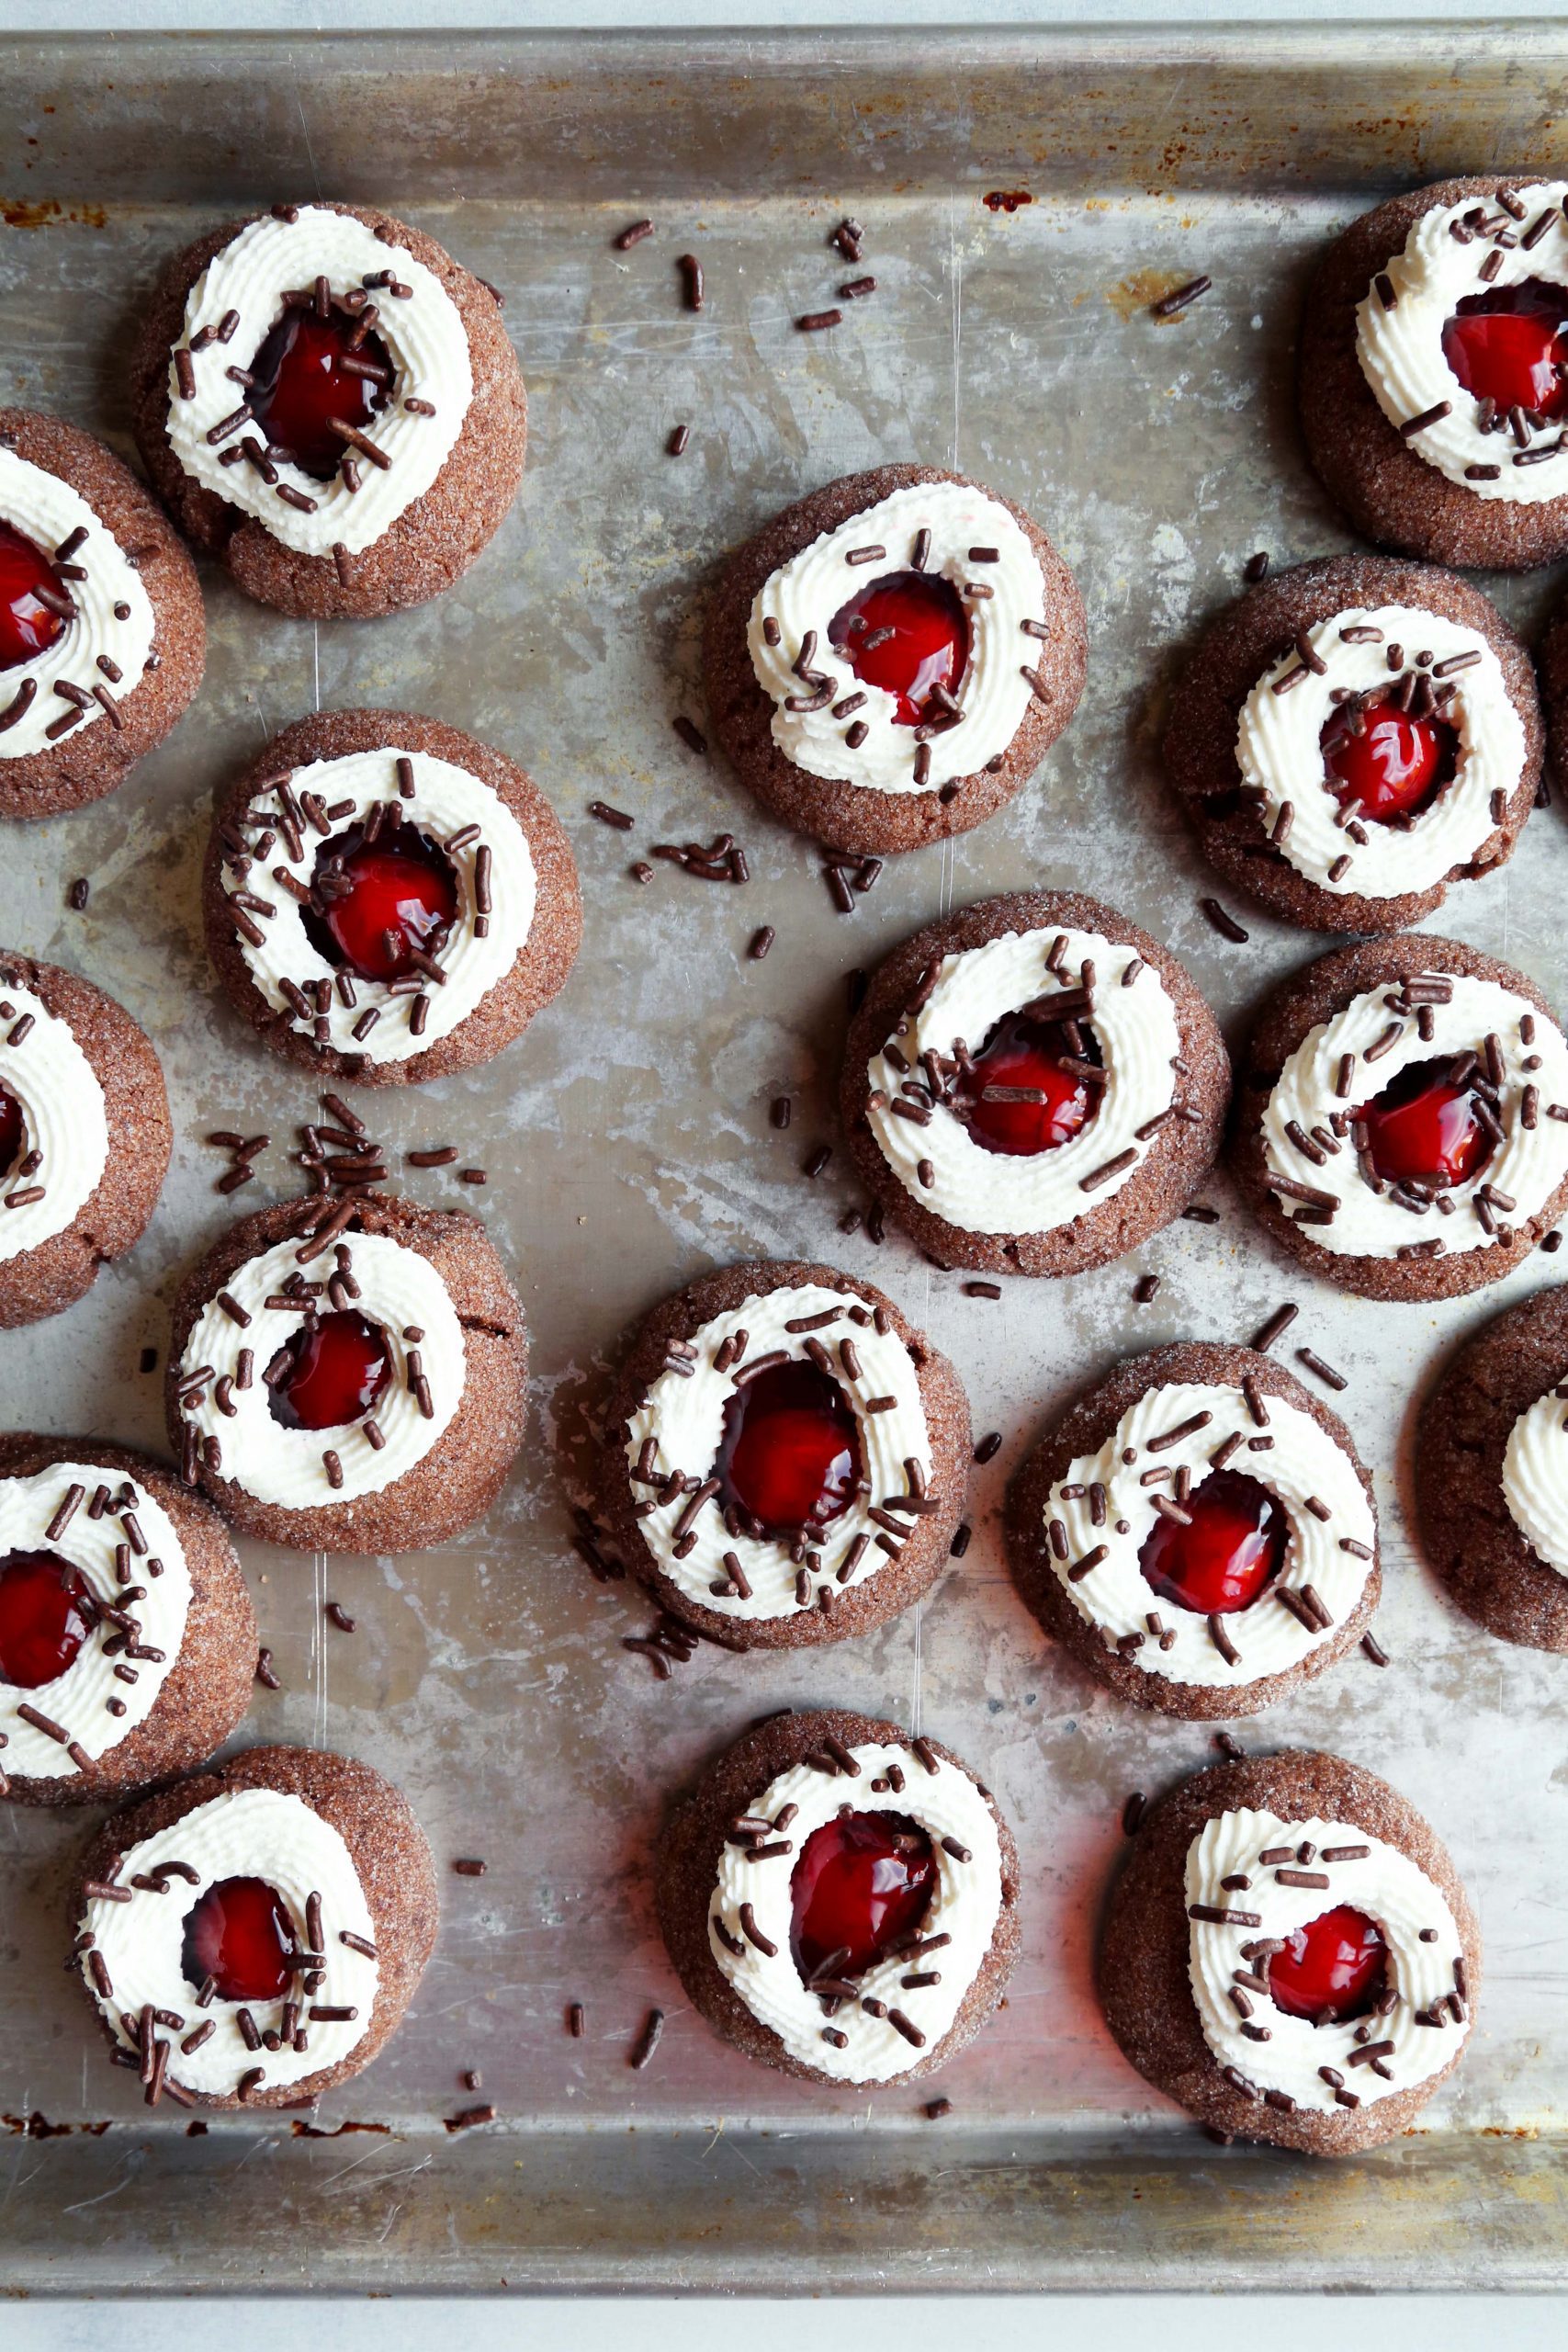
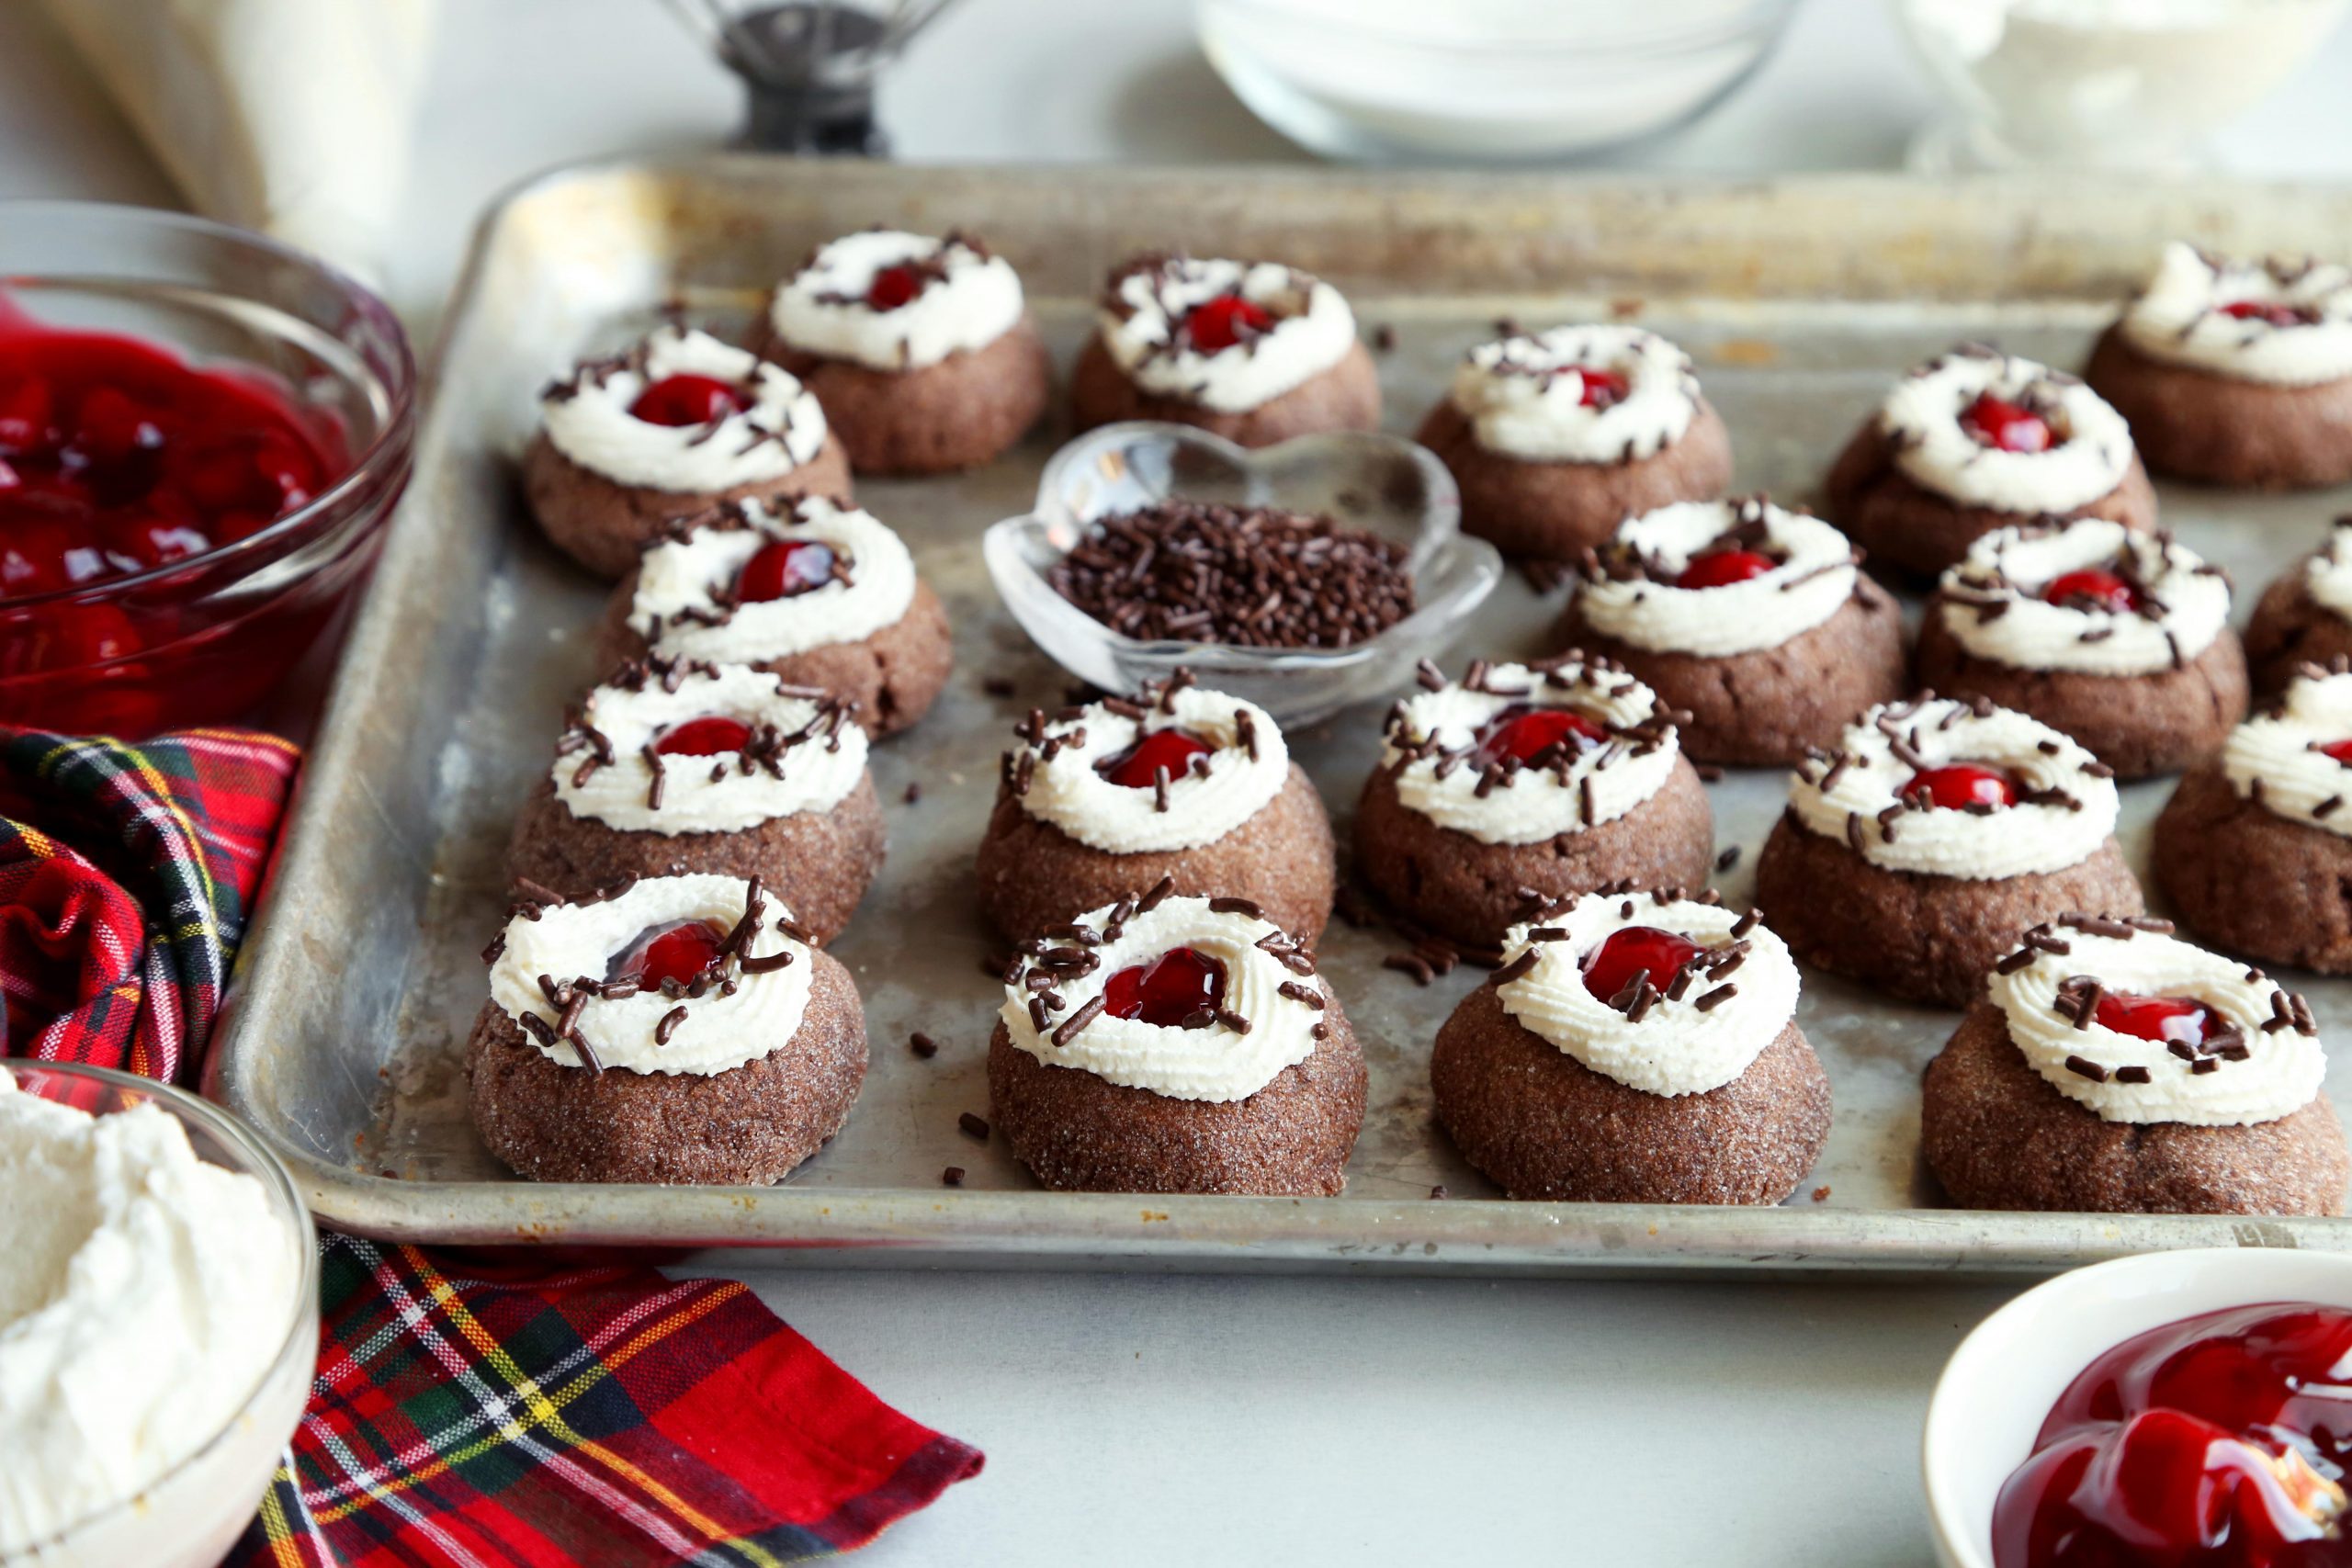
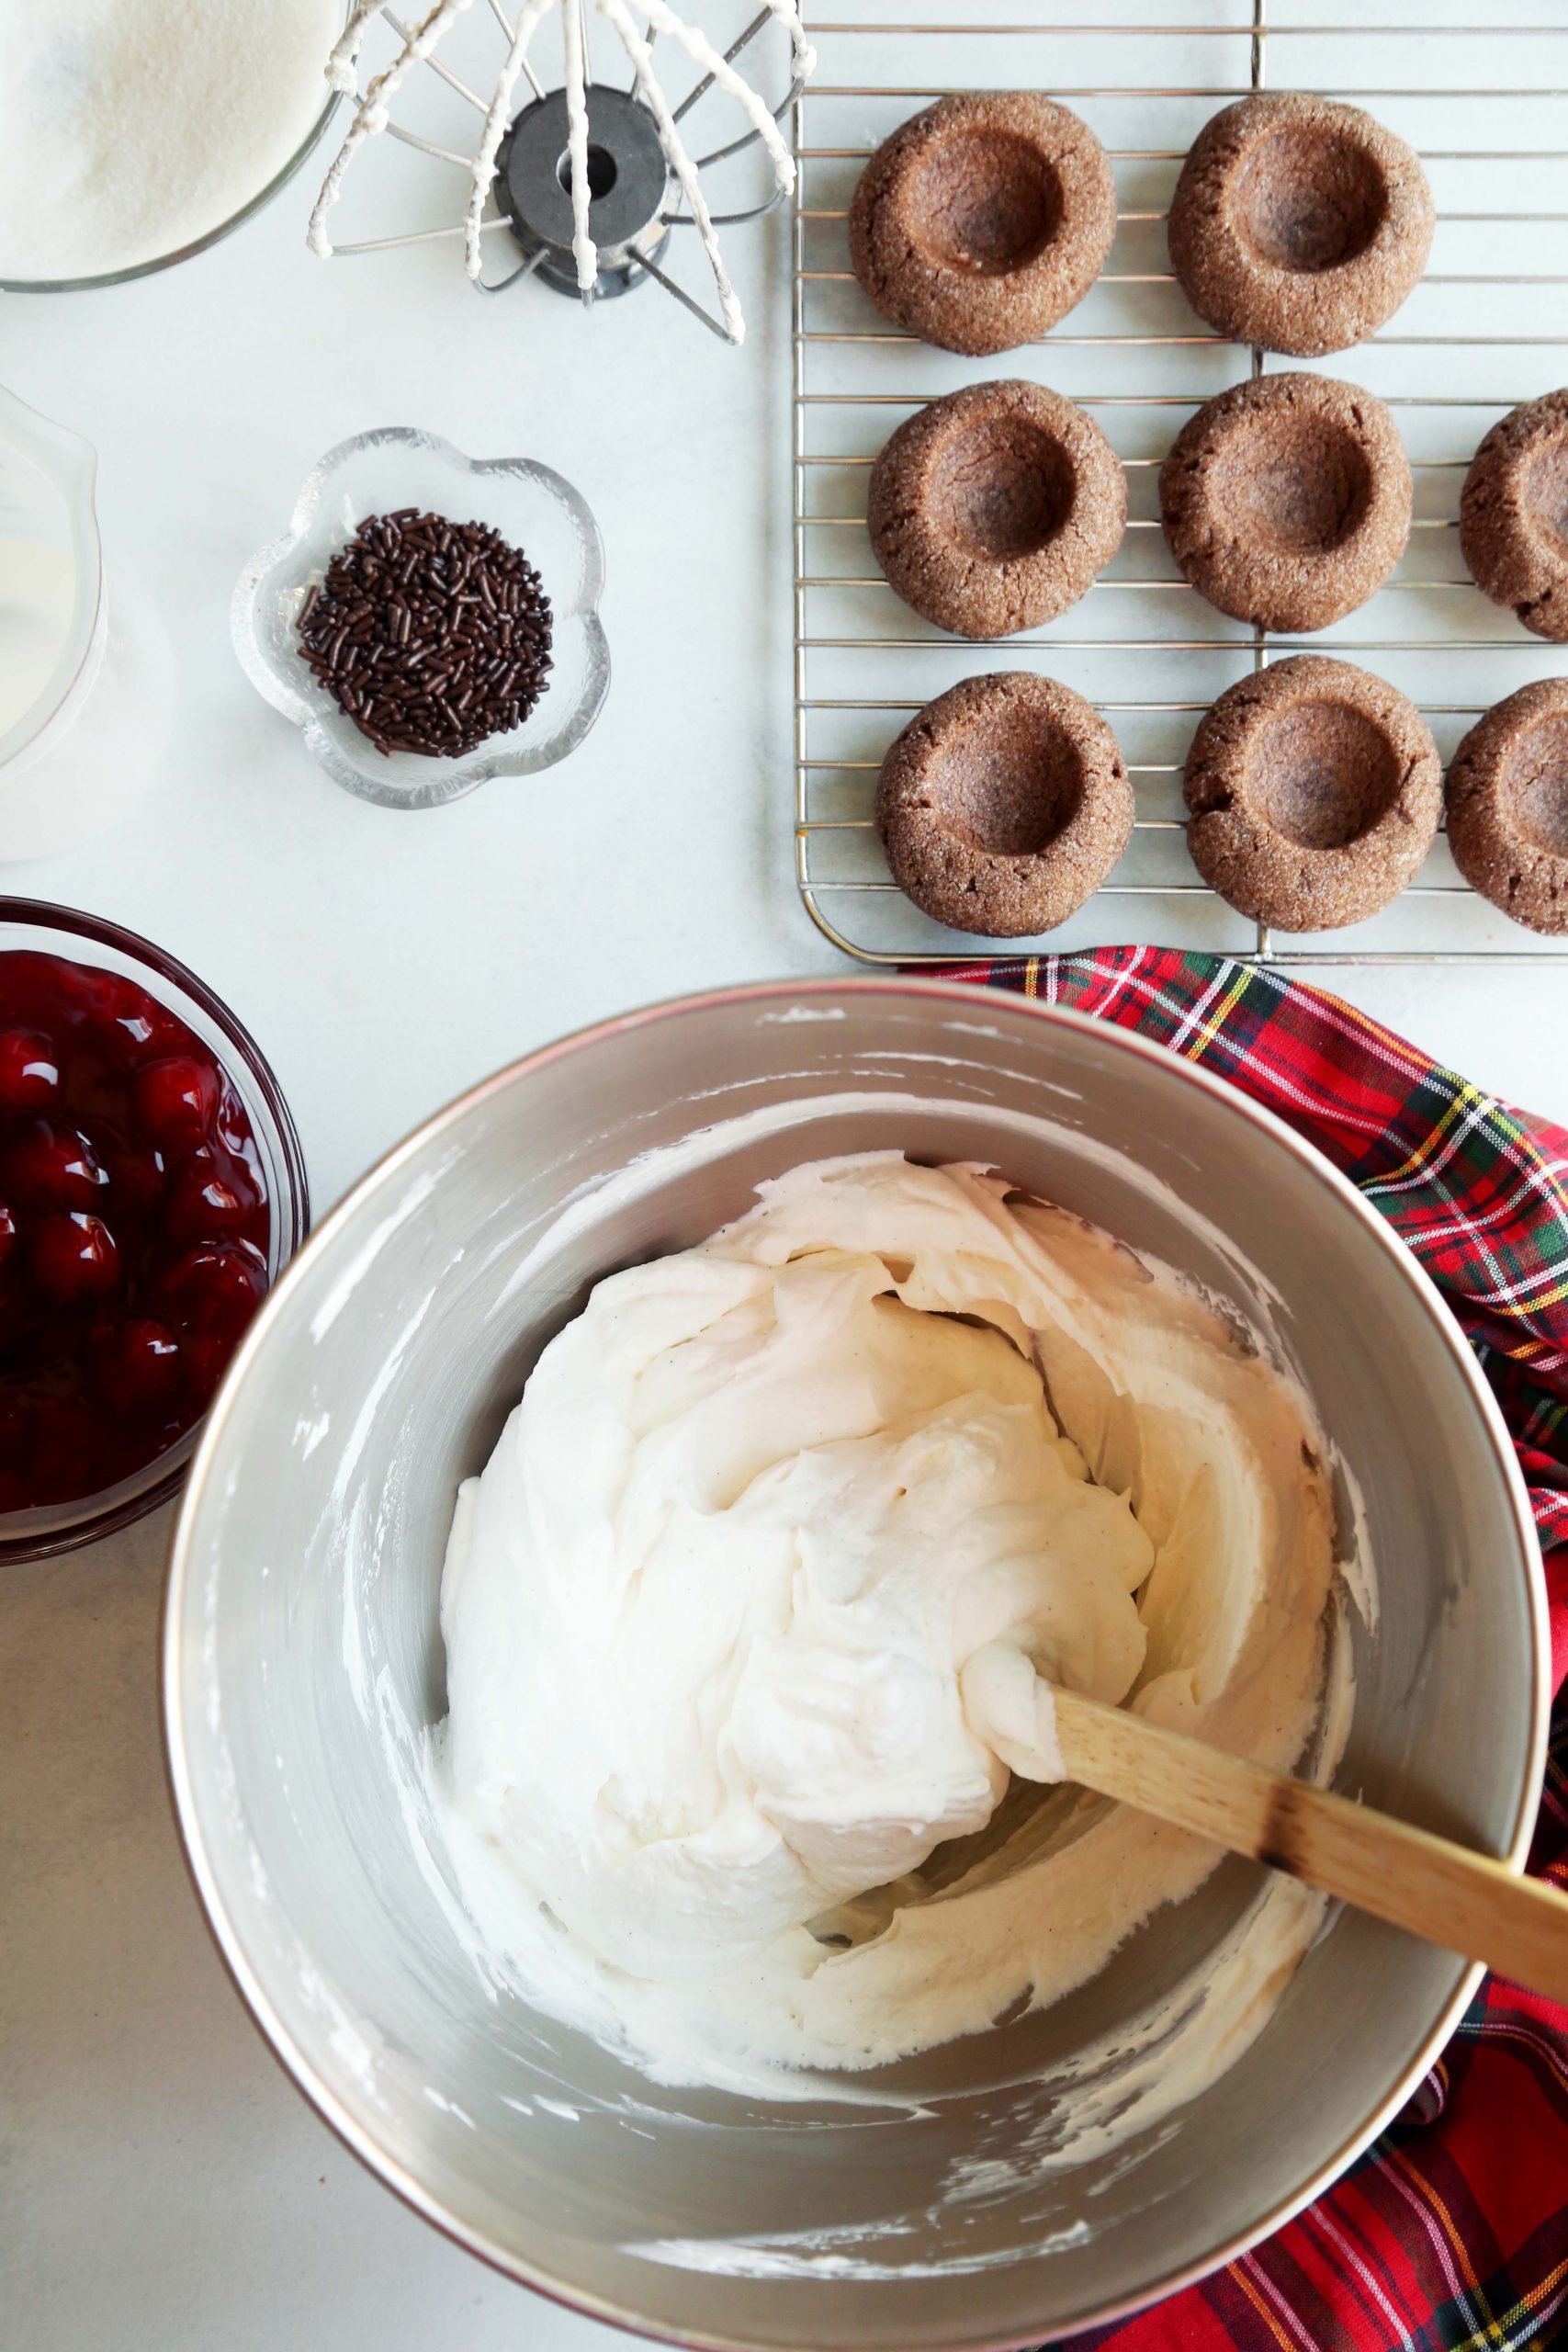 Fill the center of each cooled cookie with a cherry and some of the syrup. Pipe a ring of whipped cream around each cherry and top with chocolate sprinkles.
**Note: I like to use a piping bag fitted with a small star tip to pipe out the whipped cream. If you don’t have a bag and decorating tips, you can totally just use a plastic food storage bag with the end snipped off.**

Serve immediately or store in the fridge in an airtight container until ready to eat. You can eat them cold or allow them to come to room temperature slightly before serving. Just slightly, you don’t want to leave them out too long because of the cream.
 If you’re not a big fan of (or just against using) canned cherry pie filling, you can use a small scoop of cherry jam or preserves instead! You do want something cherry flavored because that’s a classic black forest flavor.
 I’ll leave you with one last tip…if you don’t have chocolate sprinkles on hand, you can use semi-sweet or bittersweet chocolate and just shave it onto the cookies with a vegetable peeler. Of course, you can also just omit either all together.
 I say this often, but this just might be my new favorite cookie recipe on the site. I’m a huge fan of black forest cake and believe me when I say that if you’re a fan as well, then these cookies are most definitely for you! You don’t want to miss out on them. And they’re actually not that difficult to make. If you have any questions or comments, leave them below. Stay safe out there my friends.
Black Forest Thumbprint Cookies
Ingredients
Cookies:
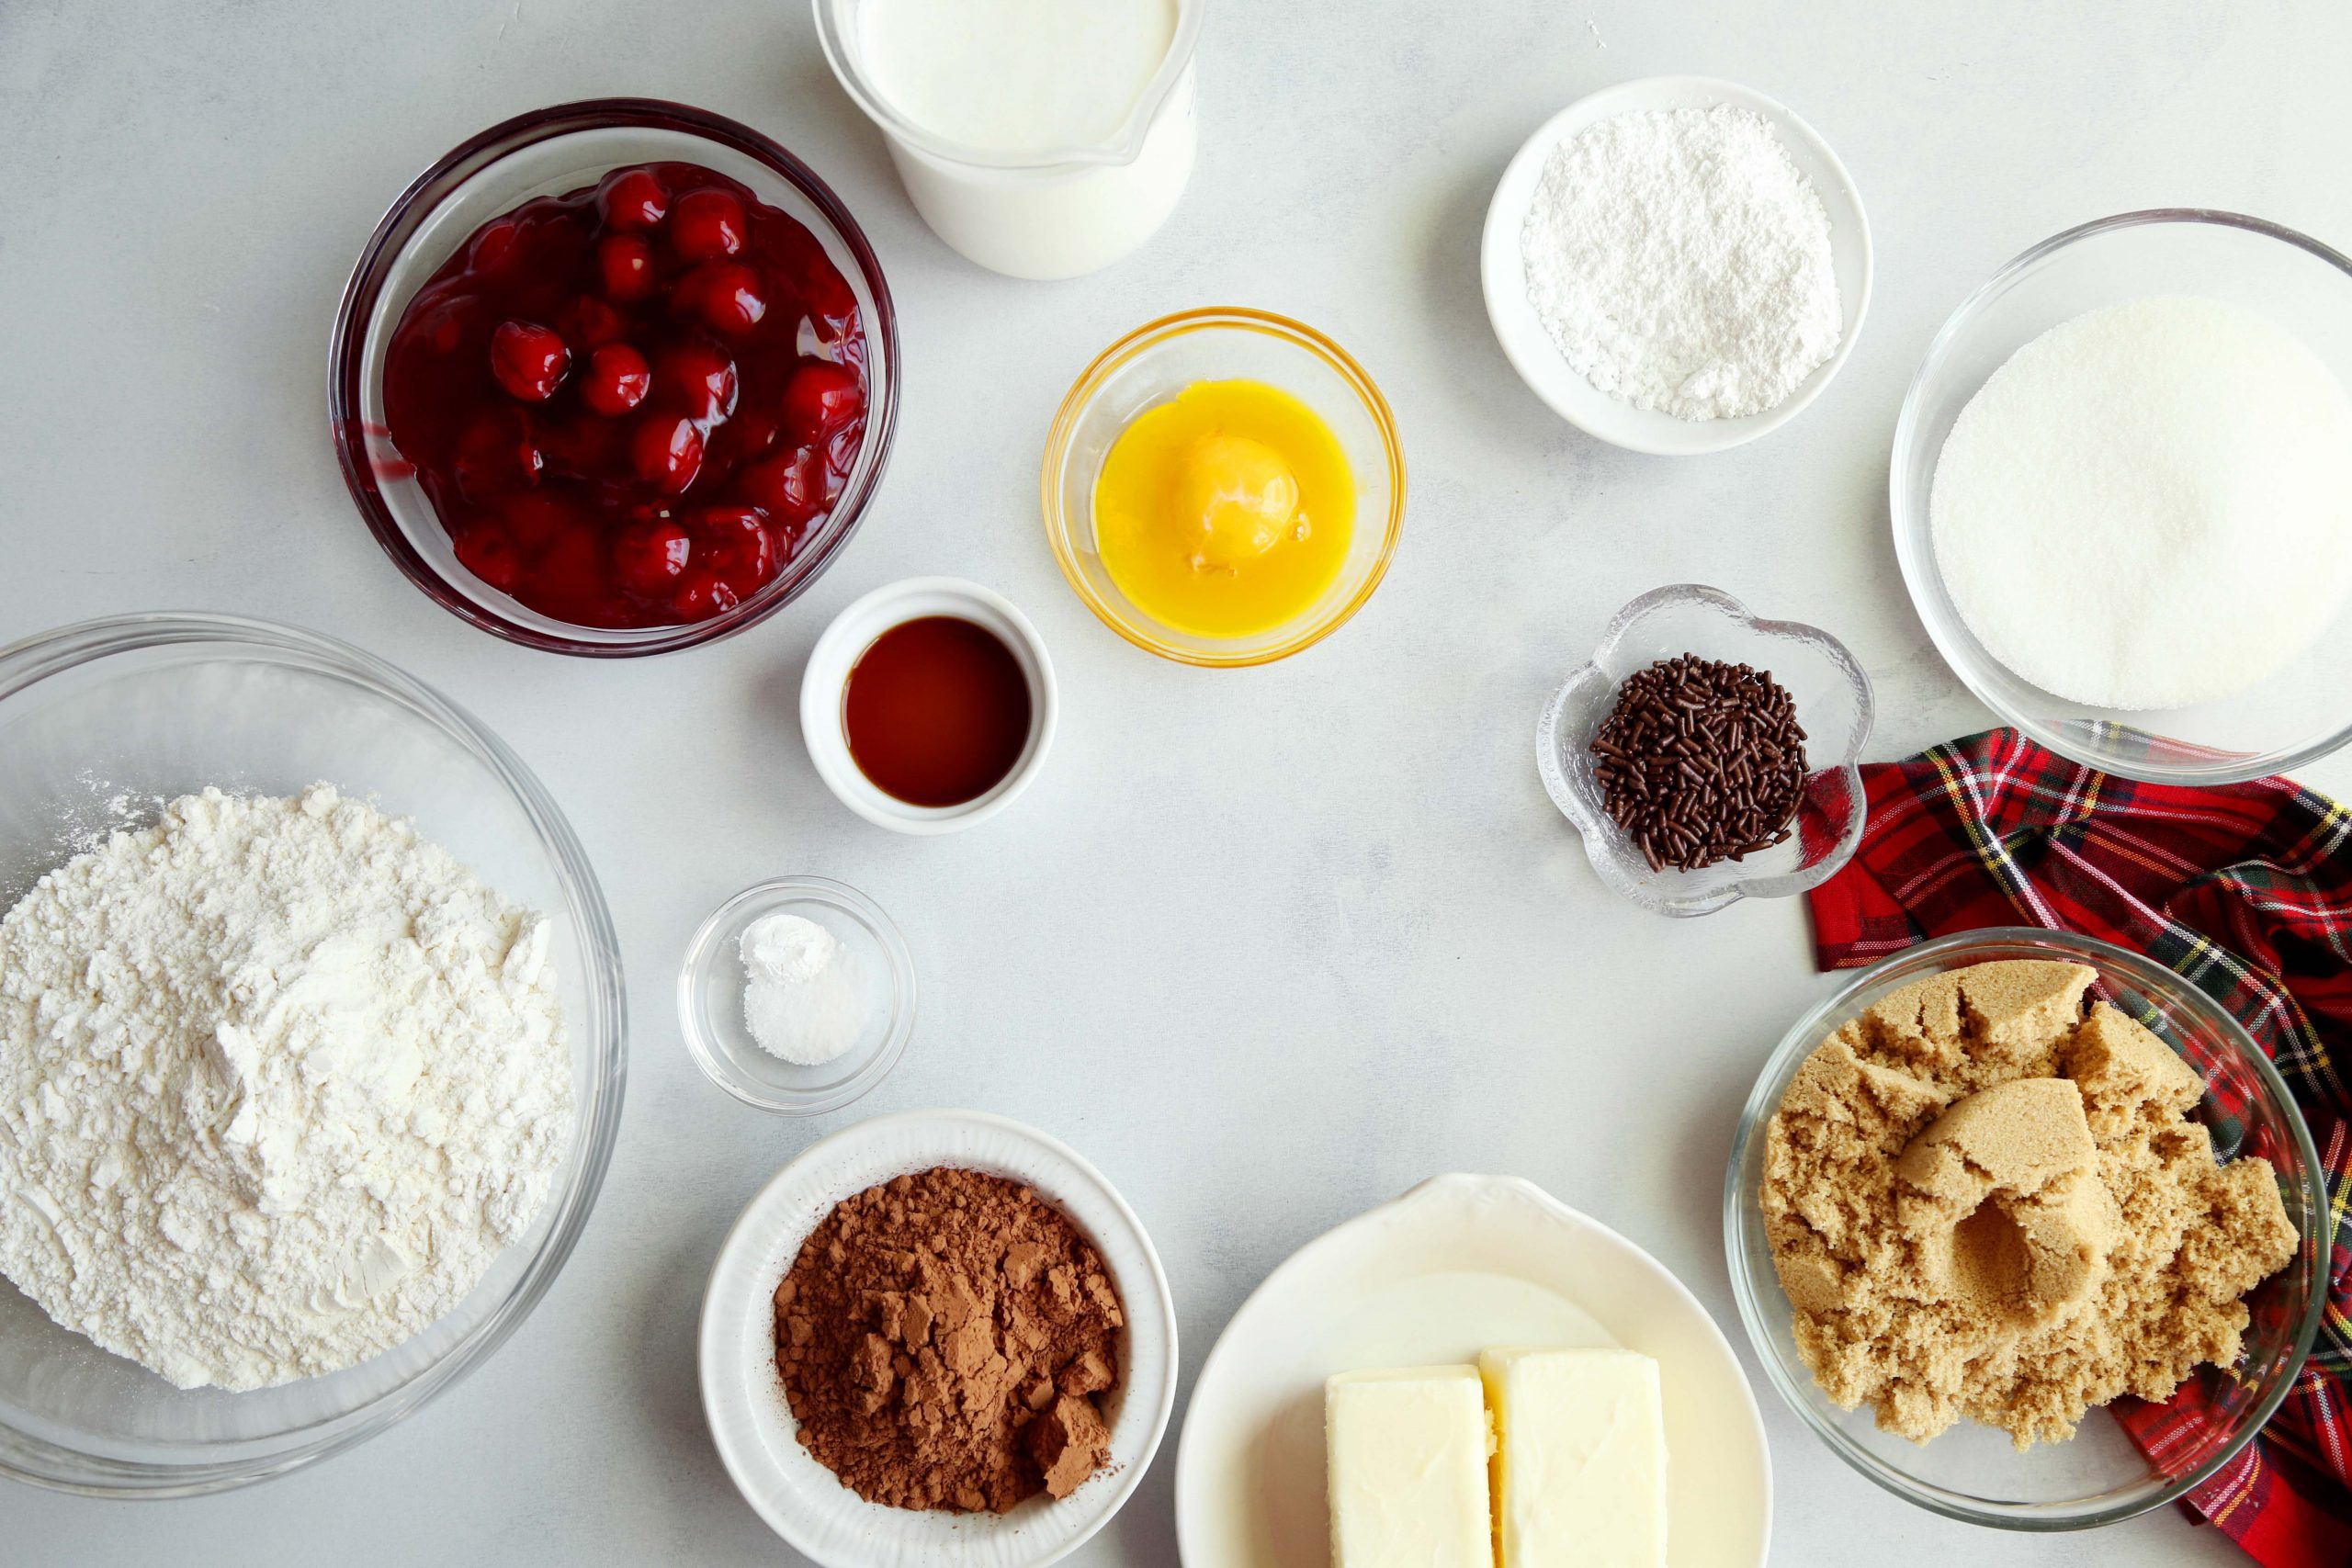
- 2 cups all-purpose flour
- 1/3 cup unsweetened cocoa powder
- ½ teaspoon kosher salt
- ¼ teaspoon baking powder
- 1 cup 2 sticks unsalted butter, softened
- ¾ cup firmly packed light brown sugar
- 2 large egg yolks
- 1 ½ teaspoons vanilla extract
- 1/3 cup granulated sugar
- ½ cup canned cherry pie filling
Topping:
- 1 cup cold heavy whipping cream
- 3 tablespoons powdered sugar
- 1 teaspoon vanilla bean paste or vanilla extract
- 1 tablespoon chocolate sprinkles
Instructions
- Preheat oven to 350°F. Line two baking sheets with parchment paper, set aside.
- In a medium bowl, whisk together the flour, cocoa, salt and baking powder. Set aside.
- In the bowl of a stand mixer, fitted with the paddle attachment, beat together the butter and sugar until light and fluffy, about 2 minutes. Add the egg yolks and vanilla and mix until combined. Gradually add the flour mixture to the butter mixture, beating until combined.
- Shape the dough into 1-inch balls and coat in the granulated sugar. Place onto the prepared baking sheets, about 2 inches apart. Use a ¼ teaspoon measuring spoon to gently make an indentation in the center of each ball. Bake until the cookies feel set, about 9 to 11 minutes. Remove pans from the oven, and press down centers again. Allow to cool on the pans for 10 minutes before transferring to a wire rack to cool completely.
- To make the topping, beat the heavy cream with the sugar and vanilla until soft peaks form. Transfer to a piping bag, fitted with a small star tip.
- Fill the center of each cooled cookie with a cherry and some of the syrup. Pipe a ring of whipped cream around each cherry and top with chocolate sprinkles. Serve immediately or store in the fridge in an airtight container until ready to eat.
Looks wonderful. Would maraschino cherries work with this? What about cream cheese frosting instead of the whipped cream topping?
Both of those options would work perfectly and would be delicious!
These are so cute and I bet just yummy! 🙂
Looks to be much easier than Black Forest Cake. I made Emeril’s cake once and it was a lengthy baking session. It was my husbands 50th Birthday so was worth every minute to see his face and hear all the oohs and ahhs I recieved. It was so delicious. I have been looking for a simpler version packed with flavor for everyday gatherings. This I believe would be perfect. I wonder, do you think the adult versions could do with a small brushing of cherry brandy? Maybe just a smidge added to the whipped topping instead? Perhaps drizzling a tiny amount of chocolate ganache over cookie before piping whipped cream? What do you think of these ideas to perk cookies up for a party? Great recipe, thank you! Loretta
love these cookies, perfectly artful too, love the cherry filling too, thank you
How many cookies did this recipe make?
I made these to bring to a NYE party. They were a big hit. Fun to make, the recipe made 24 cookies. I doubled up the cherries as the can had so much left over; not a piping expert so the whipped cream piping got a little messy but the recipe made more than enough whipped cream