 I don’t make homemade bread as often as I really should, which I guess is a good thing, because if I did, I’d be eating bread nonstop all day every day. What’s more, I really don’t eat white bread at all because I end up buying the whole wheat kind so that I don’t feel so guilty about it later. We all know what store-bought white bread tastes like because chances are we probably grew up eating nothing but that. I feel like it’s filled so much junk in it to keep it soft and white and long-lasting, but I have to say that nothing really beats a loaf of homemade sandwich bread. To make it yourself can be so soothing and not to mention, fills up the house with the best smell in the world. It’s versatile, making it perfect for any sandwich, grilled cheese or even French toast—and if it gets too old, you can turn it into bread crumbs and use it all to the last bit. I had a specific sandwich recipe in mind that I’ve been wanting to share on the blog and so I figured that I should probably make the bread from scratch to really make it as epic as possible. So I’m sharing this Classic White Sandwich Bread recipe now so that later in the week I can bring you my favorite sandwich recipe. It’s worth the effort, trust me.

Let’s start by preparing the yeast. Since it’s dry yeast, we need to bloom it in warm water to wake up. In a large bowl combine the warm water, milk, sugar and yeast. Allow to sit until the yeast foams up and doubles in size, about 10 minutes.
**Note: If the mixture doesn’t foam up, either the water and milk were too hot or not warm enough. They should be somewhere between 110 to 115°F. Toss it and start over if that’s the case.**
 Once foamy and doubled in volume, transfer the mixture to the bowl of a stand mixer, fitted with the dough hook attachment. Essentially you could just do this step in the bowl itself. I don’t know why I felt the need to dirty another bowl.
 Add in 2 cups of bread flour and stir until combined. Add the kosher salt and vegetable oil and mix, adding the remaining flour one cup at a time, stirring until the dough comes together and pulls away from the sides.
**Tip: If for some reason it doesn’t, add a tablespoon or so more of flour until it does. Knead on moderate speed until soft, about 5 minutes. Remember that you can always add more but you can’t take some back!**
 Transfer the dough to a large lightly oiled bowl. Turn it over to coat both sides, and then cover loosely with plastic wrap and a damp kitchen towel. Let rest in a warm spot until doubled in size, about 1 hour.
**Tip: You can do this by a window that lets in sunlight or above the fridge is a nice warm spot. I’ve also done it in an oven that I’ve turned on for about 5 minutes and then turned it off to create a nice warm atmosphere for rising.**
 Punch the dough down to release the air and knead a few times on a work surface. Cut in half and let for 5 minutes, covered loosely with a kitchen towel.
 Grease two 9×5-inch loaf pans. Shape each piece of dough into a loaf and place into the prepared tins. Brush the tops with melted butter and loosely cover with plastic wrap. Let rise until doubled in size, about 30 to 45 minutes.
 In the meantime you can preheat your oven to 350°F. You can allow the bread to rise on top of your stove while the oven warms up since it’ll most likely warm up the top of the stove as well, creating a great place for the bread to rise!
 Bake the bread until golden brown and the loaves sound hollow when you gently tap the top, about 30 minutes. If you want to be super precise, you can check the internal temperature of the loaves with a thermometer, it should register about 190°F.
 Remove from the loaves from the oven and let cool for about 10 minutes in the tins before removing and placing on a wire rack to cool completely.
**Note: My loaves got all wrinkly on top because I left them in the tin too much and because of that it created steam in the bottom and released through the top of the loaves, causing it to wrinkle. Removing the loaves from the tins as soon as possible will prevent that issue from happening. At the end of the day though, the bread is still delicious!**
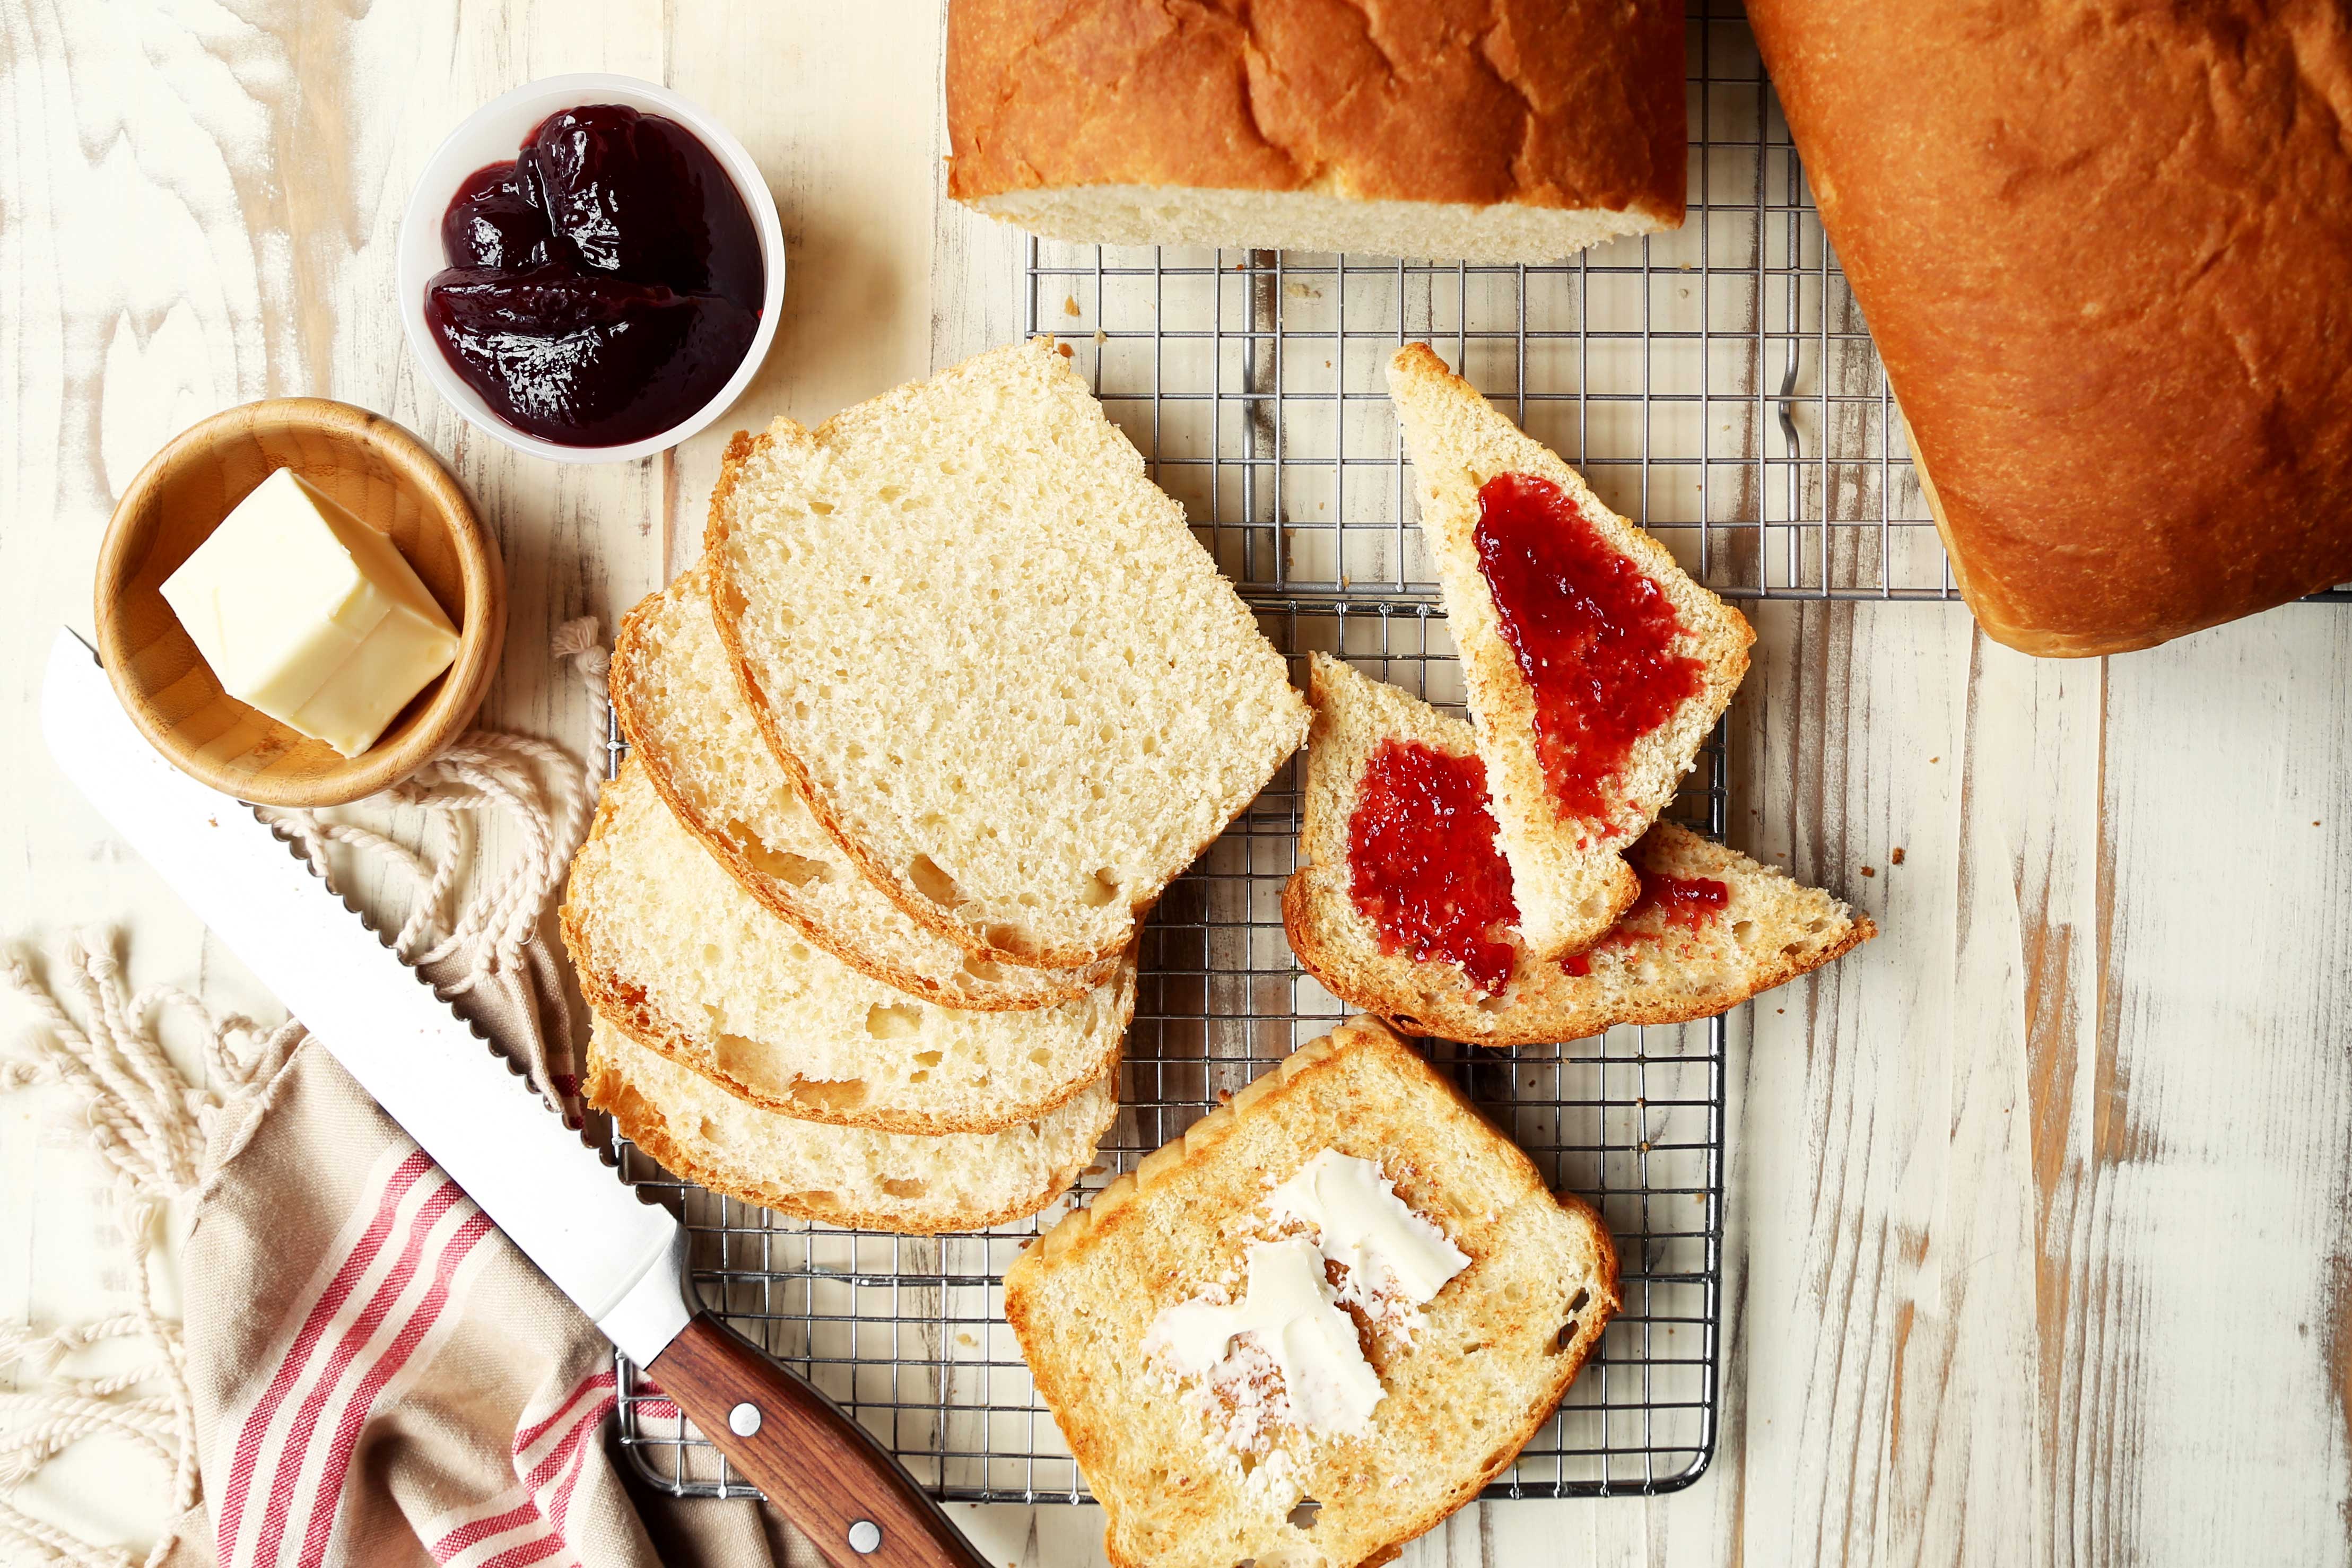
 Once the loaves have cooled completely, at that point you can either slice and use as you’d like or you can wrap each in plastic wrap and keep at room temperature for about 4 to 5 days. You can prolong that if you store it in the fridge, of course, but then you run the risk of drying it out.
 Since the recipe makes 2 loaves and I find it hard to use up both right away, I keep one out for eating immediately and then wrap the next one in plastic wrap, store in a freezer storage bag and keep in the freezer for up to 3 months. You can thaw in the fridge the night before and use for sandwiches, grilled cheeses, or even cut it thicker and make French toast out of it! The options really are limitless. Stay tuned for the next recipe on the blog this week which will feature this bread!

Classic White Sandwich Bread
Ingredients
- 1 cup warm water about 110 to 115°F
- 1 cup warm milk about 110 to 115°F
- 2/3 cup granulated sugar
- 2 packets active dry yeast
- 5 1/2 cups bread flour plus more as needed
- 1 tablespoon kosher salt
- 1/4 cup vegetable oil
- 2 tablespoons unsalted butter melted and cooled
Instructions
- In the bowl of a stand mixer, fitted with the dough hook, combine the warm water, milk, sugar and yeast. Allow to sit until the yeast foams up and doubles in size, about 10 minutes. If the mixture doesn't foam up, either the water was too hot or not warm enough. Toss it and start over.
- Add in 2 cups of flour and stir until combined. Add the salt and oil and mix, adding the remaining flour one cup at a time, stirring until the dough comes together and pulls away from the sides. If for some reason it doesn't, add a tablespoon or so more of flour until it does. Knead on moderate speed until soft, about 5 minutes. Transfer the dough to a large lightly oiled bowl. Turn it over to coat both sides, and then cover loosely with plastic wrap and a damp kitchen towel. Let rest in a warm spot until doubled in size, about 1 hour. Punch the dough down to release the air and knead a few times on a work surface. Cut in half and let for 5 minutes, covered loosely with a kitchen towel.
- Grease two 9x5-inch loaf pans. Shape each piece of dough into a loaf and place into the prepared tins. Brush the tops with melted butter and loosely cover with plastic wrap. Let rise until doubled in size, about 30 to 45 minutes.
- Preheat oven to 350°F.
- Bake the bread until golden brown and the loaves sound hollow when you gently tap the top, about 30 minutes. Remove from the oven and let cool for about 10 minutes in the tin before removing and placing on a wire rack to cool completely. Slice and serve or wrap with plastic wrap until ready to use. Enjoy!
My favorite thing to do when the loaves come out of the oven is slice a big hunk butter it and dip it in maple syrup!! My dad taught me that as a child and I still do it every time