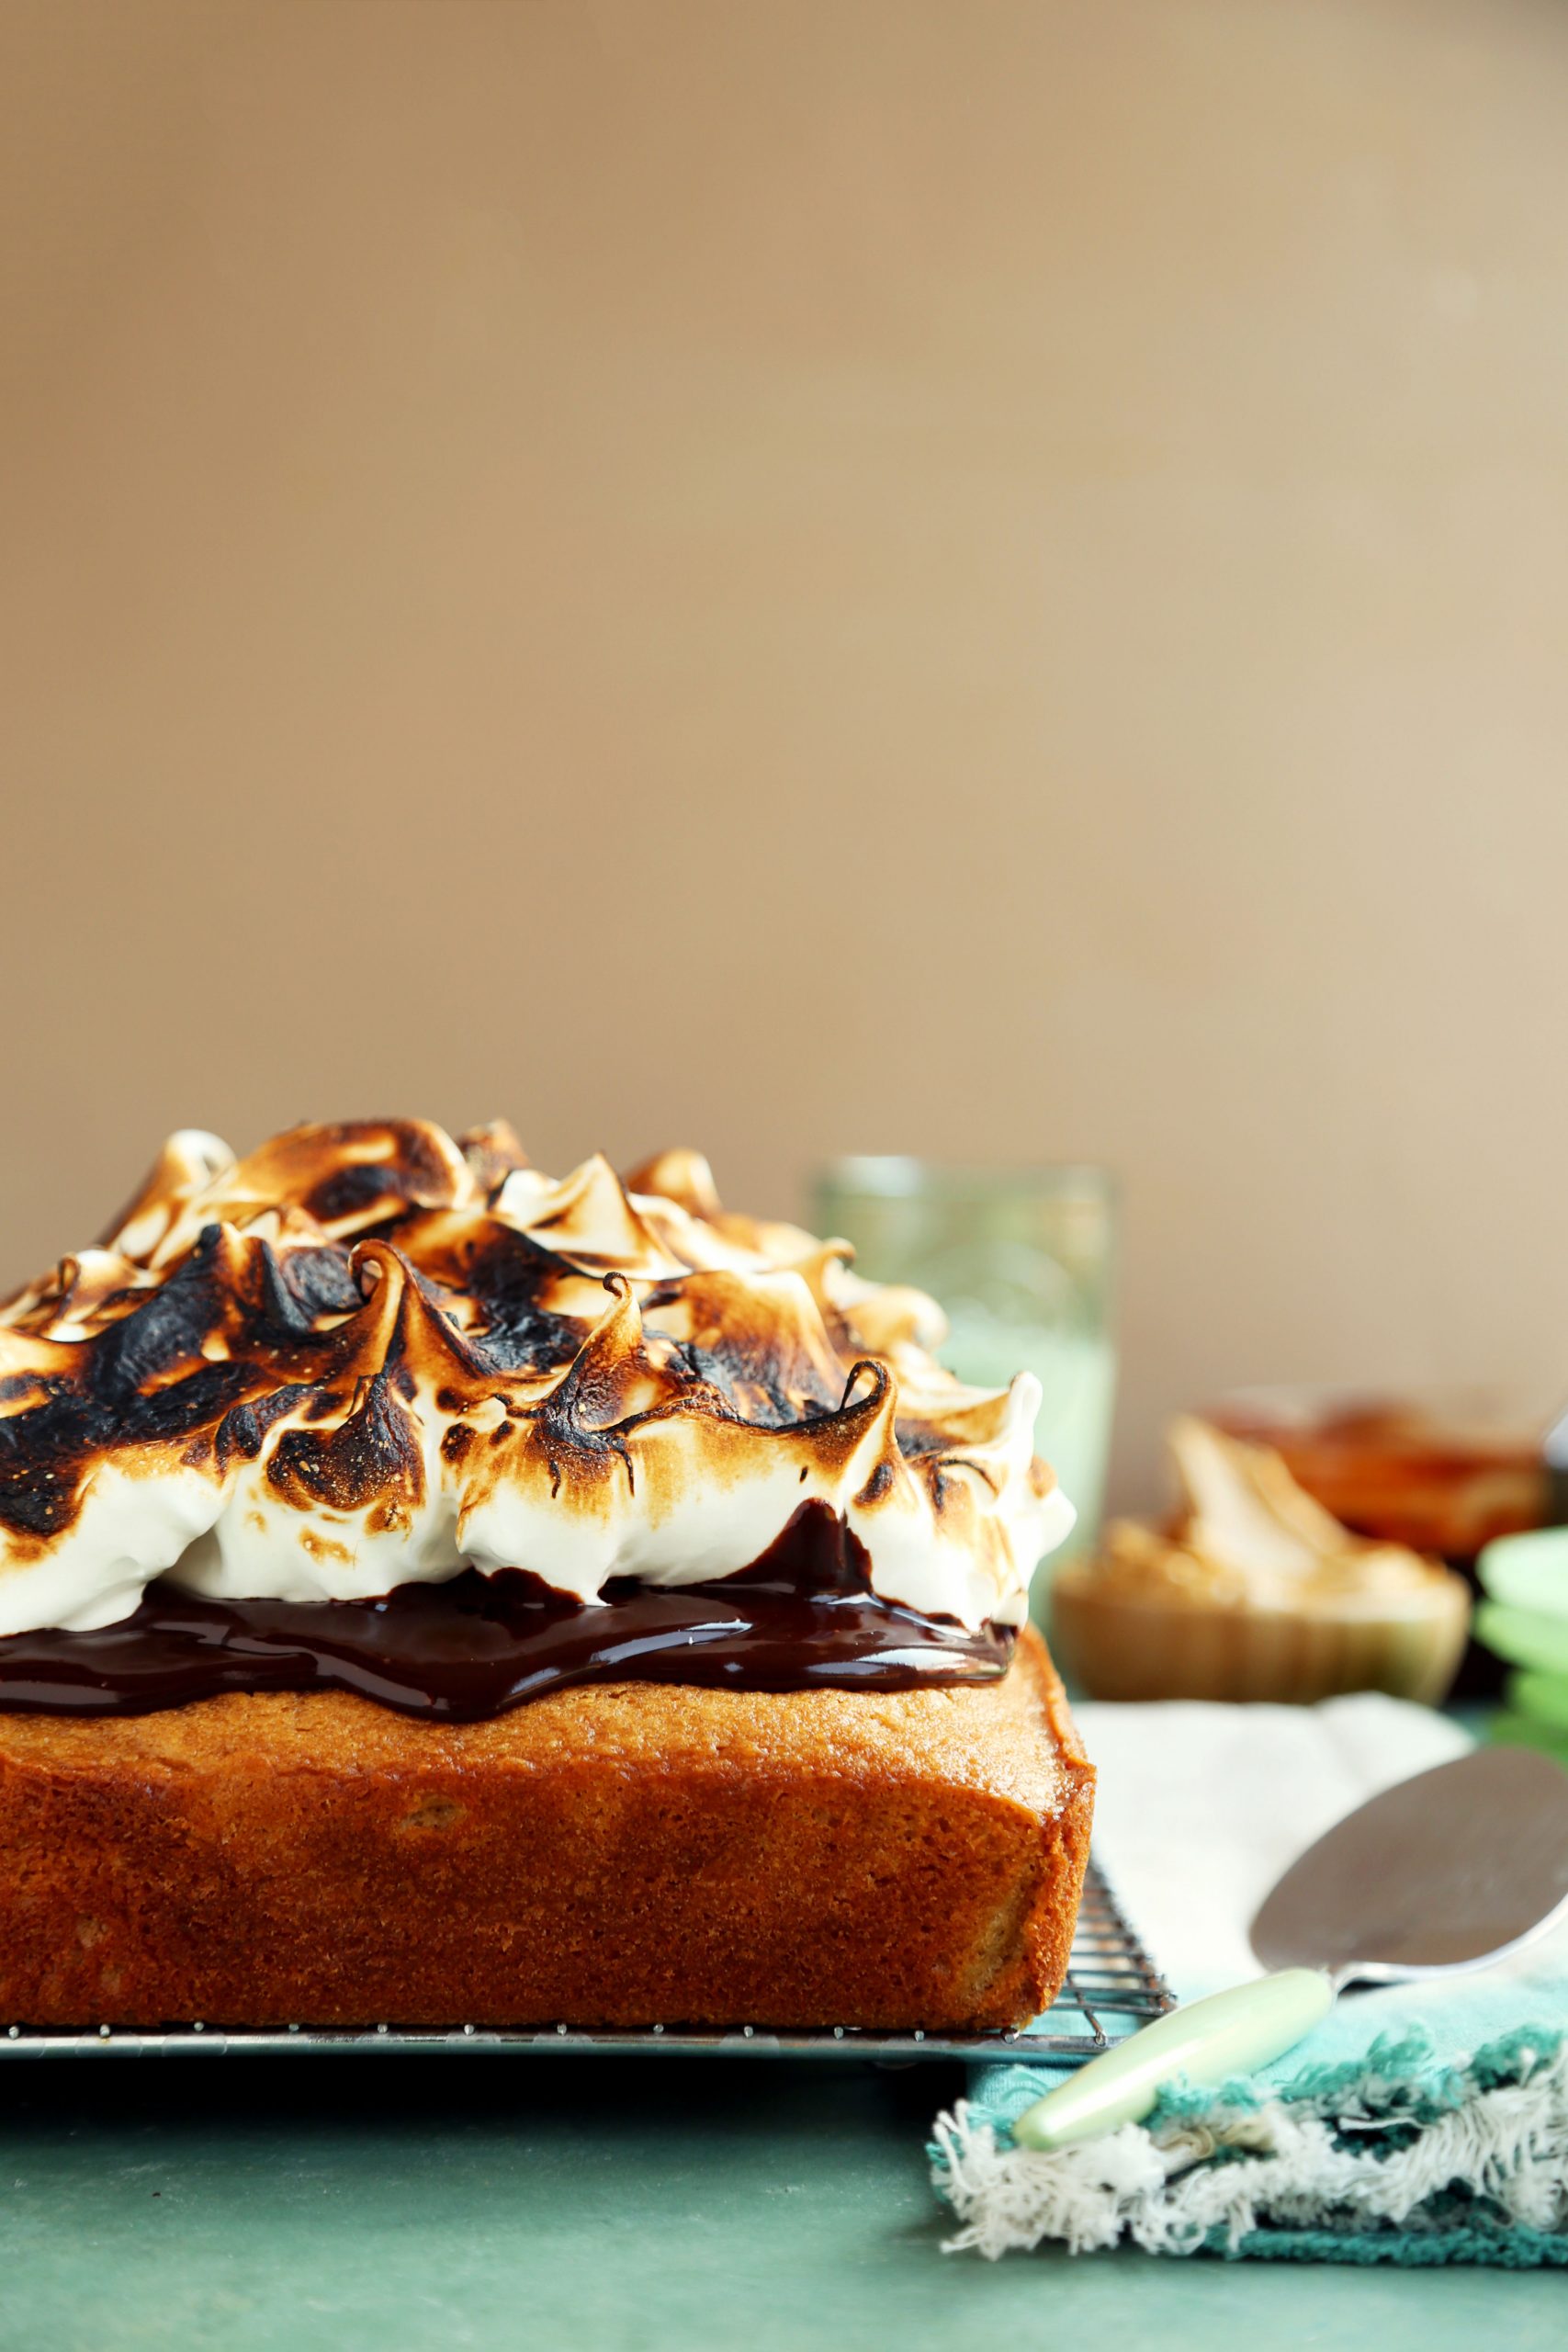
 I know that I literally just shared a s’mores cake on the blog a week or so ago, but I couldn’t not share this recipe as well. Someone just had to do it, and I’m so glad it’s me. Technically that last recipe wasn’t a cake, they were bars, so it doesn’t and shouldn’t count. This week, I’m sharing this super decadent and over-the-top Peanut Butter S’mores Cake. It’s a thing of beauty and just what we need to be eating right now. S’mores are a perfect summer dessert, but sometimes toasting marshmallows on an open fire just isn’t always all that it’s cracked up to be. The good news is that now you can bring some of that quintessential summer flavor indoors because let’s face it, if you’re anywhere near Los Angeles at the moment, the last thing you want to do is be outside in this ridiculous heat. Now, I’m sure the other last thing you want to do is bake but turn on the air, get in the kitchen and make this cake! Do it for yourself, you deserve it.

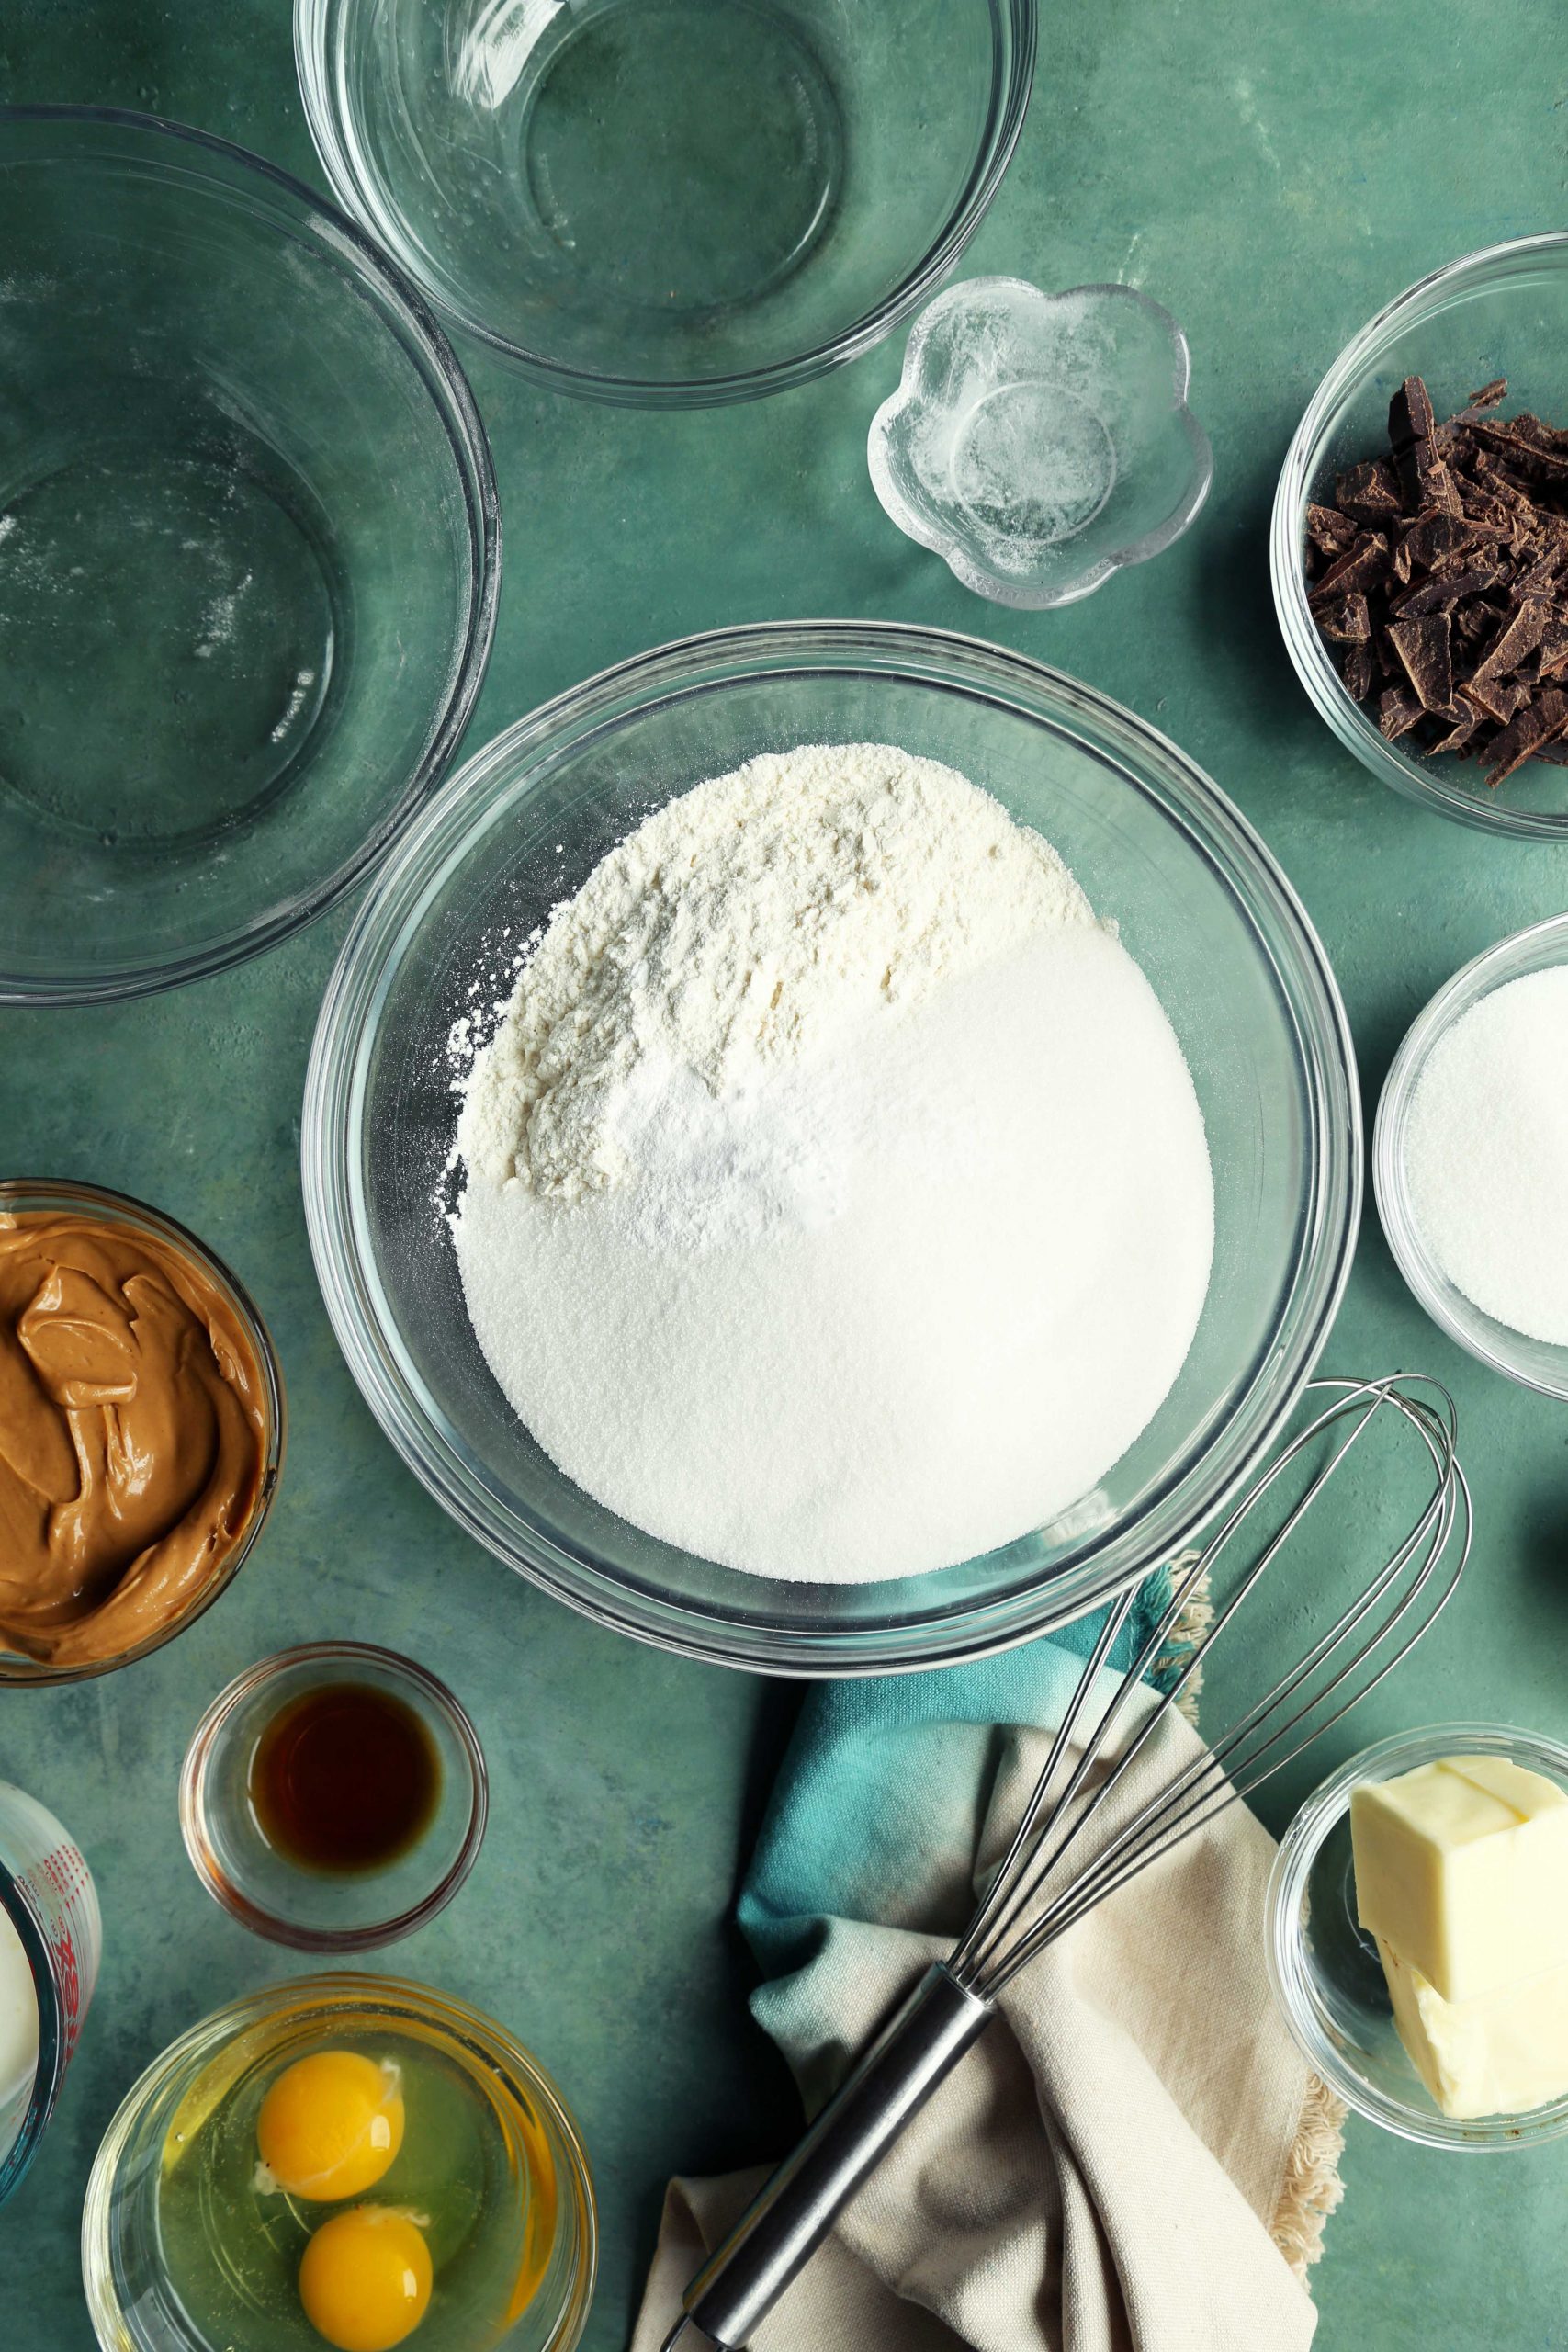
Let’s start by making the cake batter. It’s a peanut butter cake and the best part, aside from the taste, is that it’s a fairly simple cake batter to master. You don’t have to worry about creaming the butter and sugar and then adding the dry and wet ingredients alternately. It’s straight forward! In a large bowl, whisk together the flour, sugar, baking soda, baking powder, and salt. Set aside.
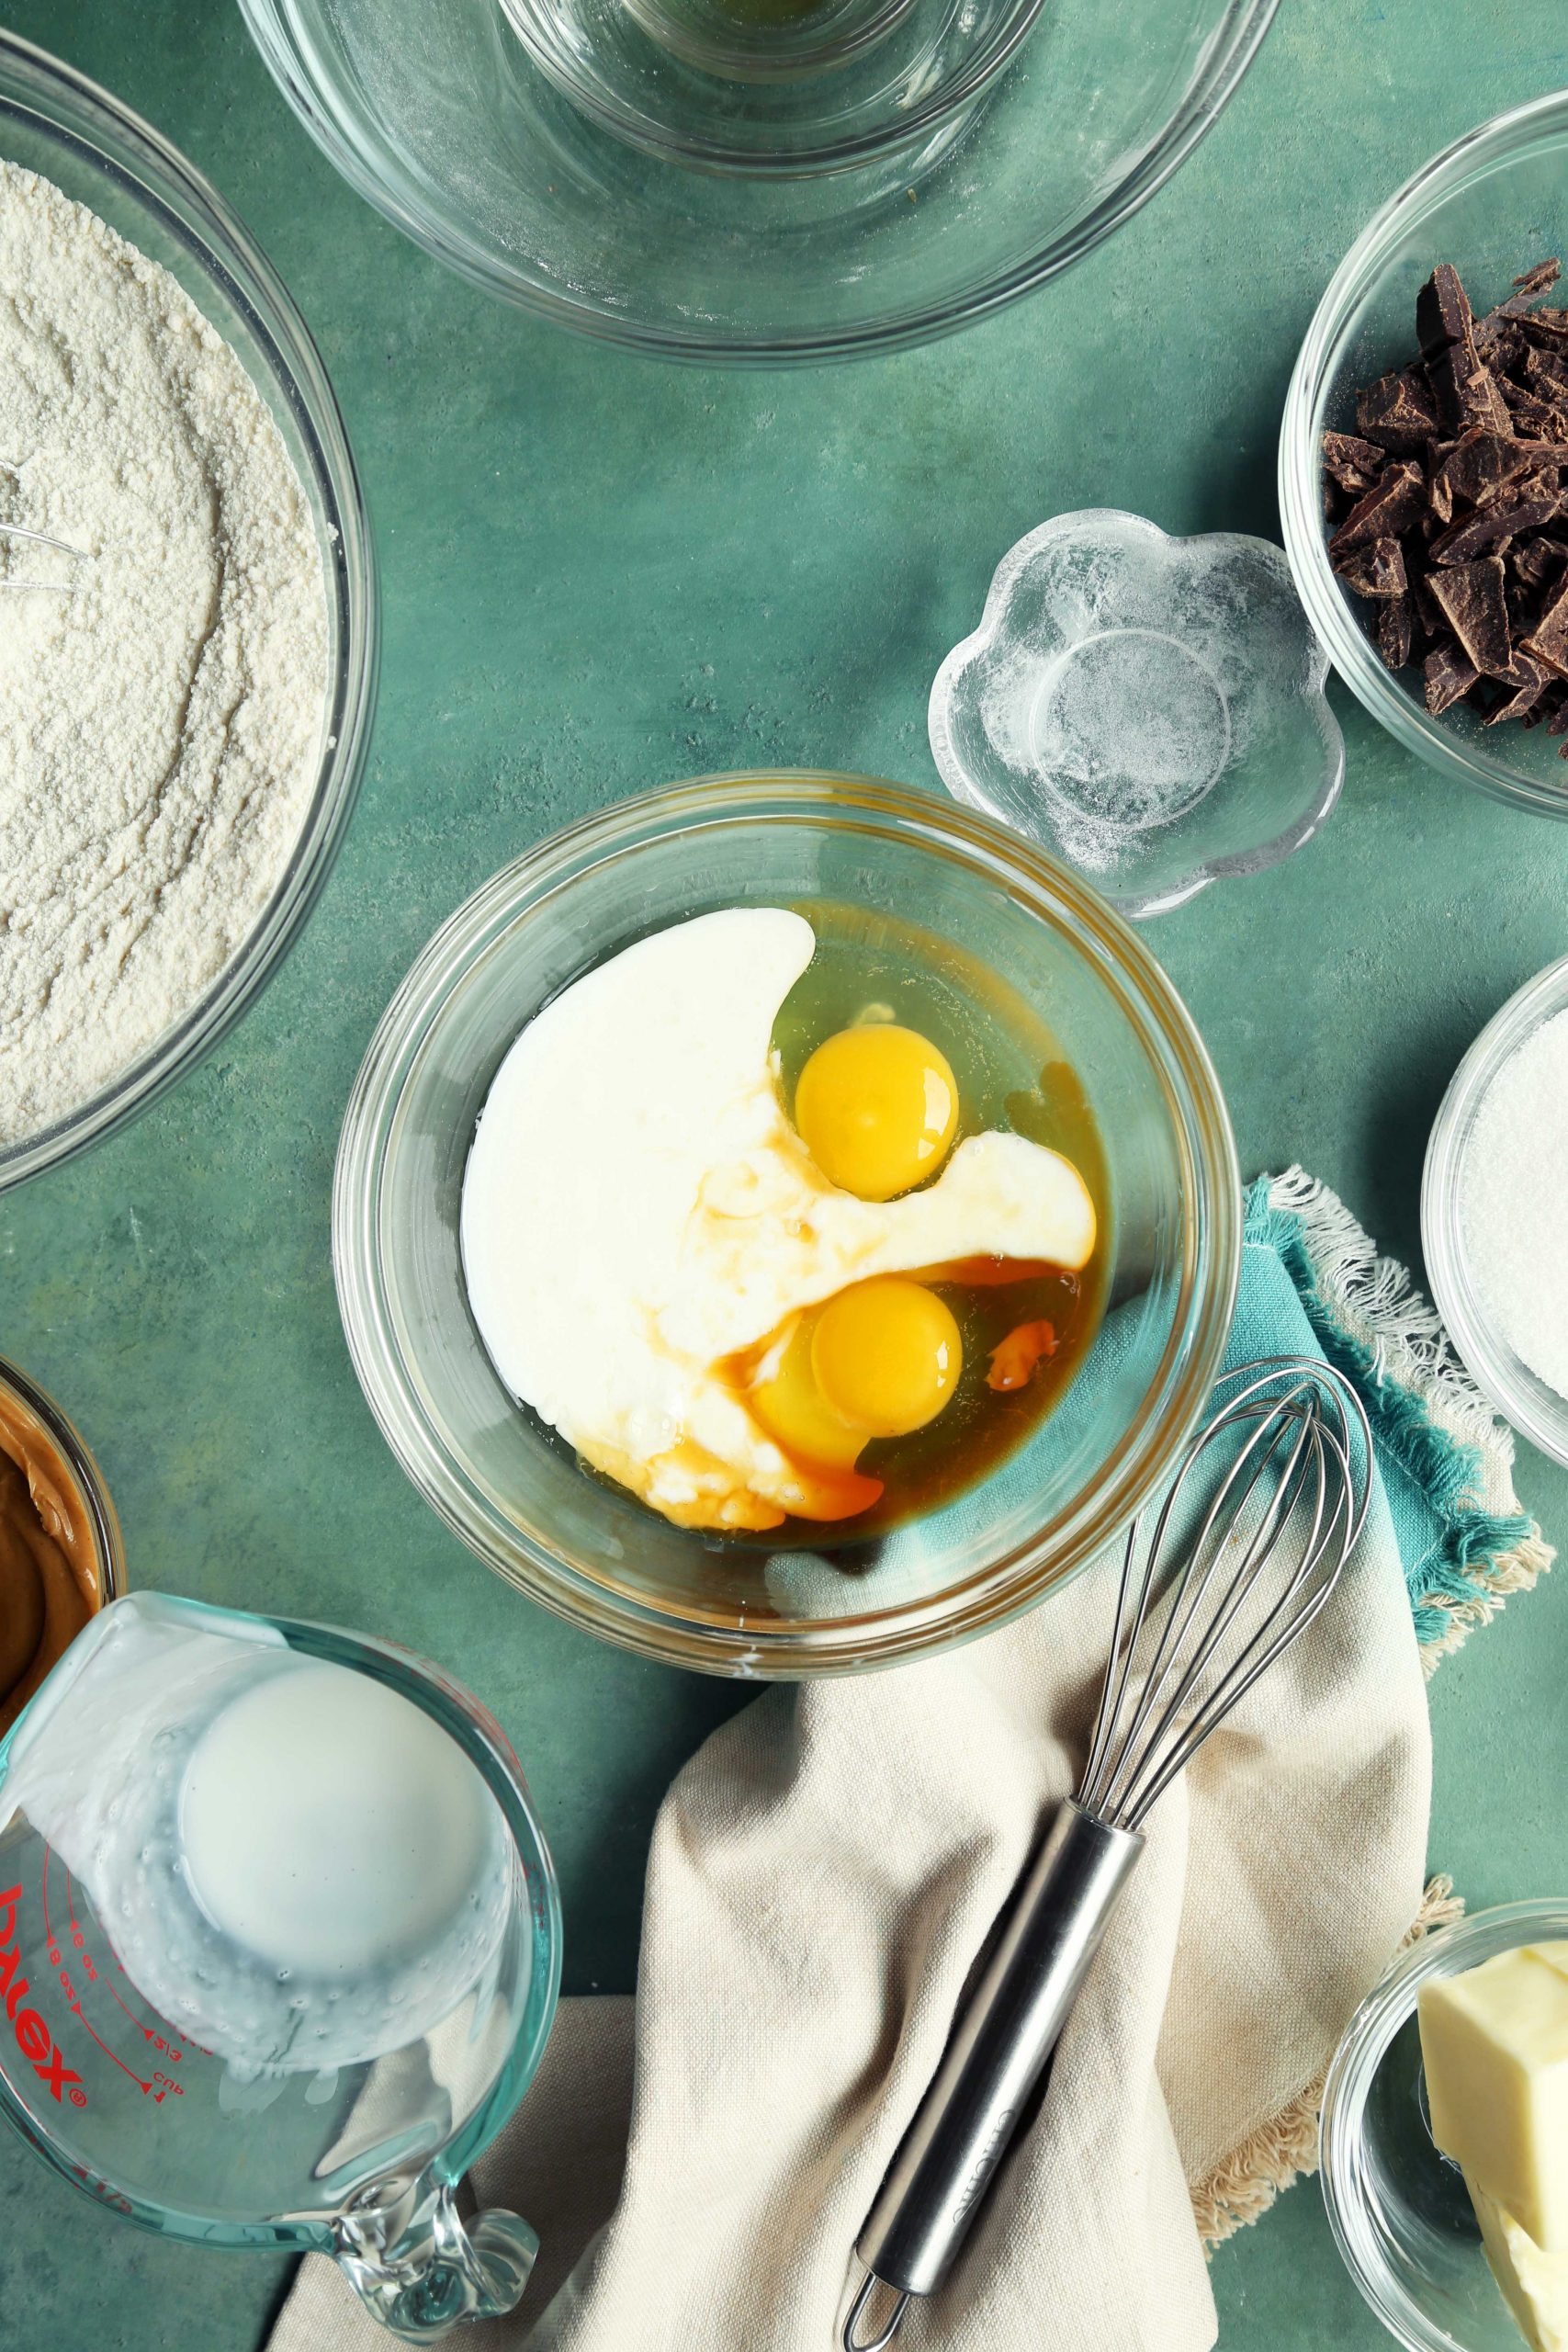
 In a separate bowl, whisk together the buttermilk, eggs, and vanilla and add to the dry ingredients, stirring until just combined.
**Tip: If you want a really moist and tender cake, I highly recommend always using buttermilk instead of whole milk whenever it’s listed in a cake recipe. It’s such a simple swap out but it makes a world of difference.**
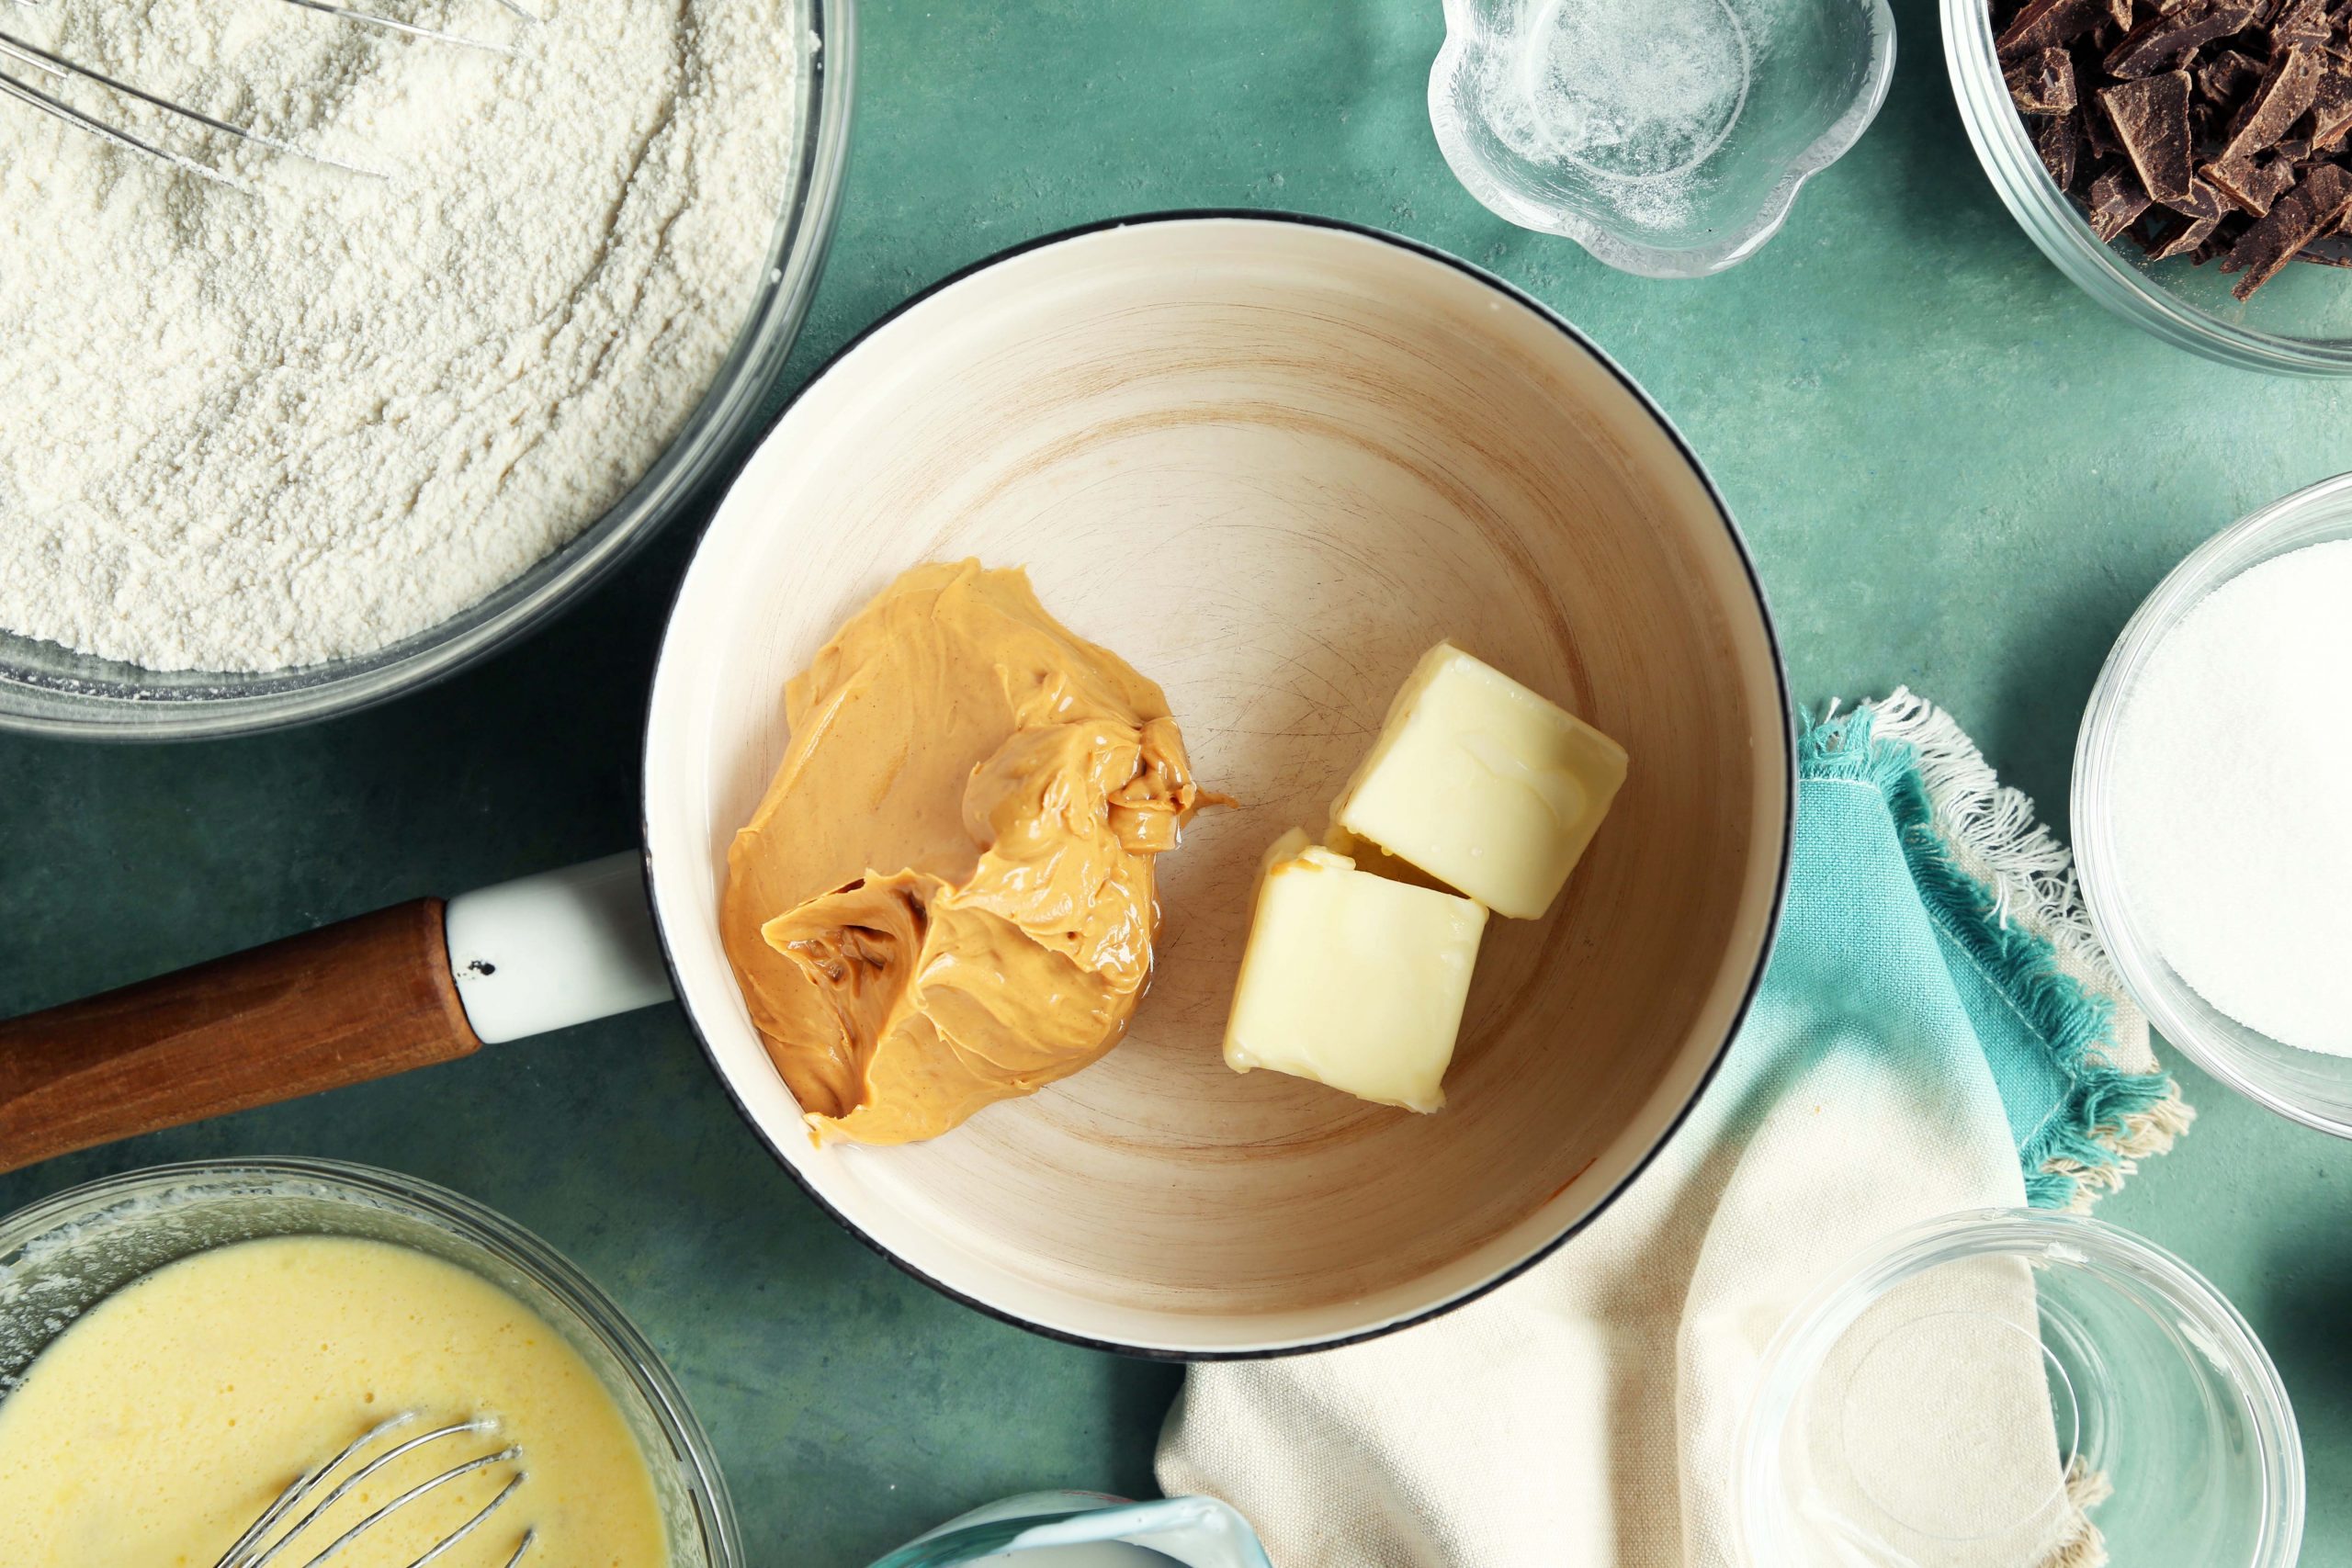
 In a medium saucepan, combine the water, butter and peanut butter and set over moderate heat. Cook, stirring often, until melted through and smooth. Remove from the heat and allow to cool.
**Note: You don’t want to add the hot peanut butter mixture to the batter because the heat will begin to cook the batter slightly and the warmth will alter the texture of the cake.**
 Add the cooled peanut butter mixture to the batter and whisk until smooth and well combined, making sure not over mix.
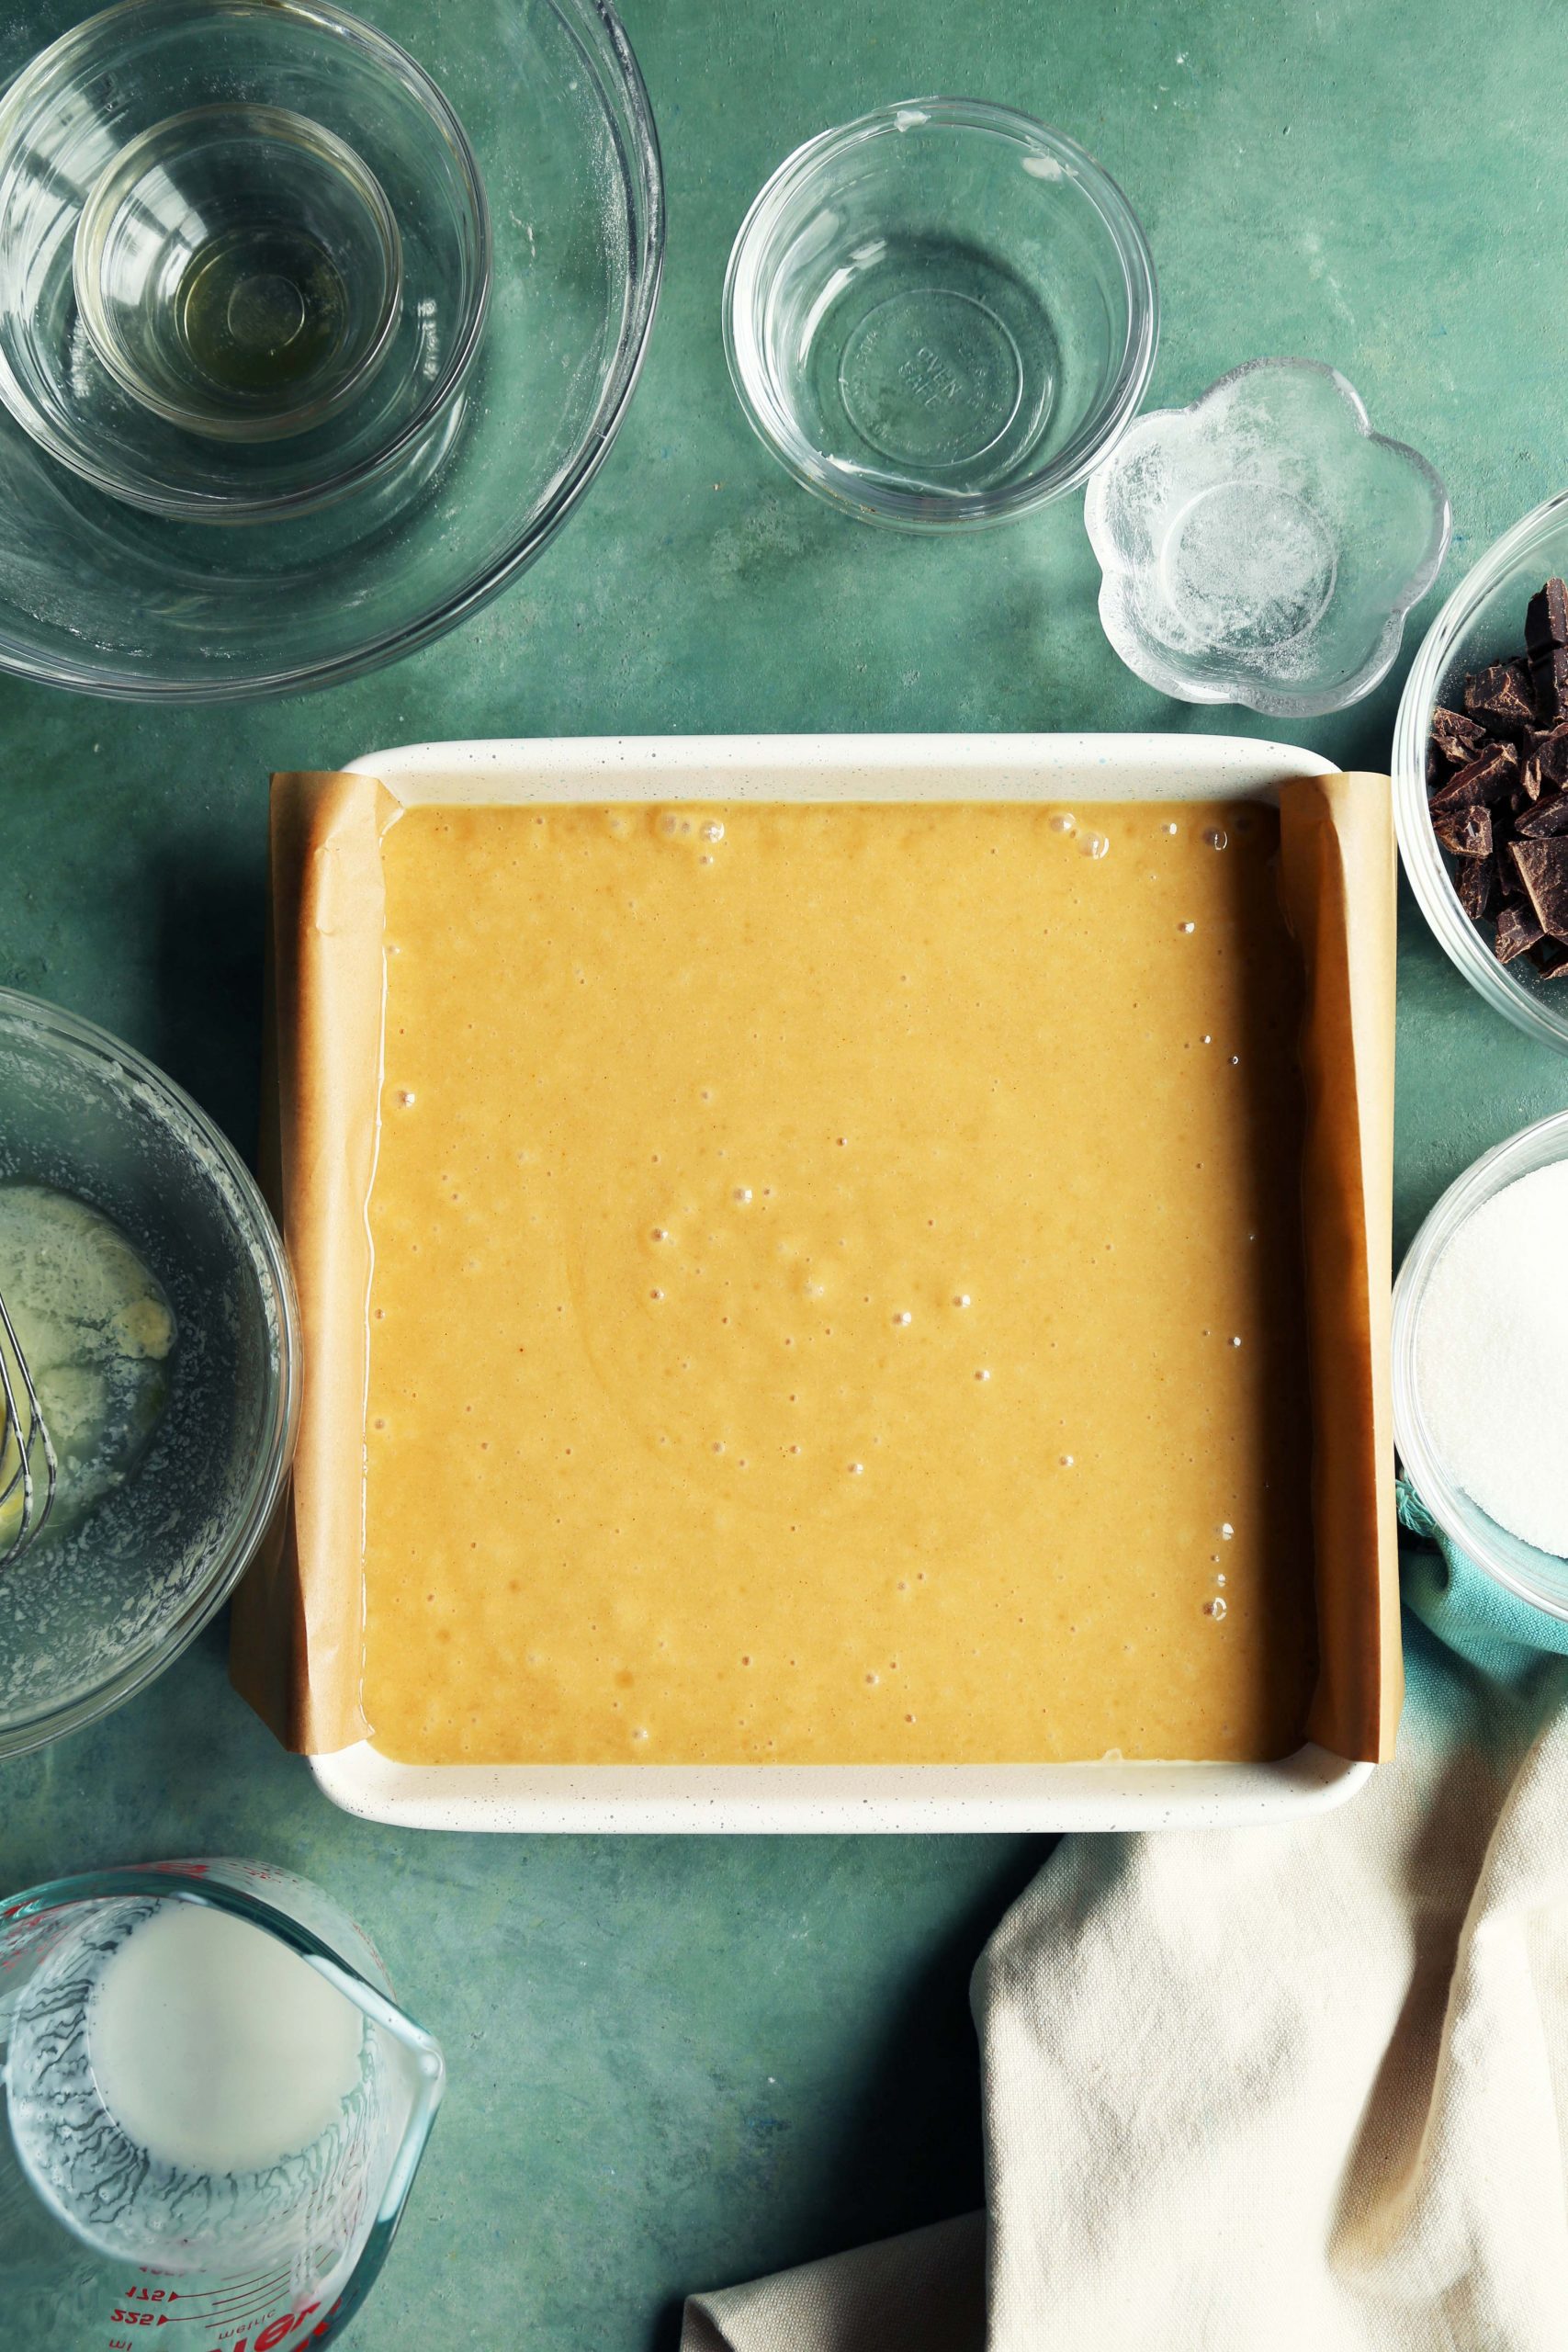
 Transfer the batter to the prepared pan and give it a few taps on the counter to remove any air bubbles. Bake in a preheated 350°F oven until golden brown and a toothpick, inserted in the middle, comes out clean, about 30 to 35 minutes.
**Tip: To make it easier to lift the cake out of the pan later on, I like to line the pan with parchment paper and I leave a bit of overhang on either side of the pan so I have something to hold while I lift the cake!**
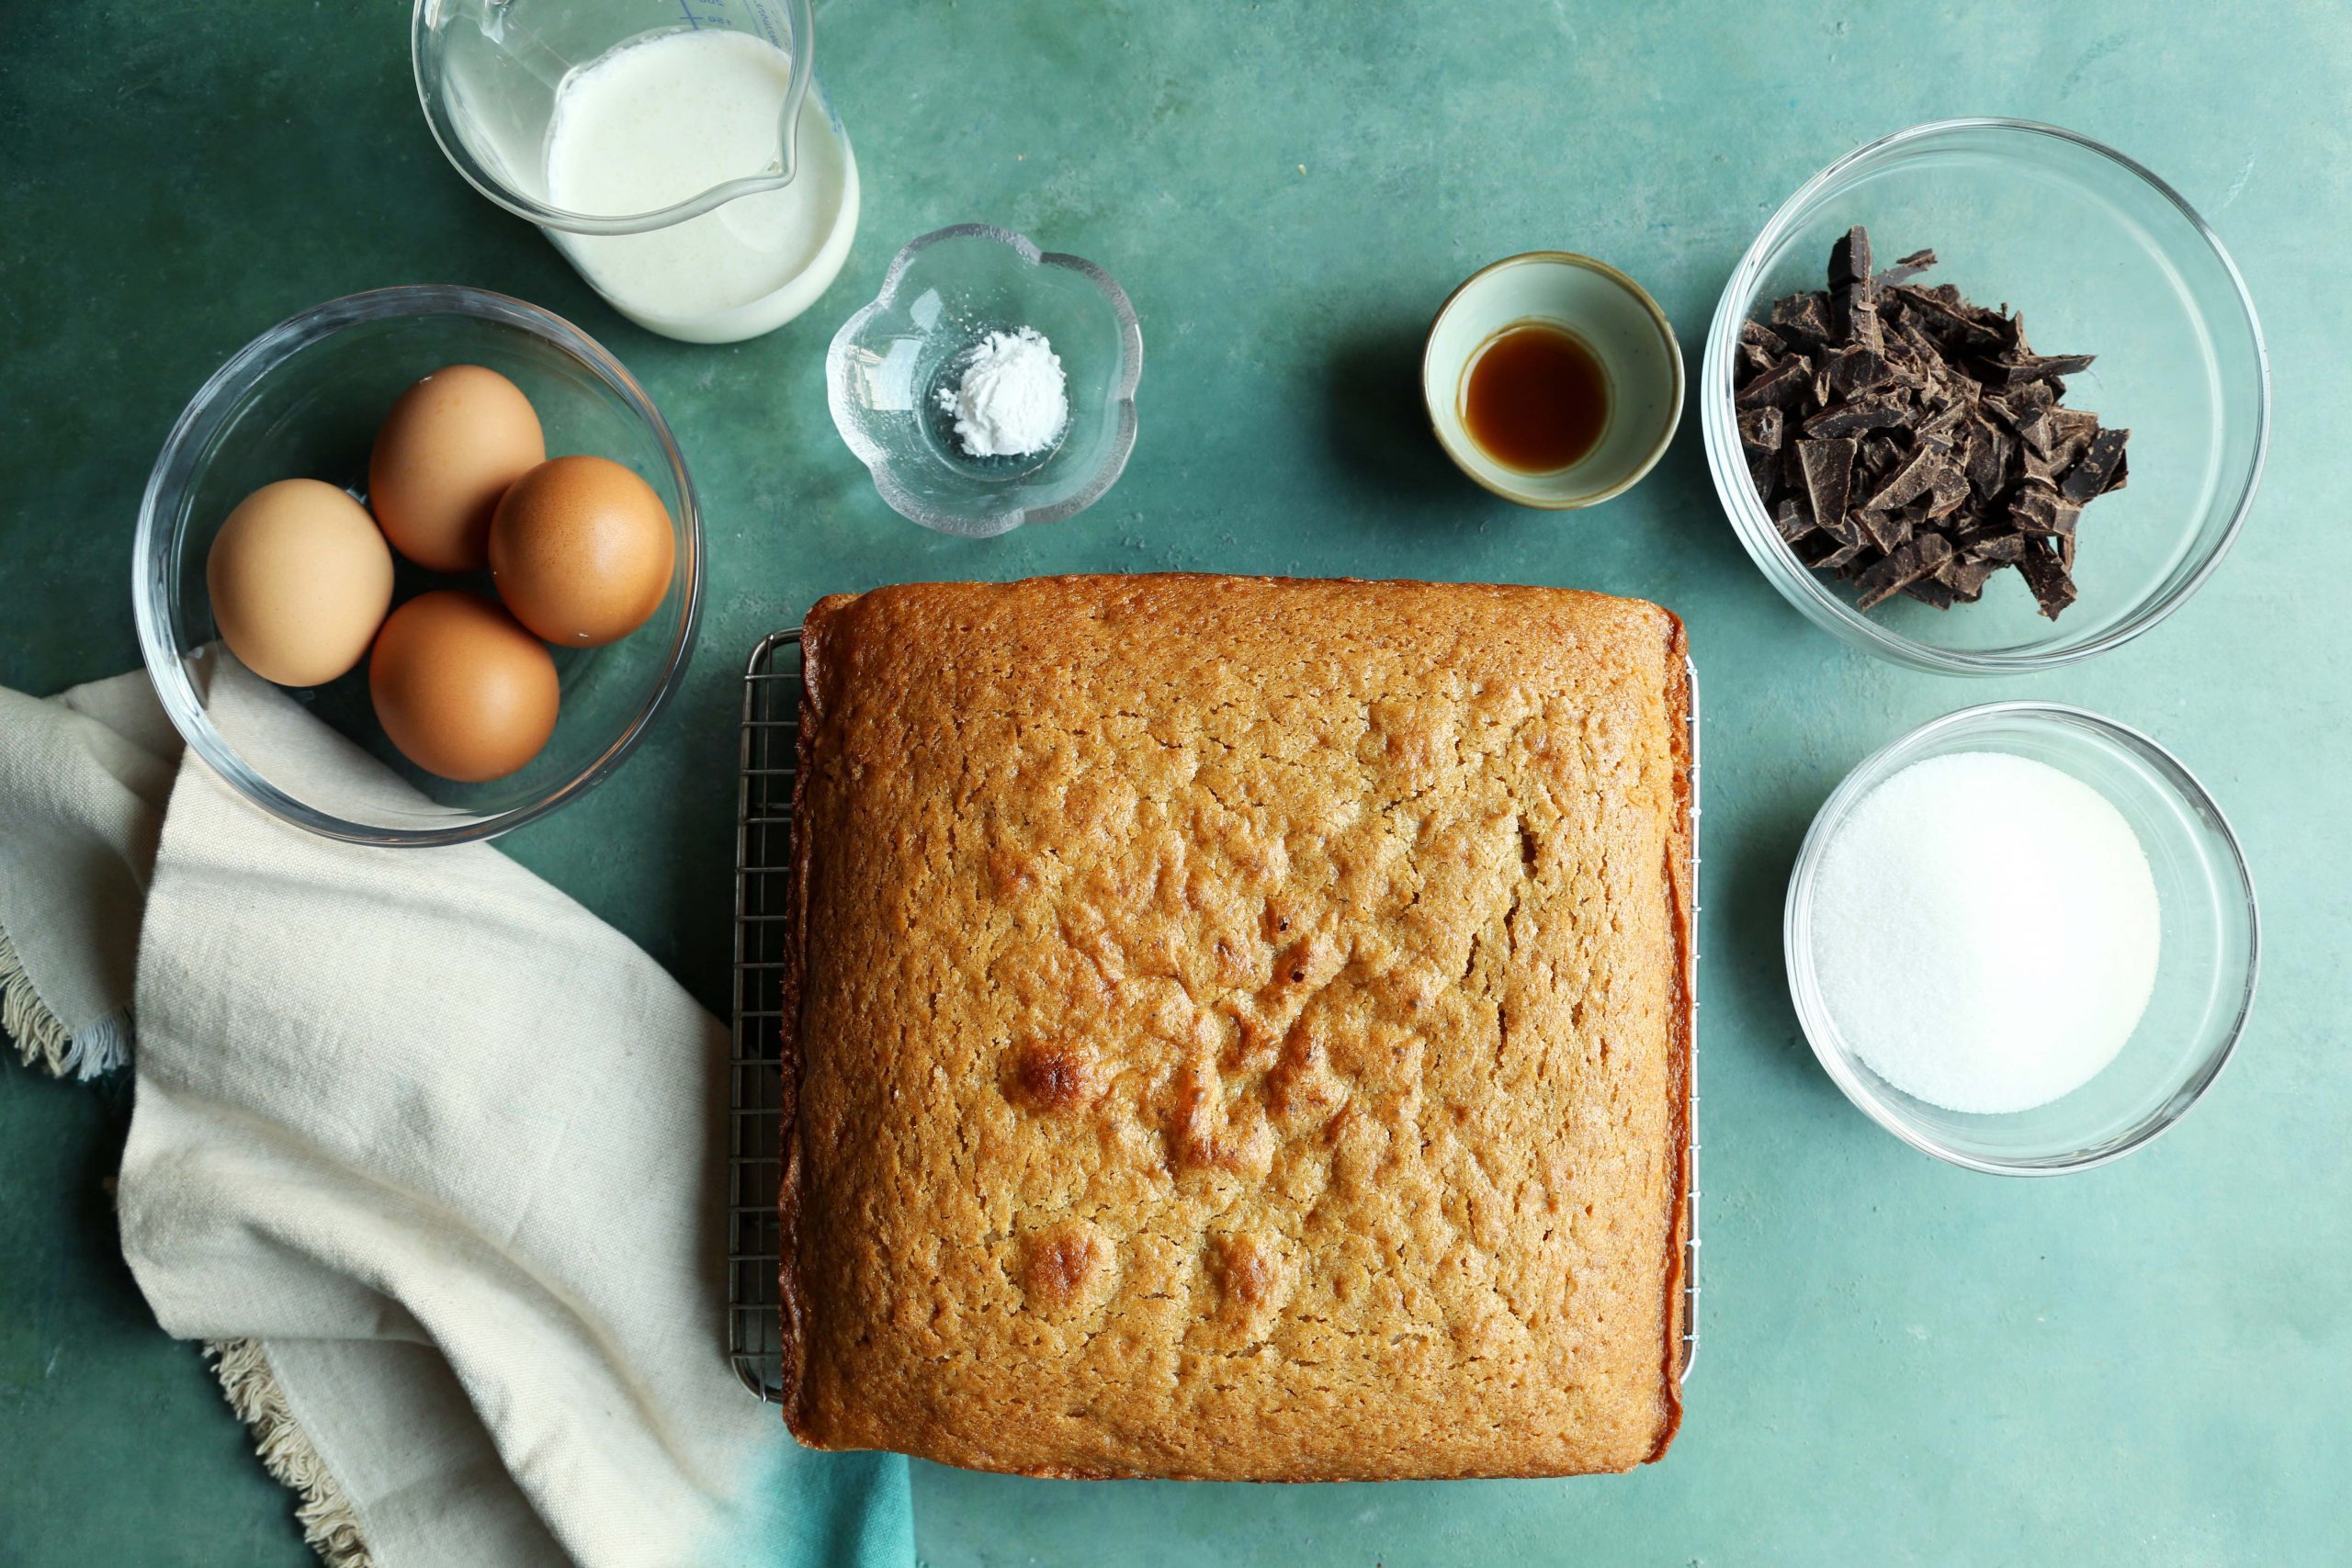
 Remove from the oven and allow to cool for 10 minutes in the pan. Use the parchment paper to lift the cake from the pan. Set on a wire rack to cool completely.
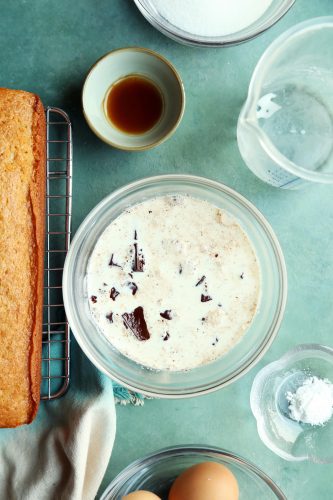
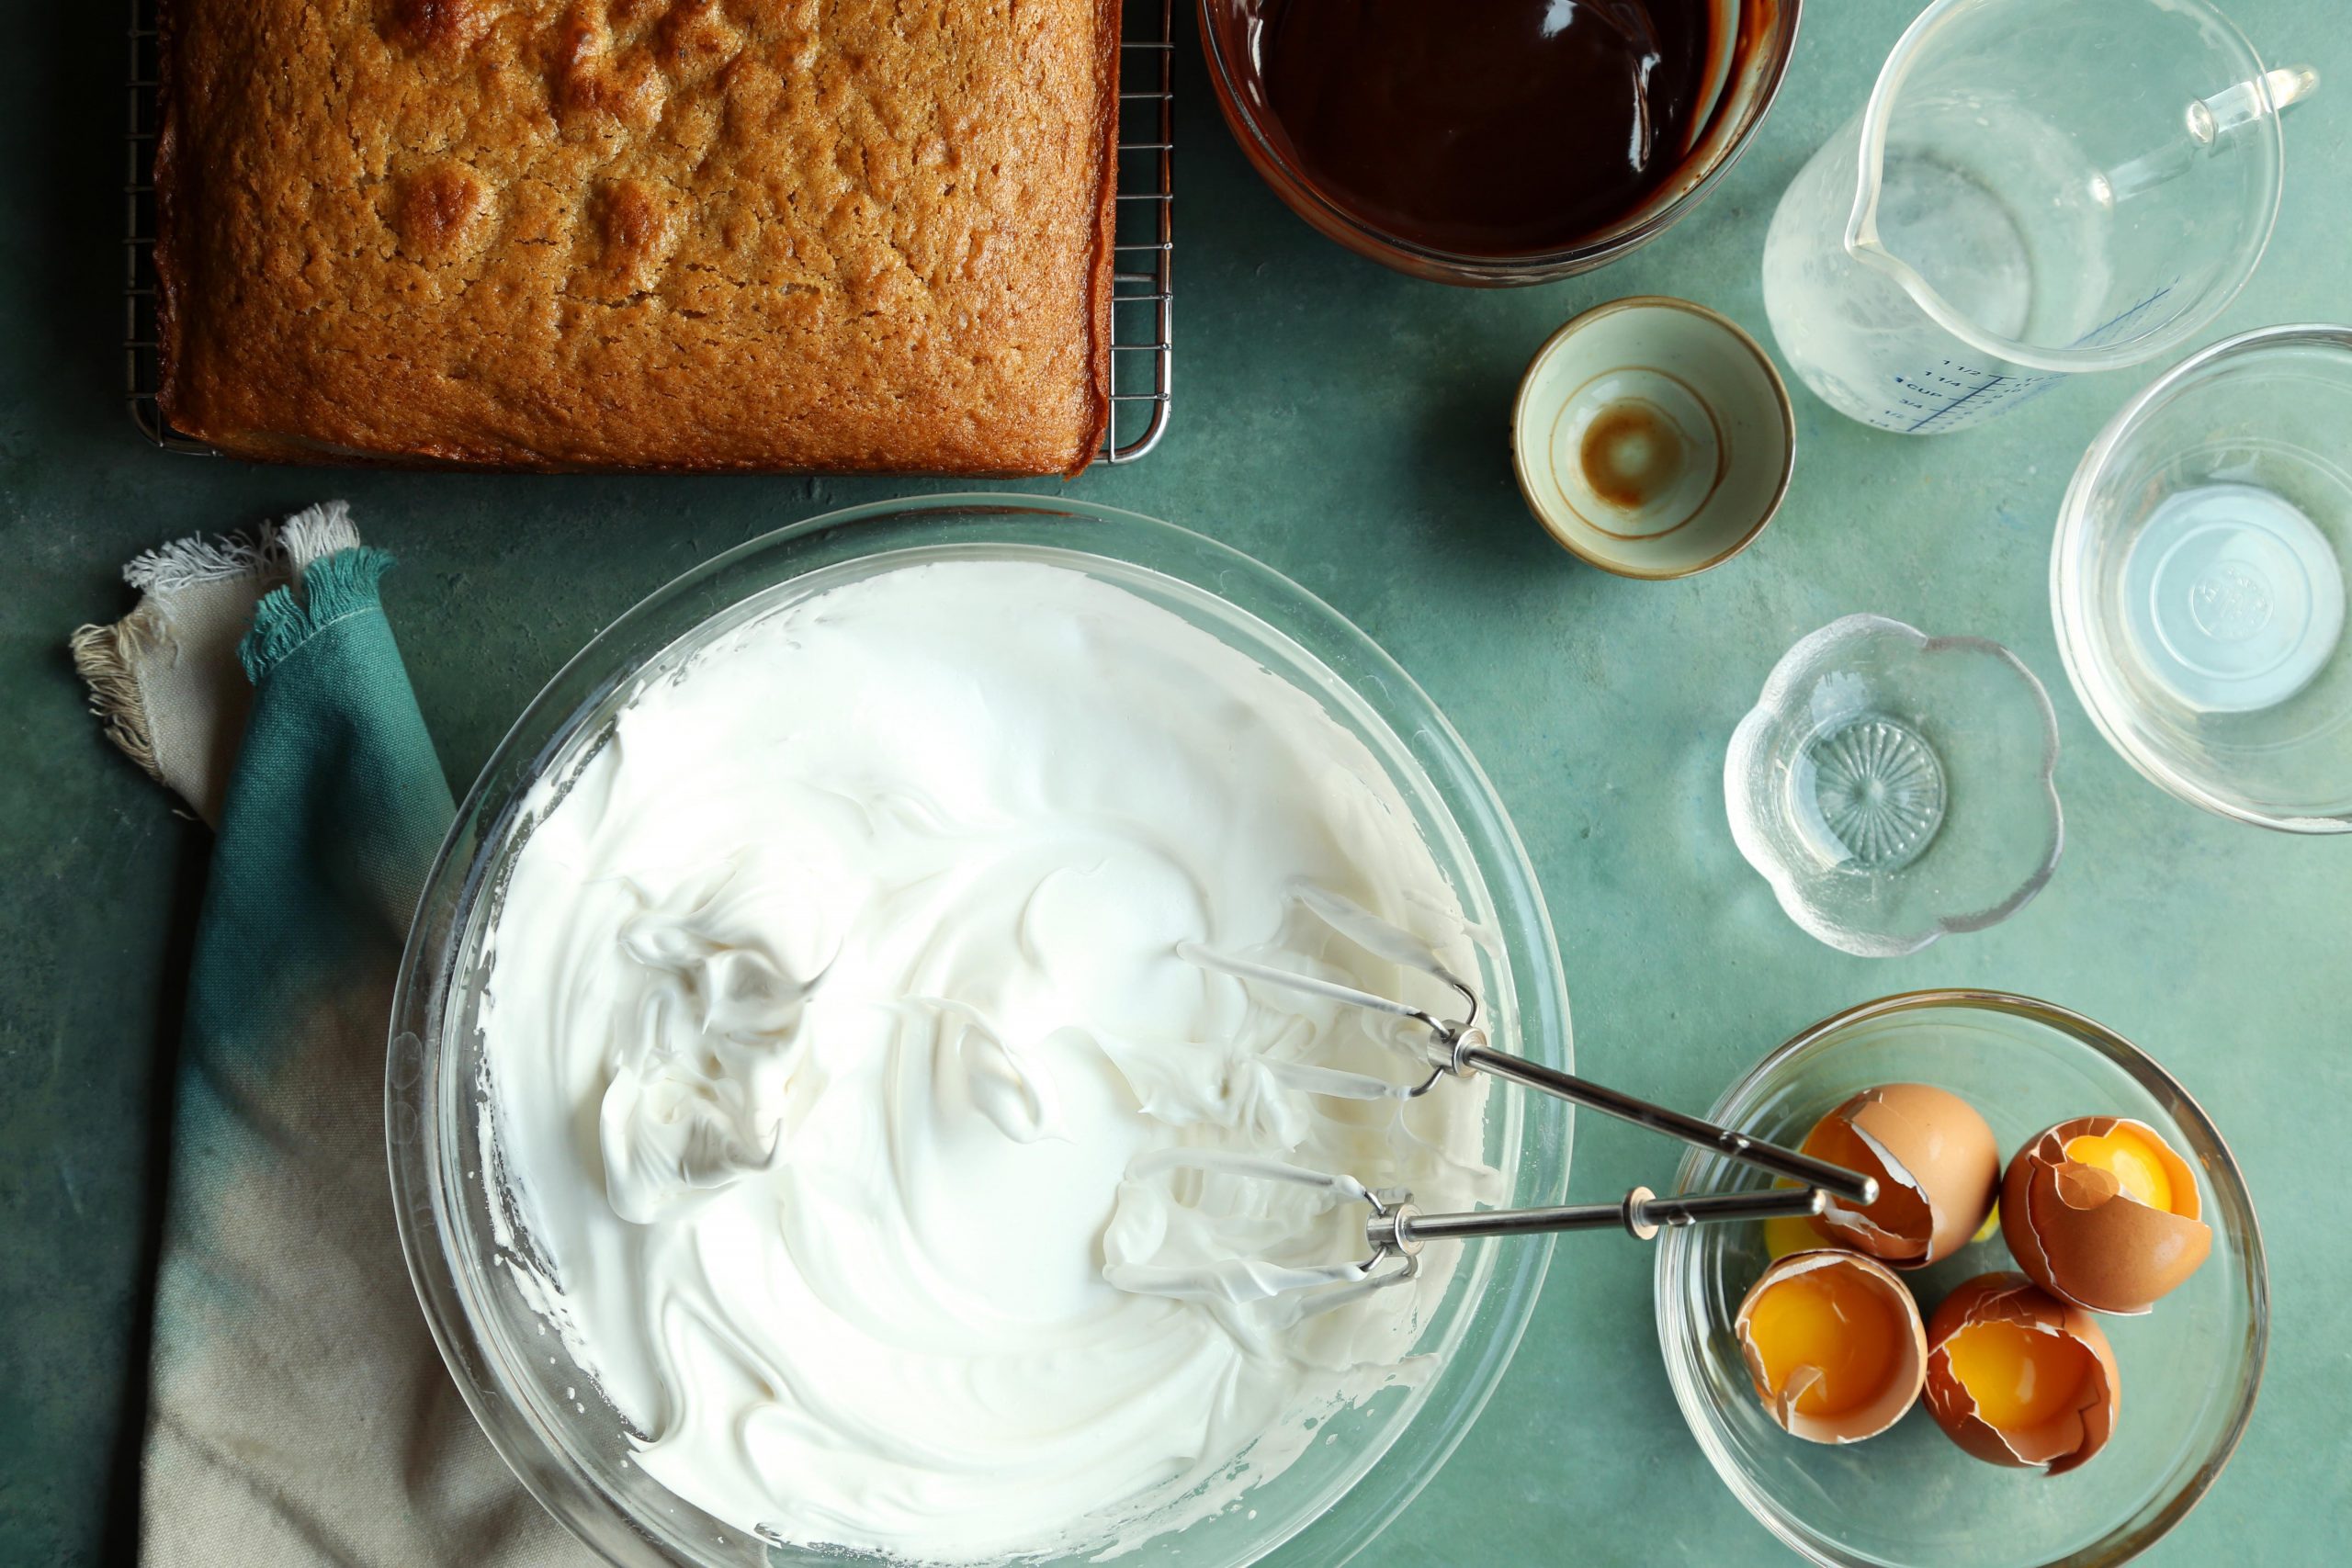
 In the meantime, take this opportunity to make the chocolate ganache. Warm the heavy cream and pour over the chocolate and allow to sit for 5 minutes before stirring until smooth and glossy.
**Tip: You can either heat the cream over low flame on the stovetop or you can leave it in a glass measuring cup and heat it in the microwave. Either way, you want the cream just scalded.**
To make the meringue, beat the egg whites (in the bowl of a stand mixer, fitted with the whisk attachment or using a handled mixer), cream of tartar, vanilla and salt on high until soft peaks form.
**Tip: I find that eggs separate a lot easier and much more cleanly when the eggs are cold. But keep in mind that egg whites beat much fluffier and faster when the whites are at room temperature. So I separate while cold and then let the egg whites come to room temperature before I beat them!**
 While mixer is running on low, slowly add the granulated sugar in a slow steady stream. After all the sugar has been added, beat on high until glossy stiff peaks form. The peaks on the beaters should be able to stand right up when you flip the mixer upside down.
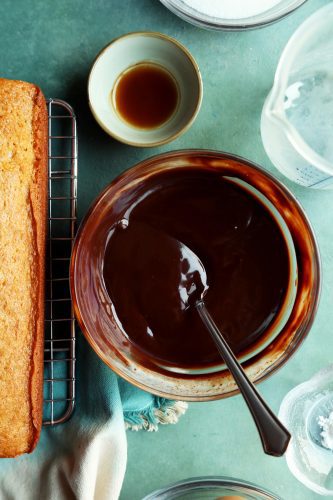
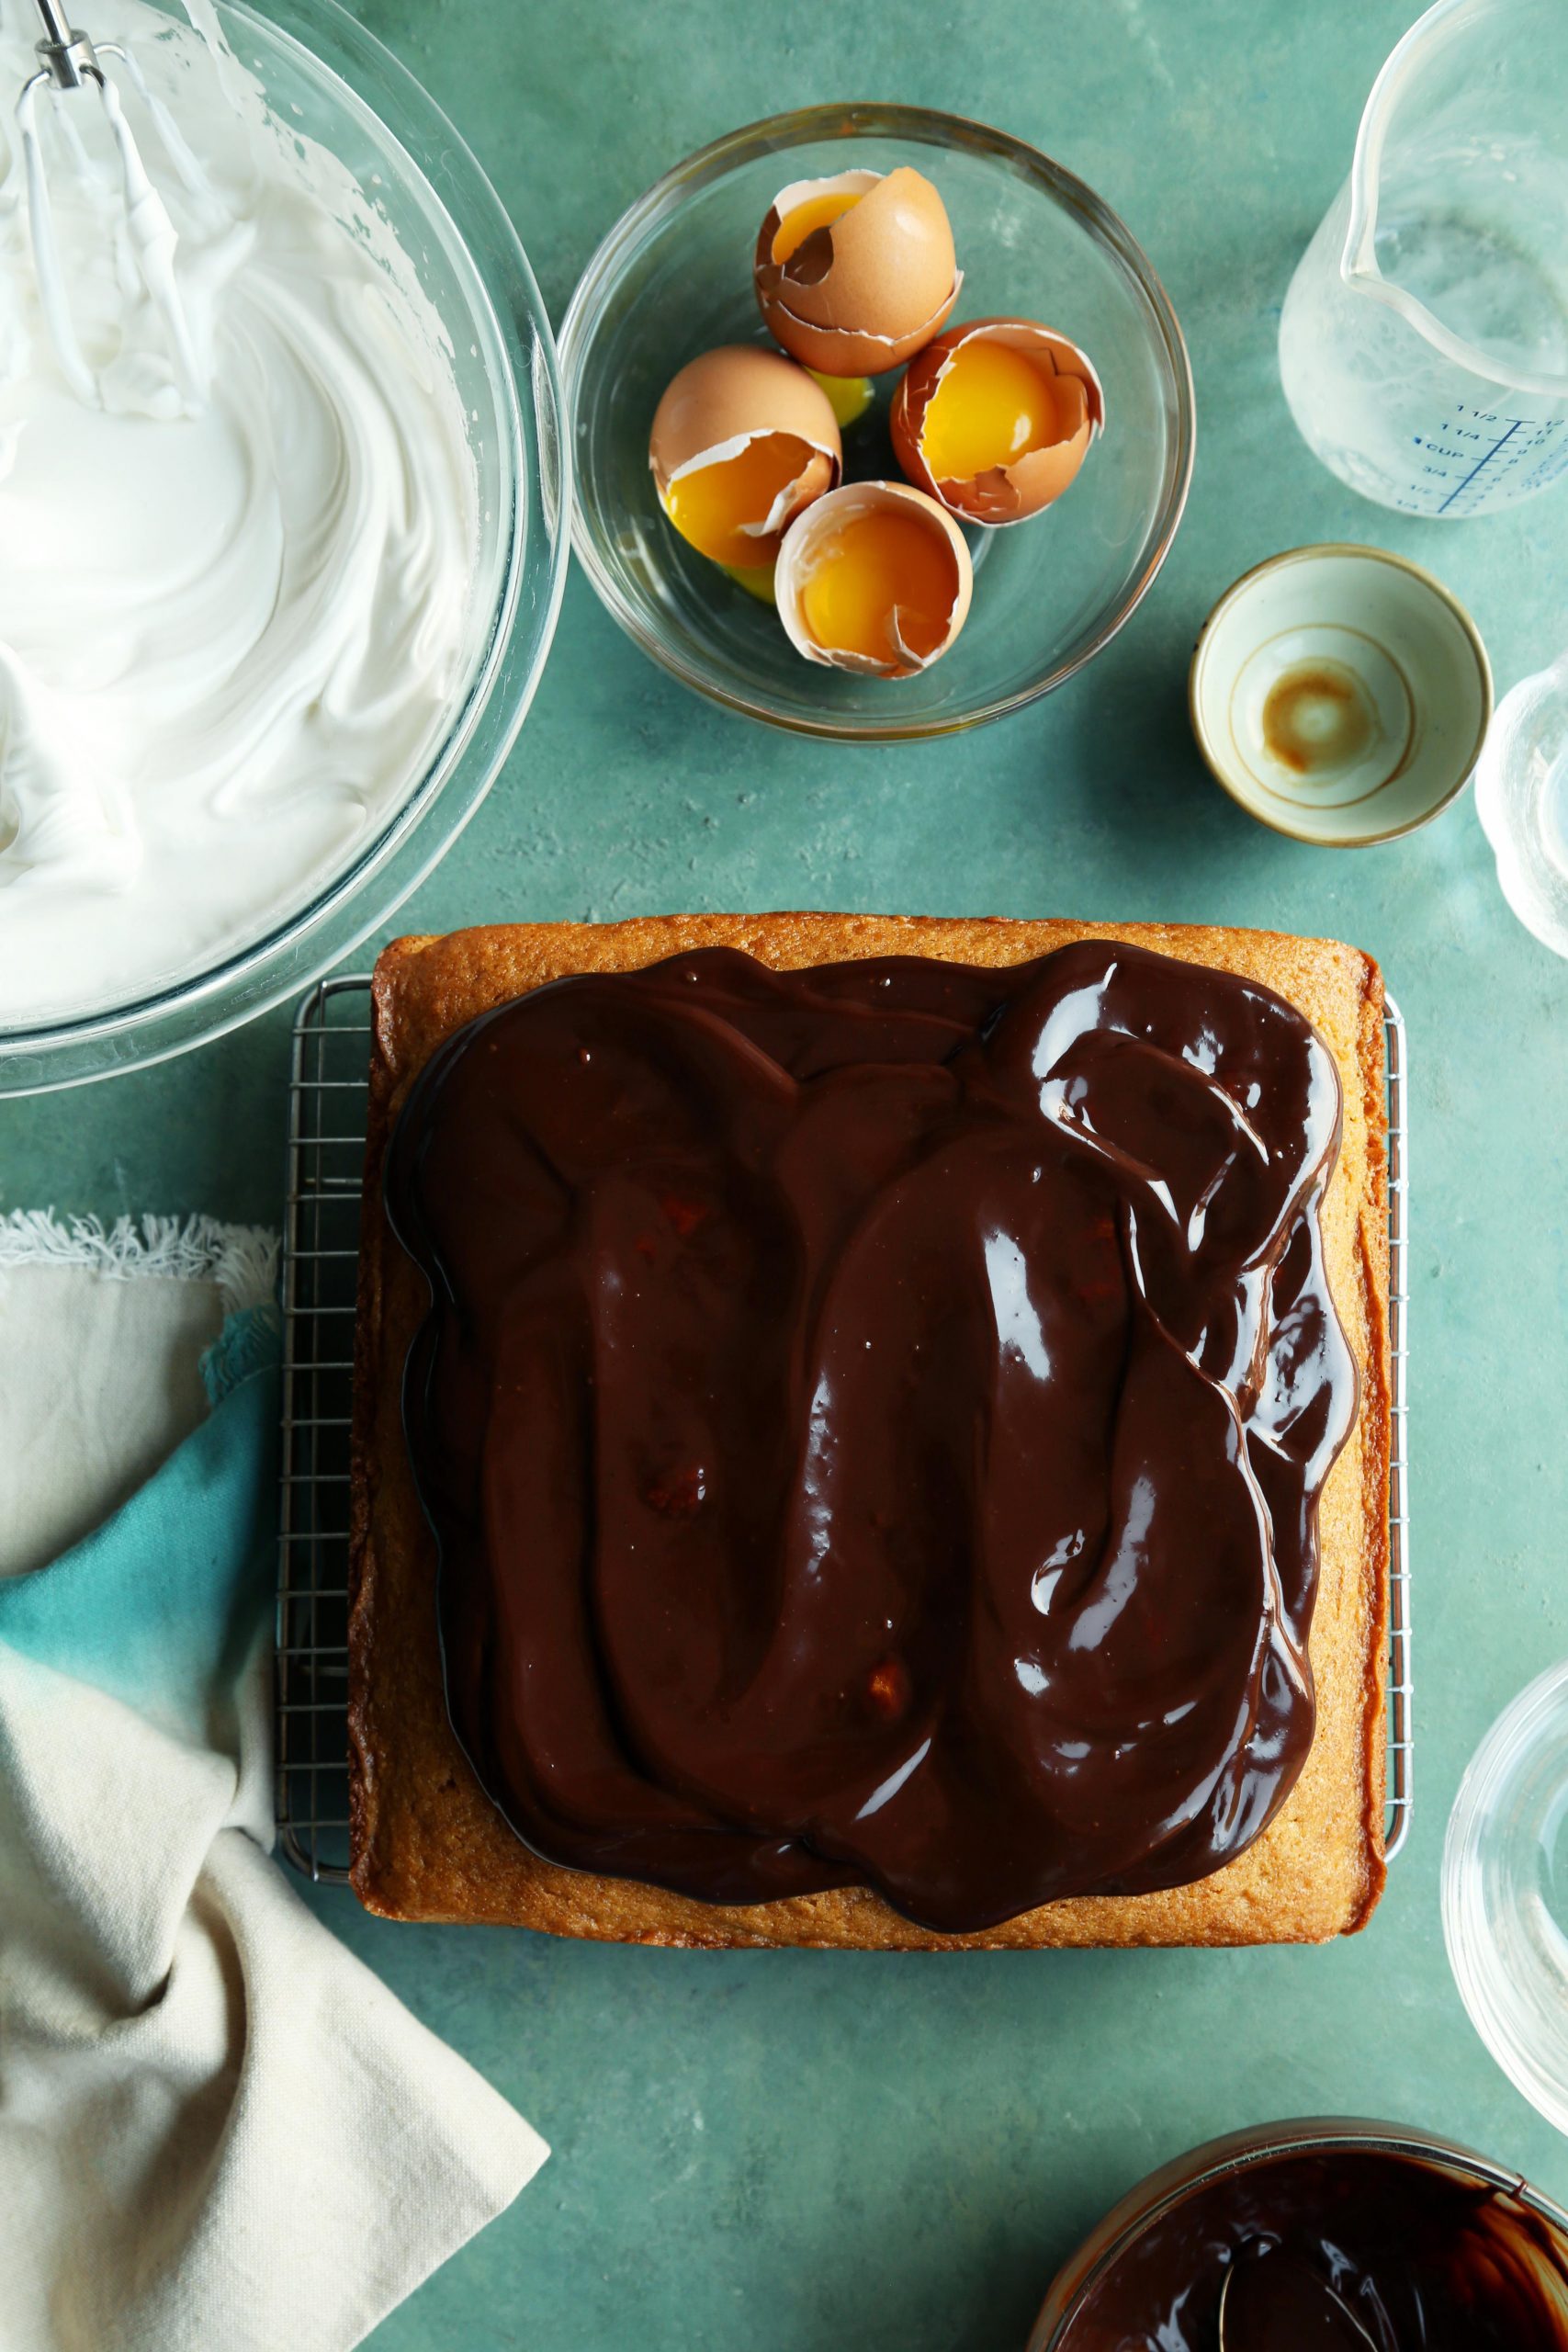
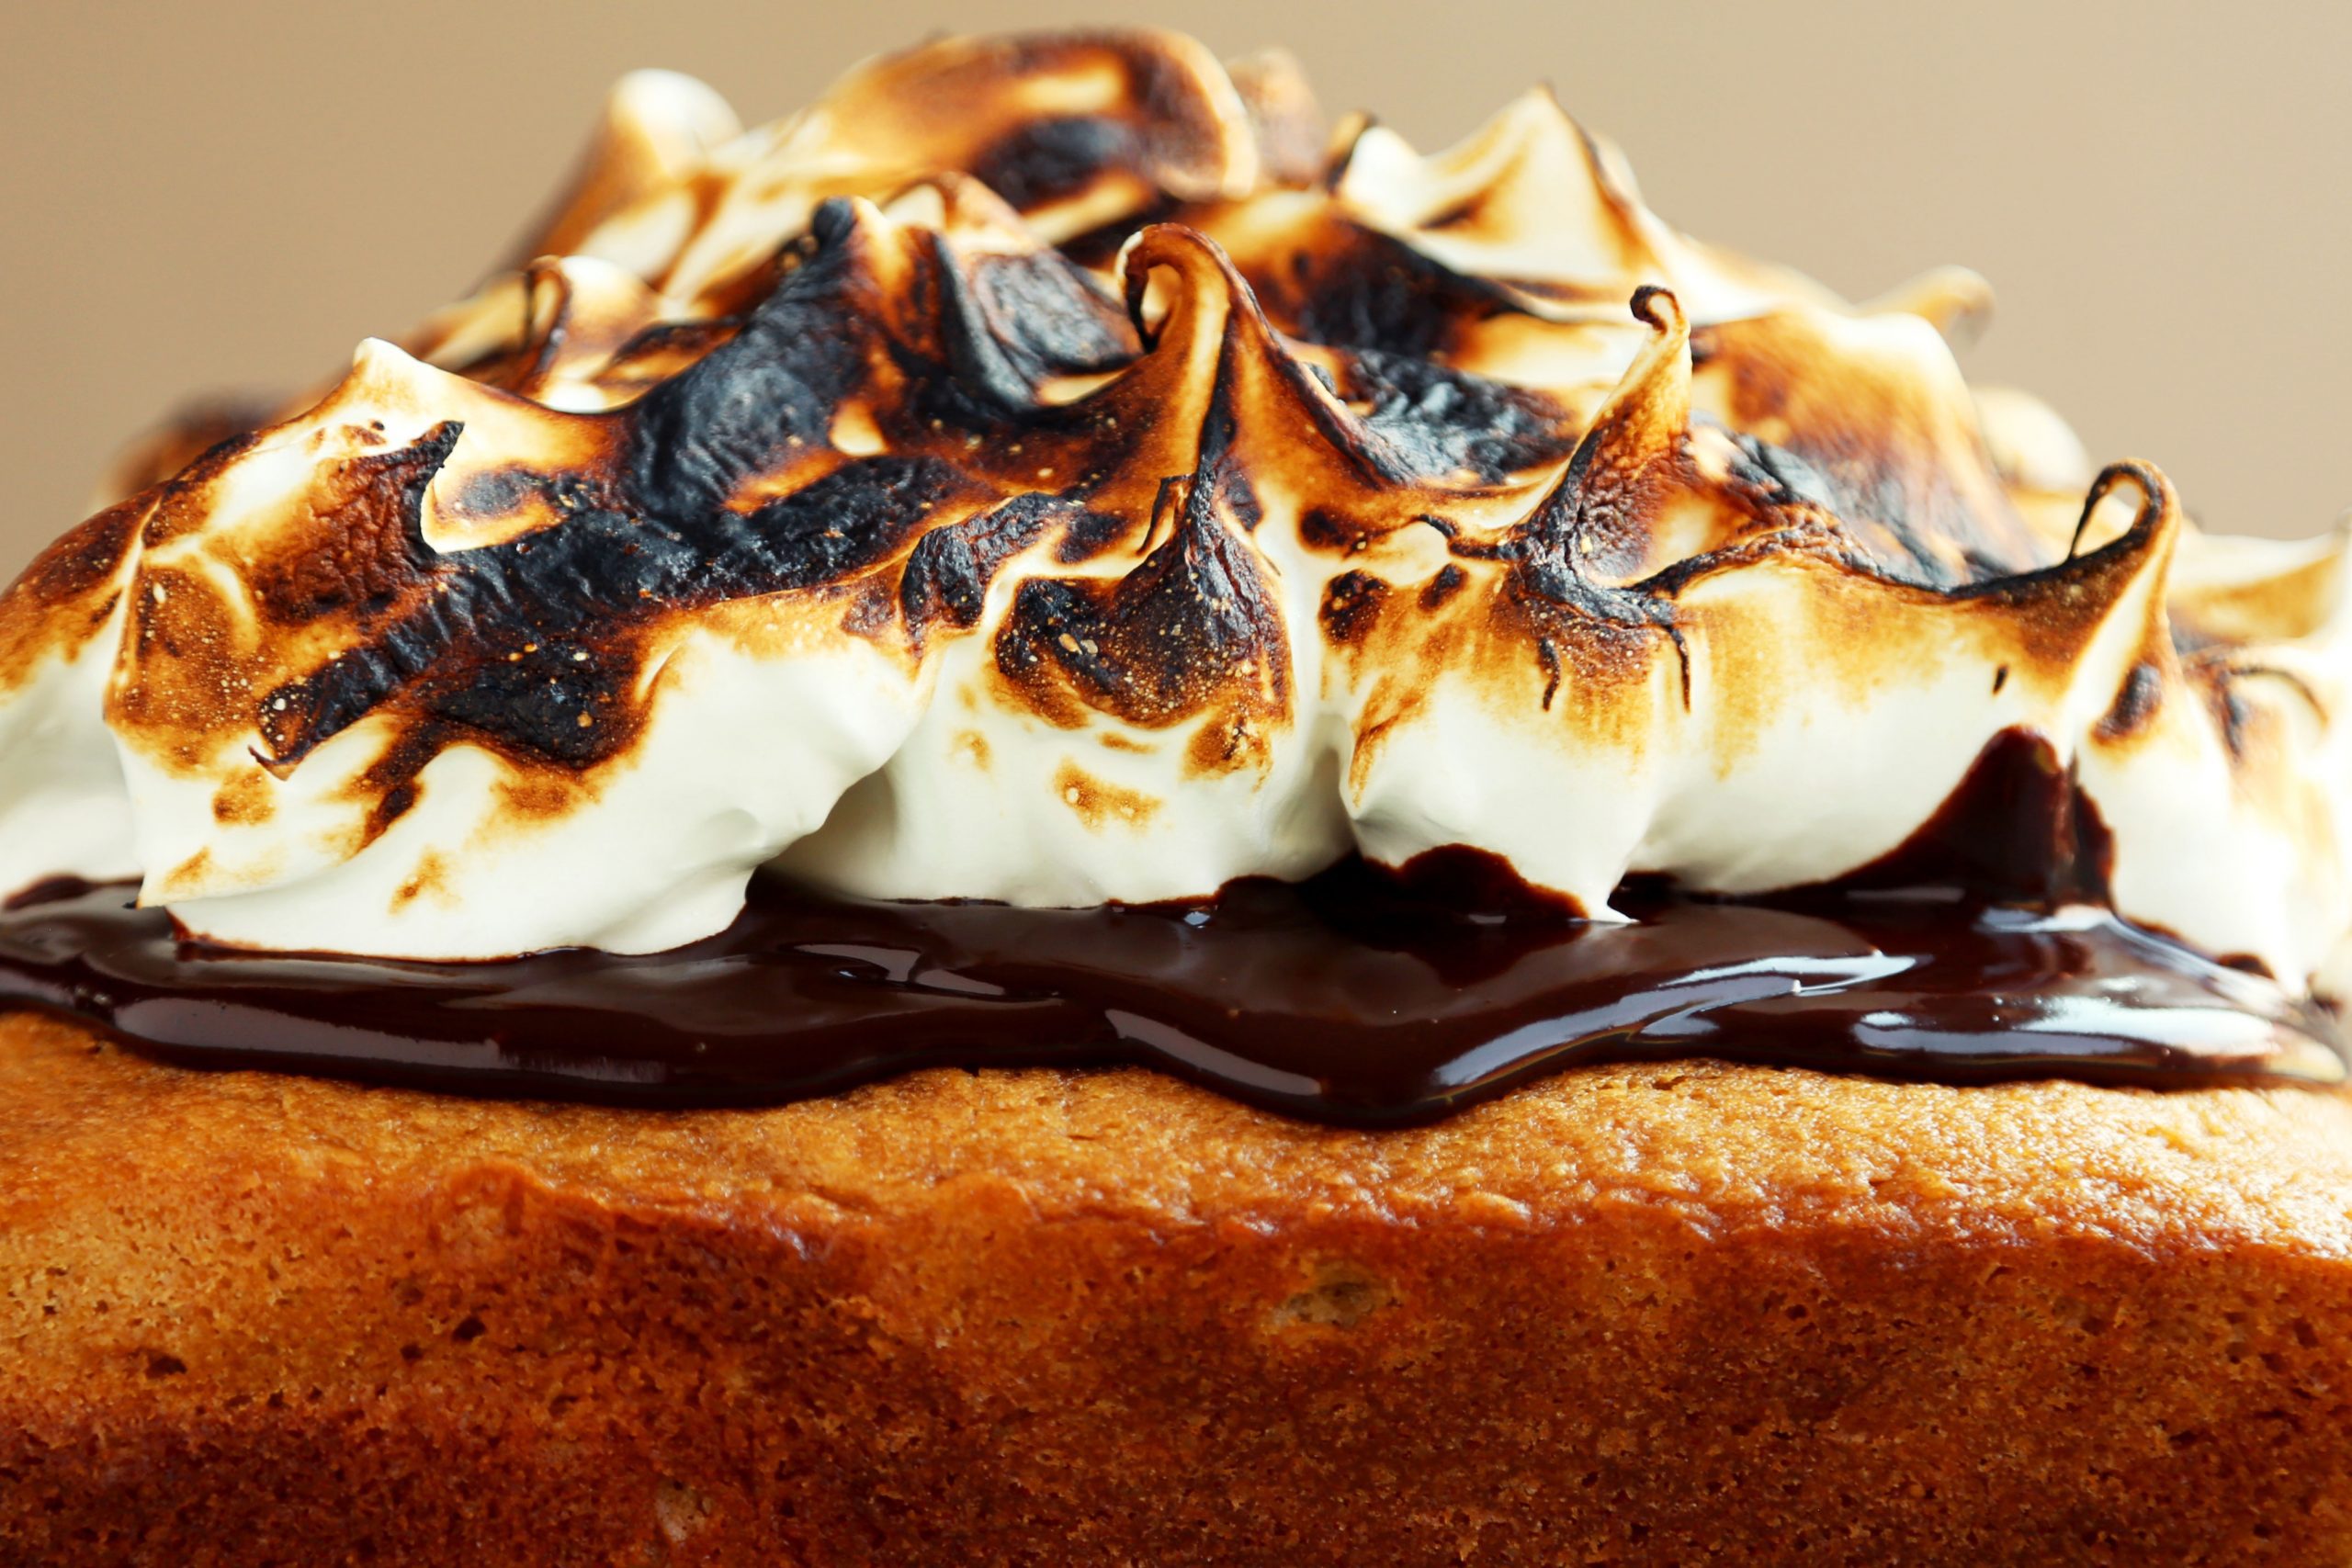
 Pour the chocolate ganache over the top of the cooled cake and spread out slightly, until just shy of reaching the edges of the cake. If you want the chocolate to sort of run down the sides, that’s okay too. Just push the ganache to the edges of the cake and gravity should push it over.
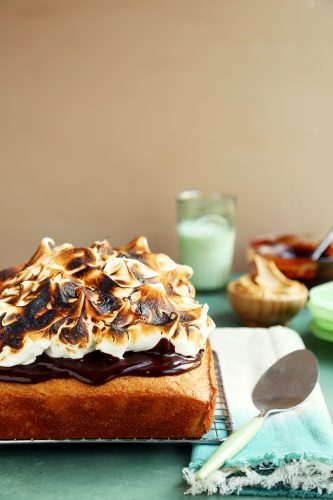
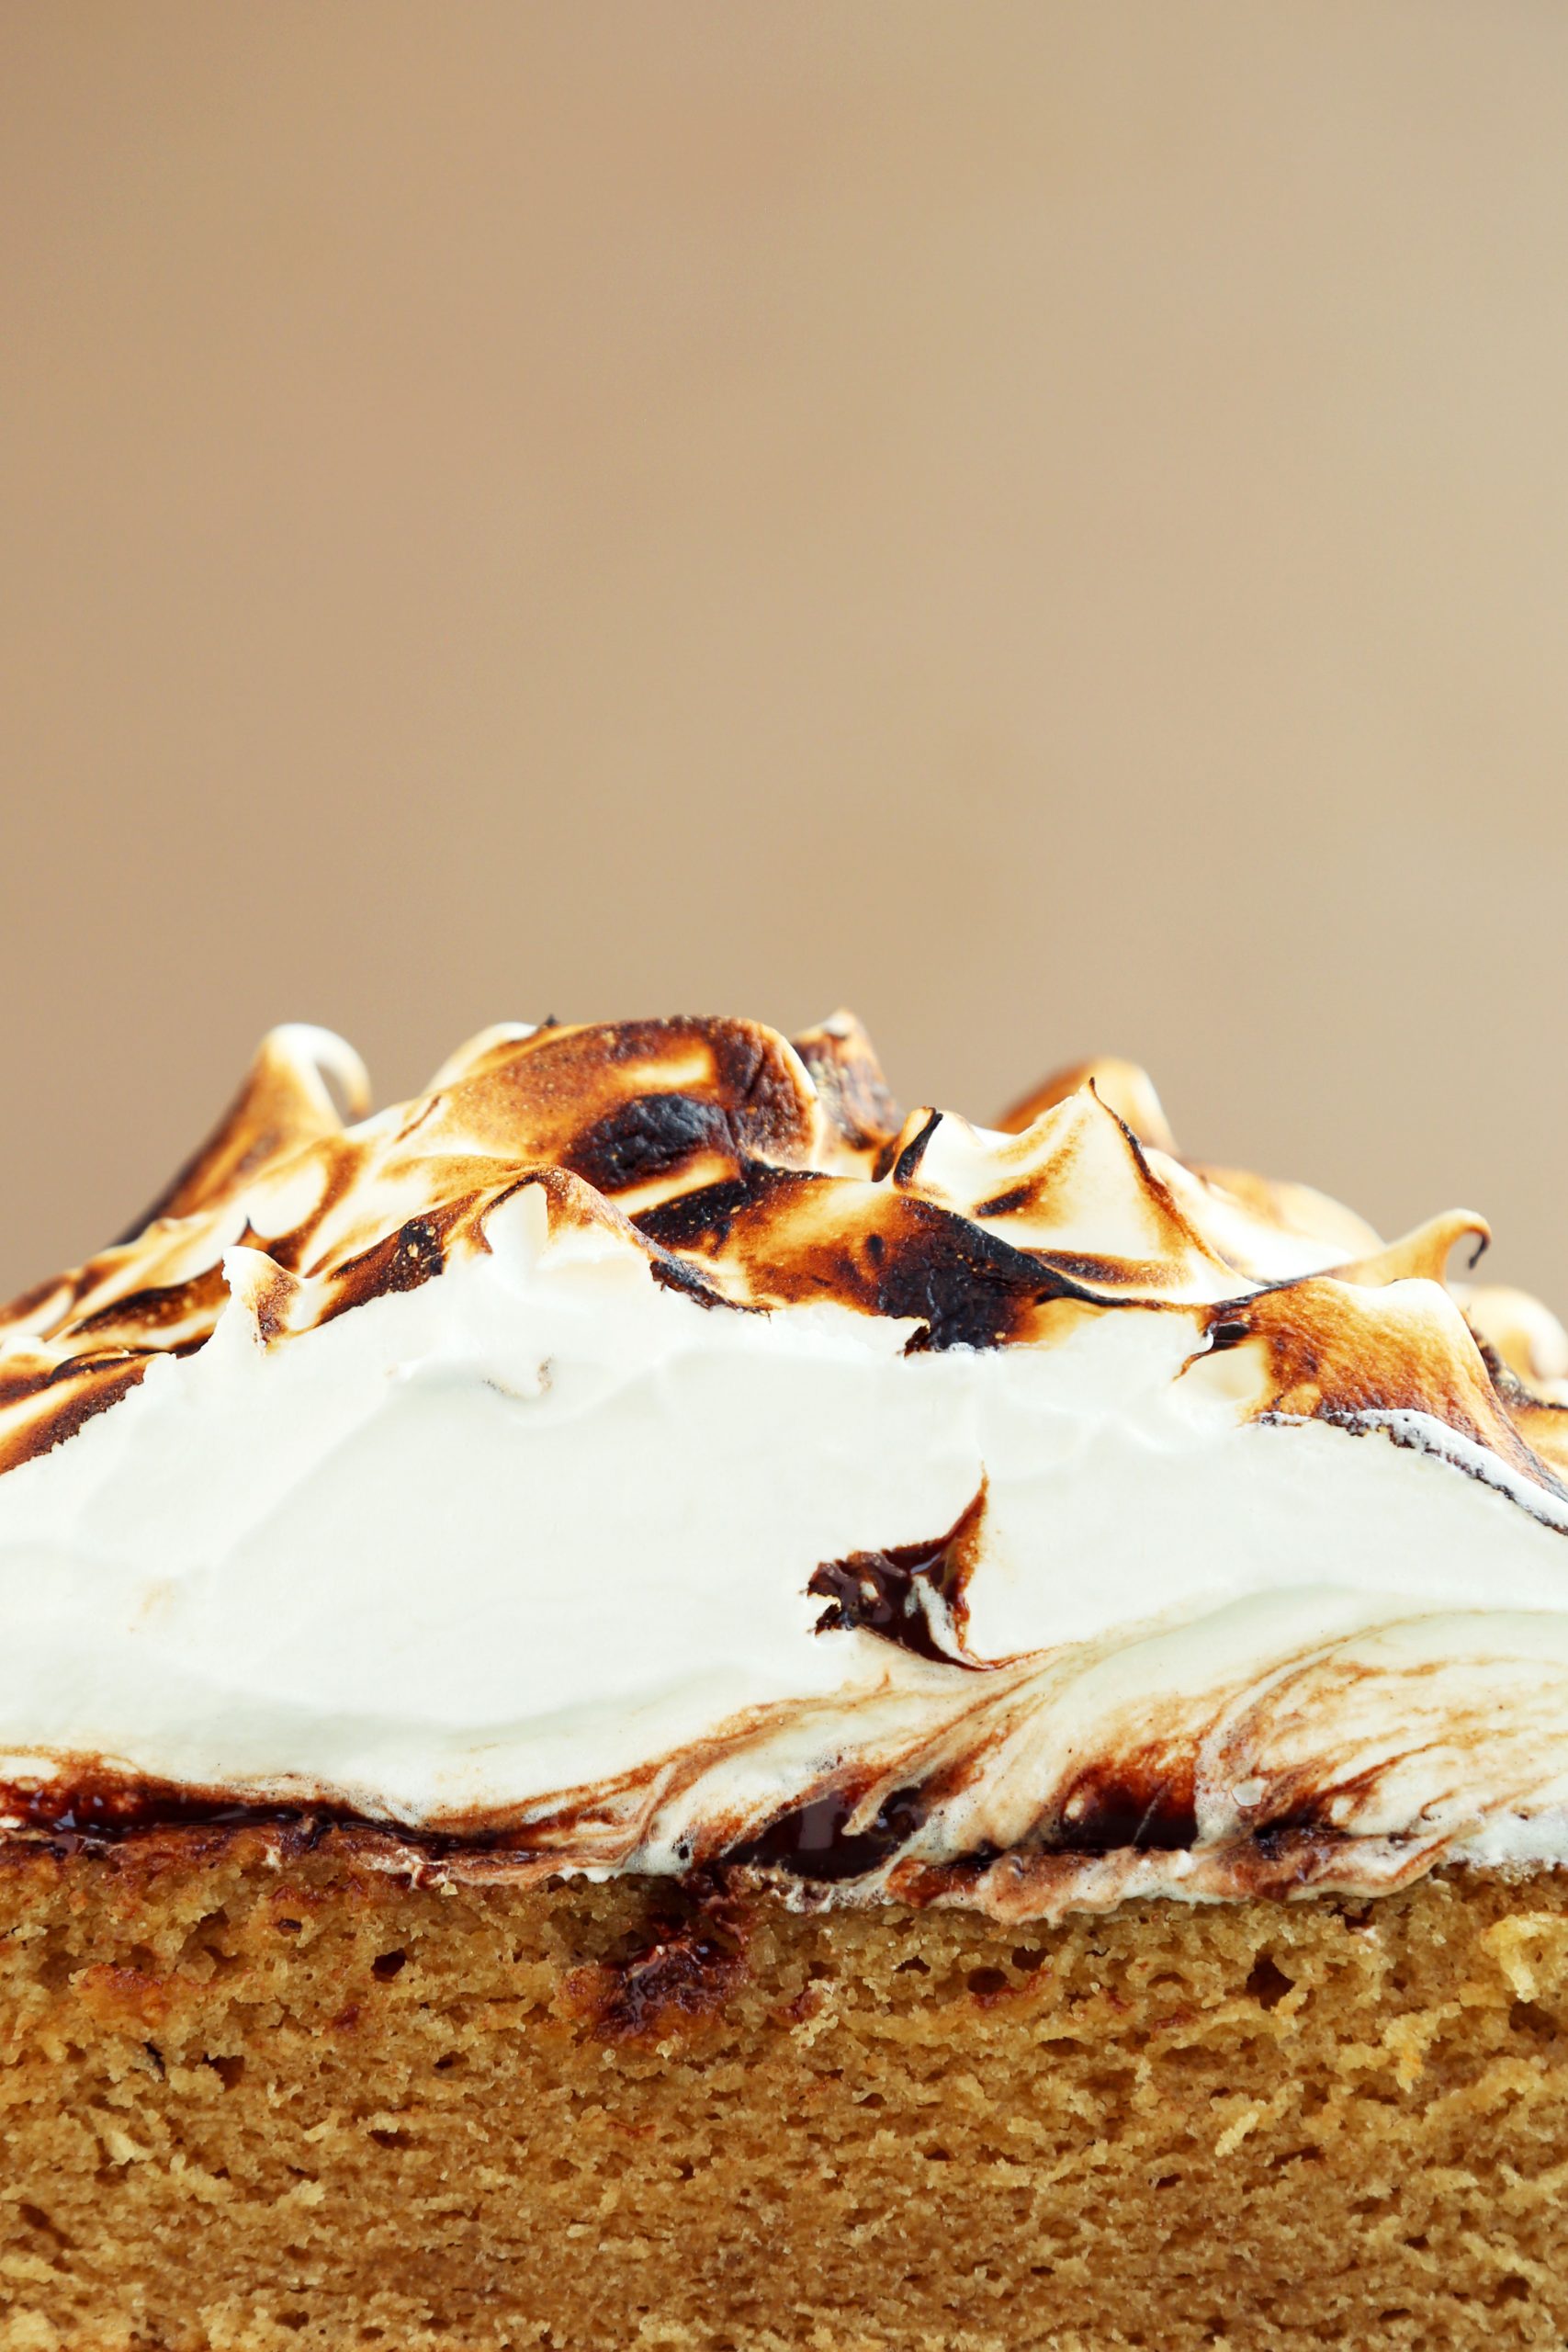
 Dollop the meringue onto the cake and create swirls with the back of a spoon or spatula. Toast the top of the meringue with a kitchen torch.
**Tip: If you don’t have a kitchen torch, you can just place the cake under a preheated broiler for just a few seconds until golden brown and toasty.**
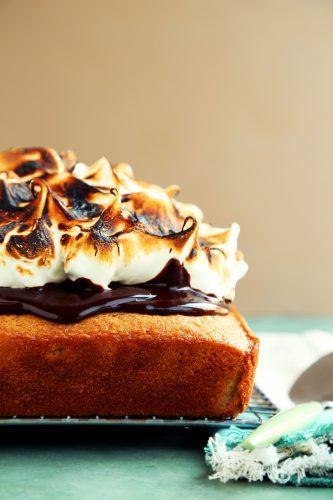
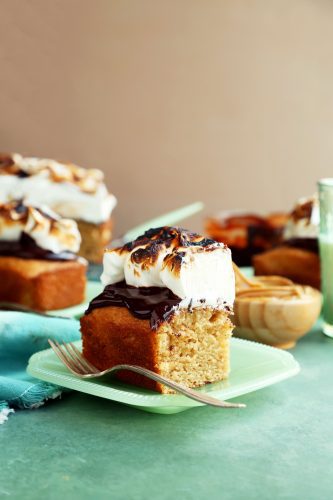
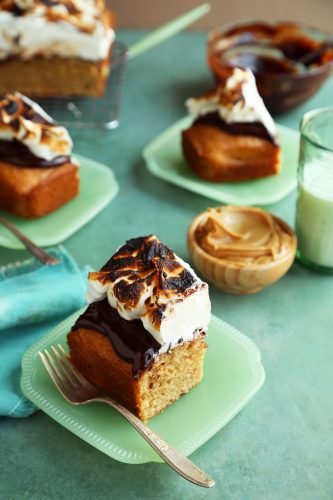
You can either slice the cake into 9 or 12 pieces and serve it immediately. As with most desserts that are topped with fresh meringue, it’s best when eaten the day you make it. But if you happen to have any leftovers, you can cover it loosely with plastic wrap and keep it the fridge for up to 3 to 4 days. Just allow to come down to rom temperature before eating.
 A note on the cake pan, I used a 9-inch square baking pan with high sides. You definitely want something 9-inches or above because of the amount of batter, and the cake does rise quite a bit. Anything smaller than that might cause the batter to overflow and make a mess in your oven. A bundt pan or even a 9×13 will be fine, if you prefer a cake that is a bit thinner.
The peanut butter cake is a great cake base recipe that you can keep up your sleeve and add it to the other homemade cake flavors you like. It would be just as delicious in all of your layered cake recipes. Add some browned butter frosting to the mix and you have a party. I do hope you’ll give this recipe a try and I can’t wait to hear what you think. Stay safe my friends.
Peanut Butter S'mores Cake
Ingredients
Cake:
- 2 cups all-purpose flour
- 2 cups granulated sugar
- 1 teaspoon baking soda
- 1/2 teaspoon baking powder
- 1/2 teaspoon salt
- 1/2 cup buttermilk
- 2 large eggs room temperature
- 1 teaspoon vanilla extract
- 1 cup water
- 1/2 cup 1 stick unsalted butter, diced
- 3/4 cup smooth peanut butter
Chocolate ganache:
- 4 ounces semi-sweet chocolate
- 1/2 cup heavy cream
Meringue:
- 4 large egg whites room temperature
- 1/2 teaspoon cream of tartar
- 1/2 teaspoon vanilla extract
- pinch of salt
- 1/2 cup granulated sugar
Instructions
- Preheat oven to 350°F. Line a 9-inch square baking pan, with high sides, with parchment paper and grease lightly with cooking spray. Set aside.
- In a large bowl, whisk together the flour, sugar, baking soda, baking powder, and salt. Set aside. In a separate bowl, whisk together the buttermilk, eggs, and vanilla and add to the dry ingredients, stirring until just combined.
- In a medium saucepan, combine the water, butter and peanut butter and set over moderate heat. Cook, stirring often, until melted through and smooth. Remove from heat and allow to cool. Add to the batter and whisk until smooth and well combined. Transfer the batter to the prepared pan and give it a few taps on the counter to remove any air bubbles. Bake until golden brown and a toothpick, inserted in the middle, comes out clean, about 30 to 35 minutes. Remove from the oven and allow to cool for 10 minutes in the pan. Use the parchment paper to lift the cake from the pan. Set on a wire rack to cool completely.
- To make the ganache, warm the heavy cream either on the stove in a saucepan or in a glass measuring cup in the microwave. Pour over the chocolate and allow to sit for 5 minutes before stirring until smooth and glossy. Pour the ganache over the top of the cake and spread out slightly.
- To make the meringue, beat the egg whites, cream of tartar, vanilla and salt on high until soft peaks form. While mixer is running on low, slowly add the sugar in a slow steady stream. Beat on high until glossy stiff peaks form. Dollop the meringue onto the cake and create swirls with the back of a spoon or spatula. Toast the top of the meringue with a kitchen torch. Slice and serve immediately or store in the fridge until ready to eat. Enjoy!