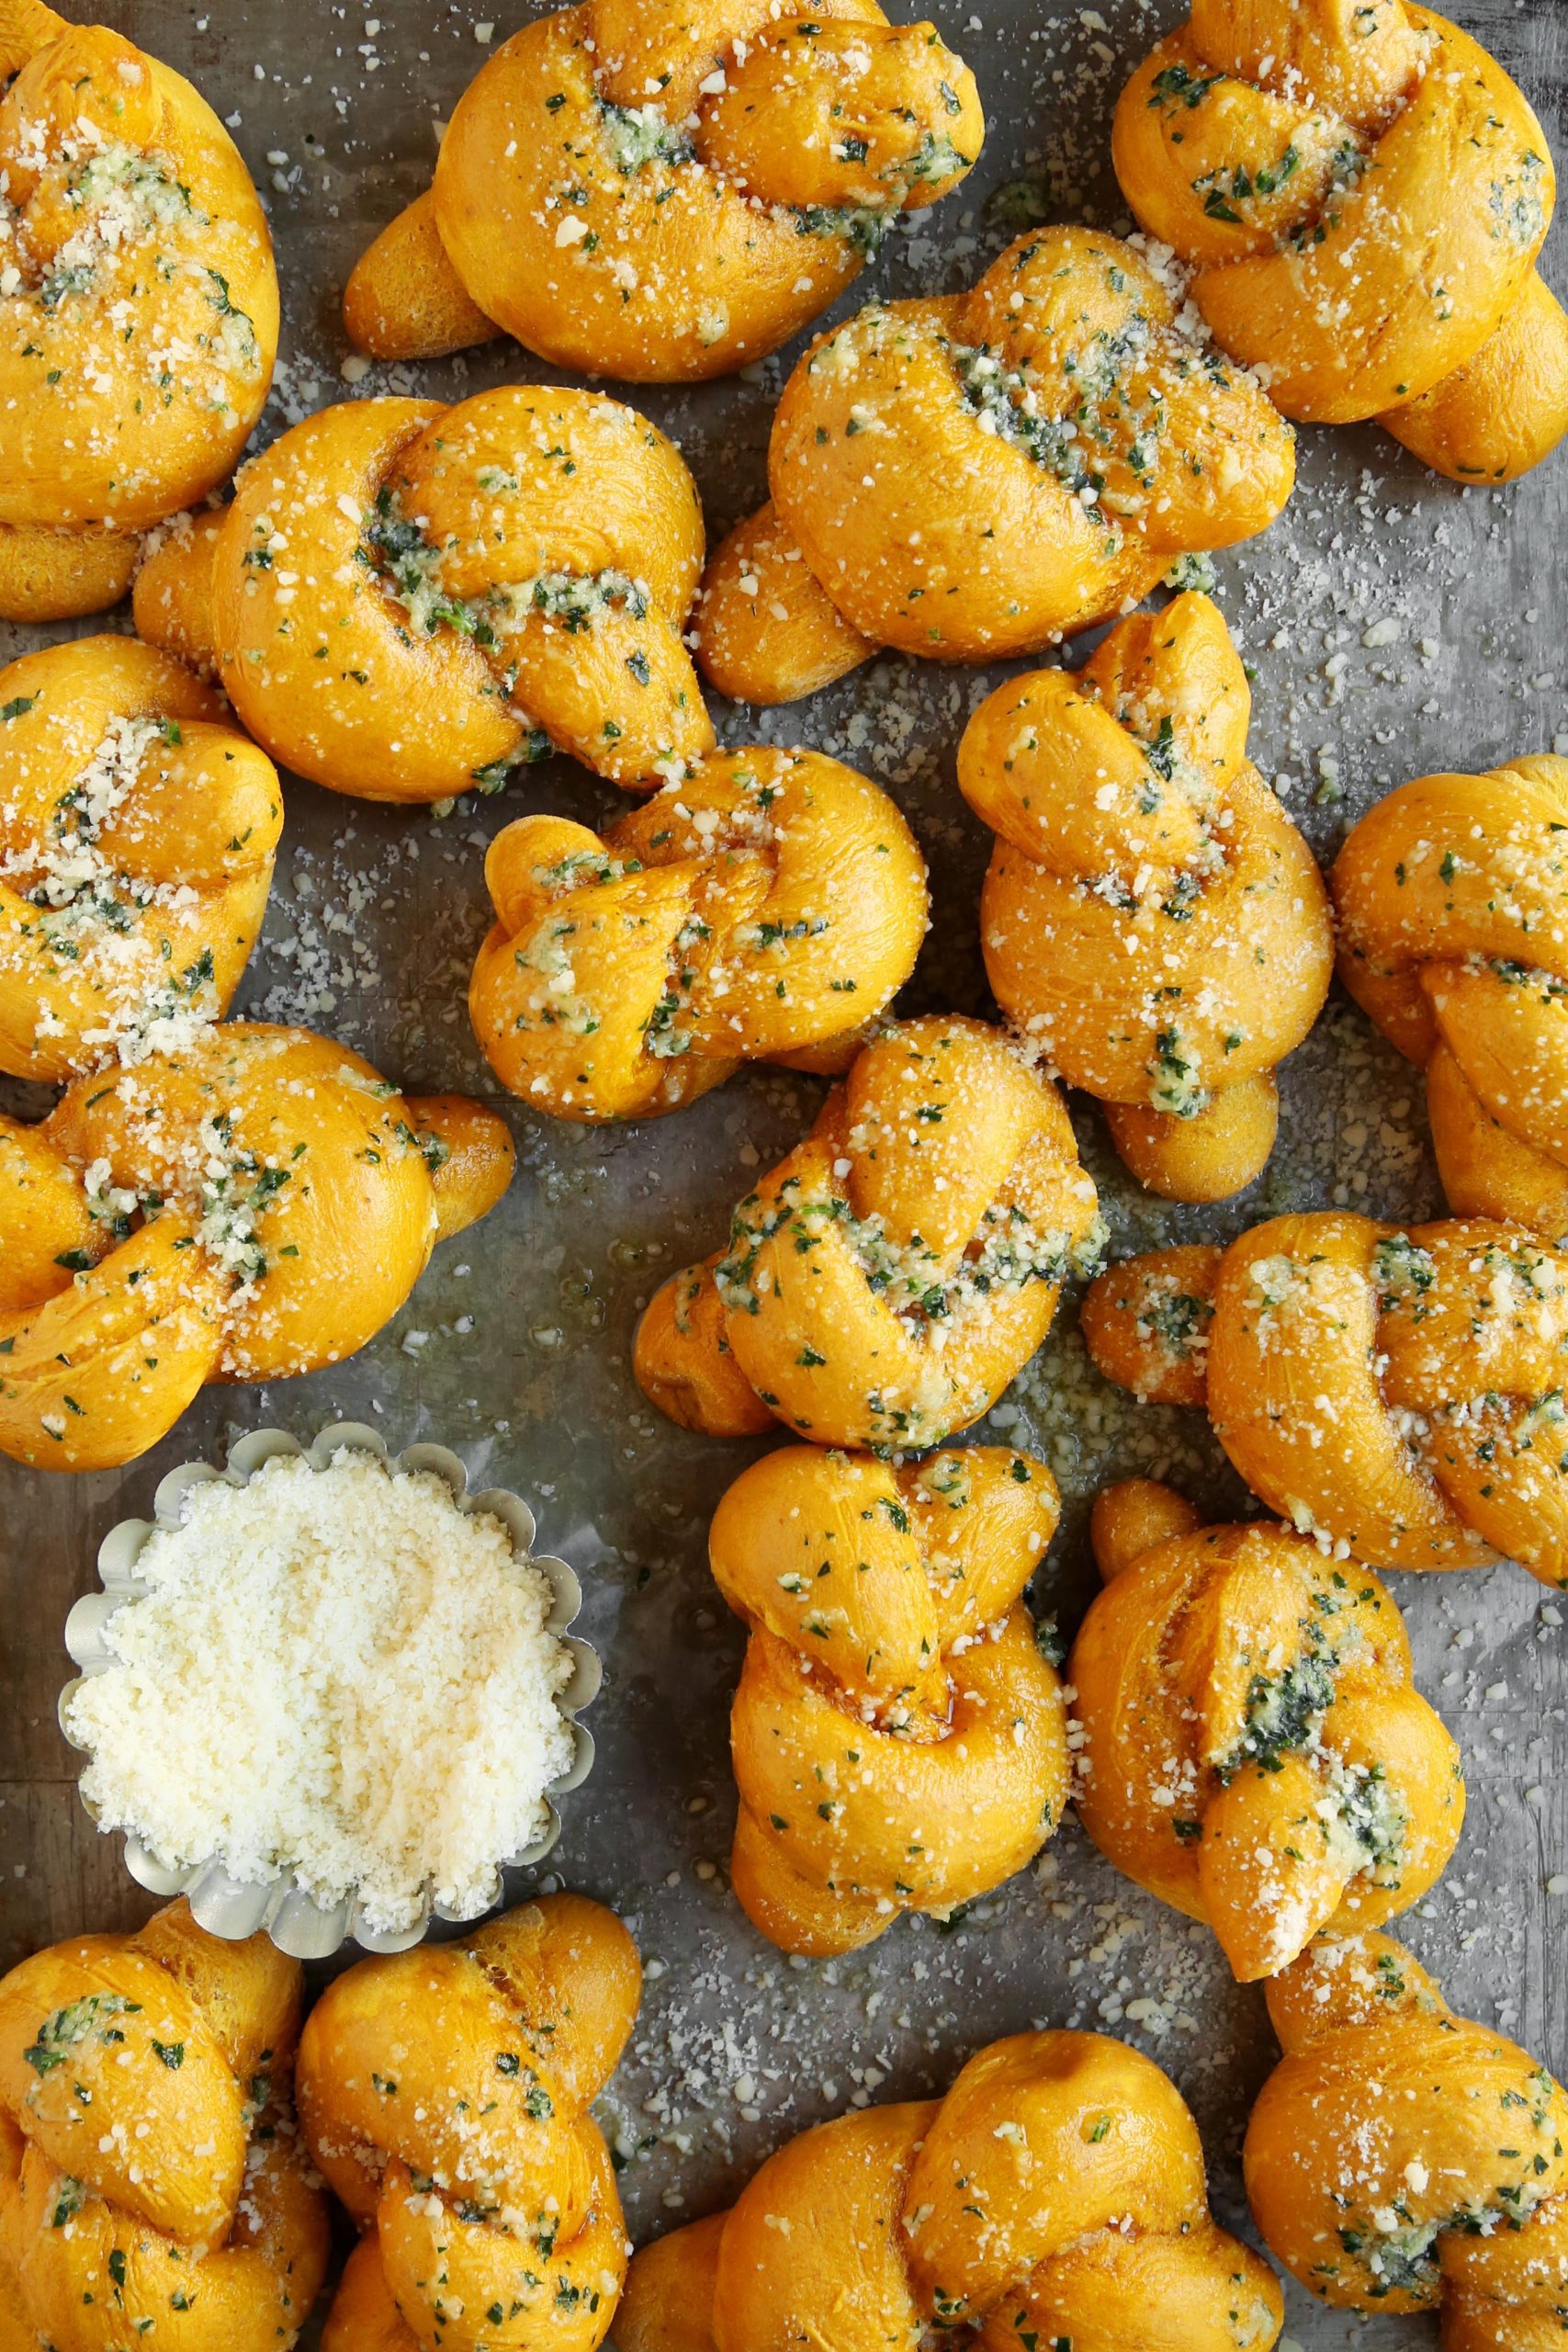
 I recently reshared these very popular Garlic Bread “Cinnamon” Rolls on Instagram, which I normally do around this time of year because I think they make for a great Thanksgiving dinner roll alternative. Anyhow, after I shared it, I got to thinking that it’s about time I came up with a new NEW alternative. Those garlic bread rolls are yesterday’s news so to speak. So this year I put on my thinking cap once again and came up with these Pumpkin Parmesan Garlic Knots. Savory pumpkin dough (tis the season after all) shaped into knots and then topped with an addictive garlic butter sauce and of course because that just wasn’t enough, I finished them off with lots of grated parmesan. They’re messy. They’re tasty. And they’re the perfect recipe to try this Thanksgiving. In case you haven’t heard, they’re the new NEW dinner roll.
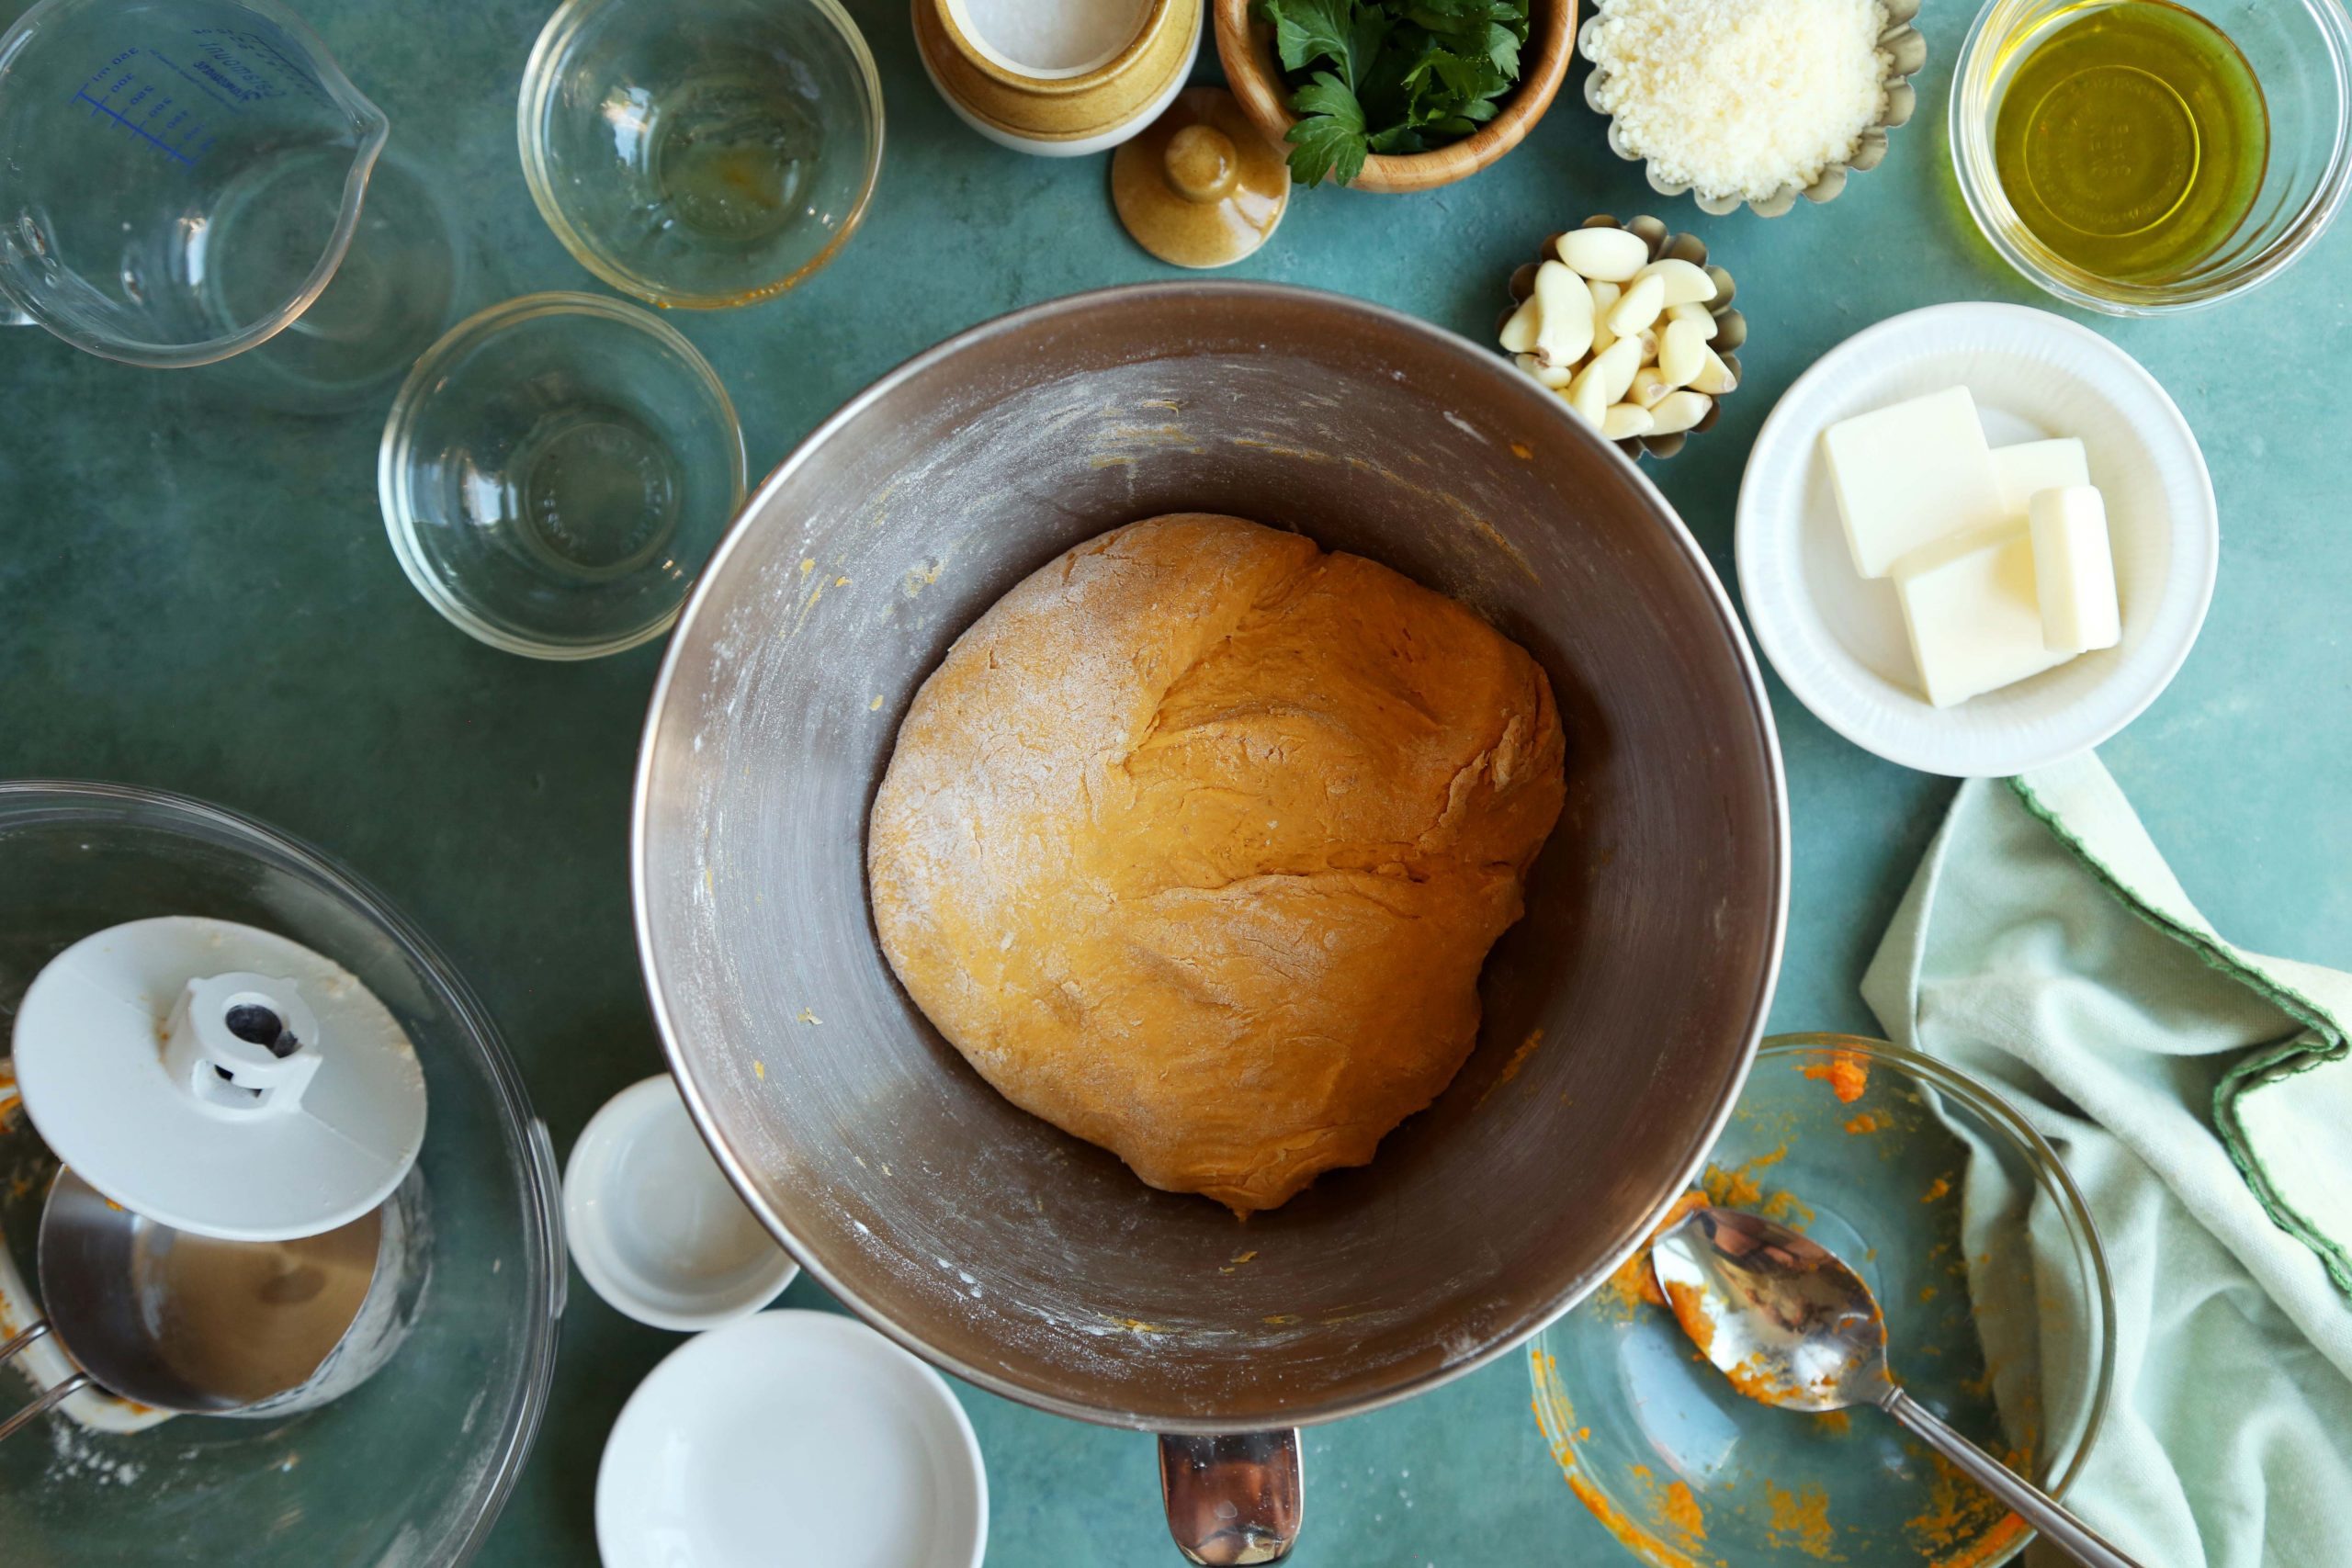
I have to admit this is somewhat of a lazy post because I just took the recipe for my seeded pumpkin breadsticks and turned them into these knots. I’ll go show and talk about the process again, just in case you didn’t know about those breadsticks or you don’t want to go to that post. In the bowl of a stand mixer, fitted with the dough hook, combine the pumpkin, honey, water, oil and instant yeast until evenly incorporated.
**Tip: I like using instant yeast because it allows me to skip the whole blooming process, but if all you have is active dry yeast, you’ll want to bloom the yeast in a 1/4 cup of the warm water listed with a pinch or so of sugar. Once frothy you can proceed as directed (along with the remaining water, don’t forget that).**
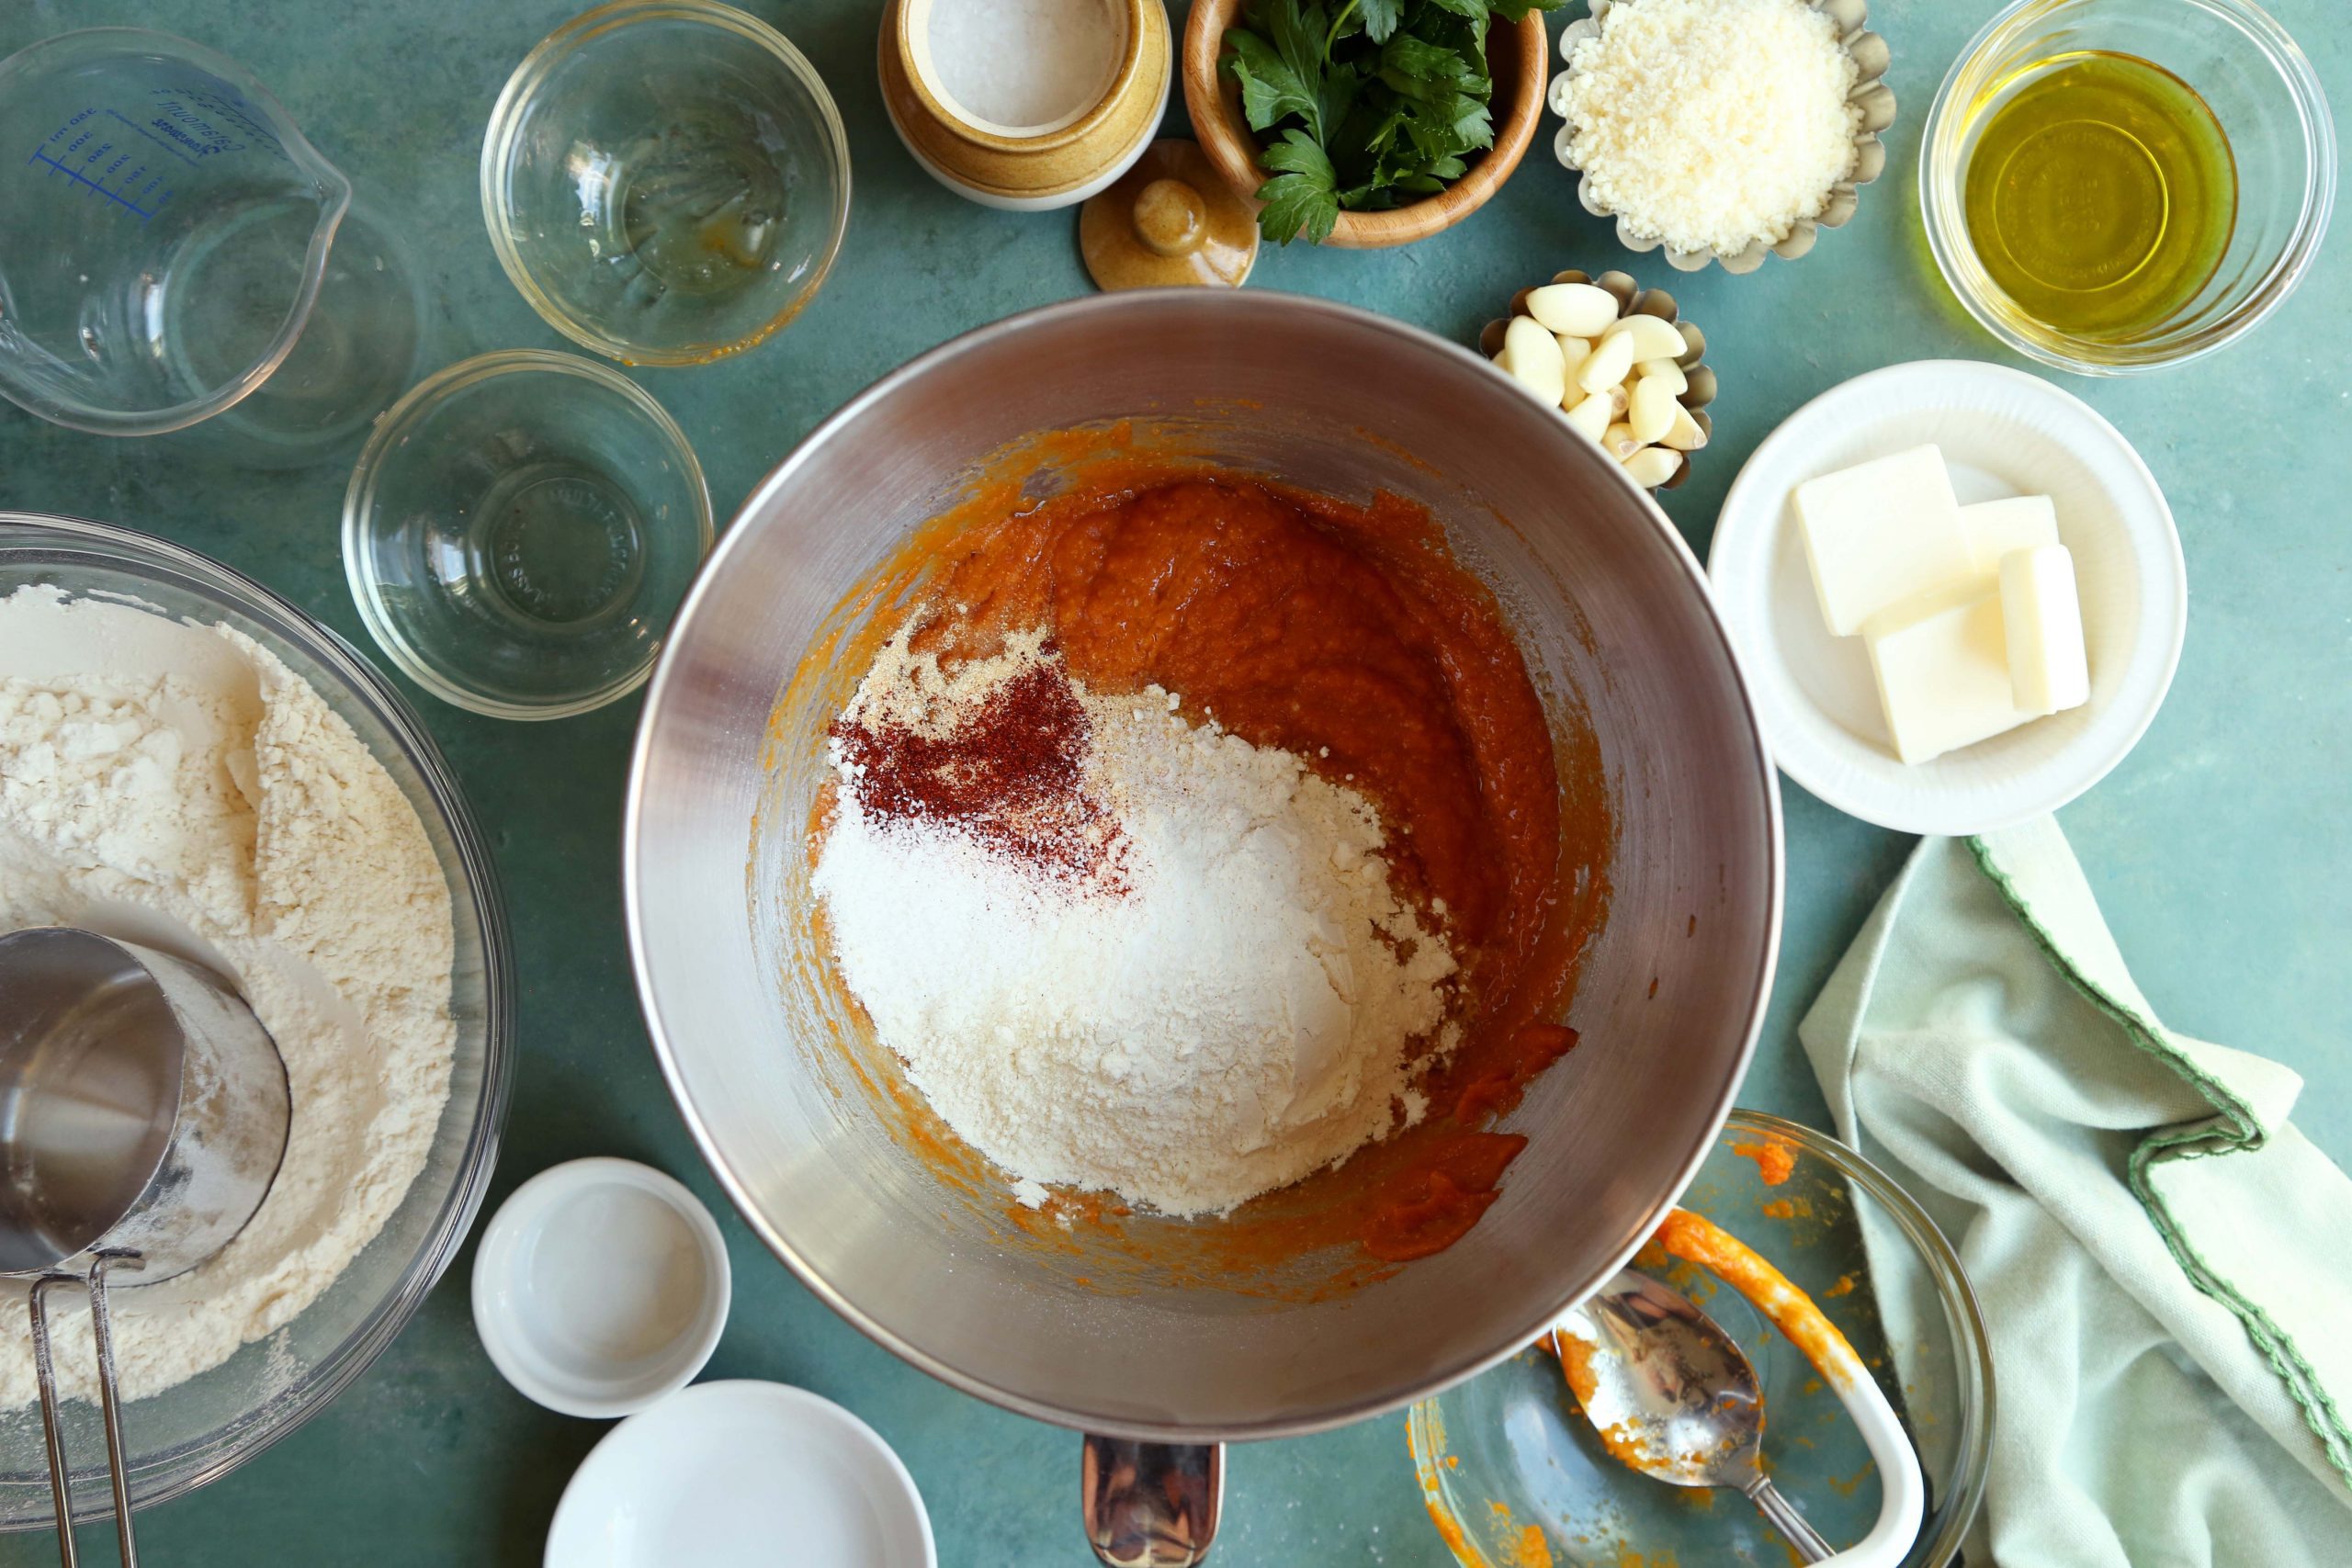
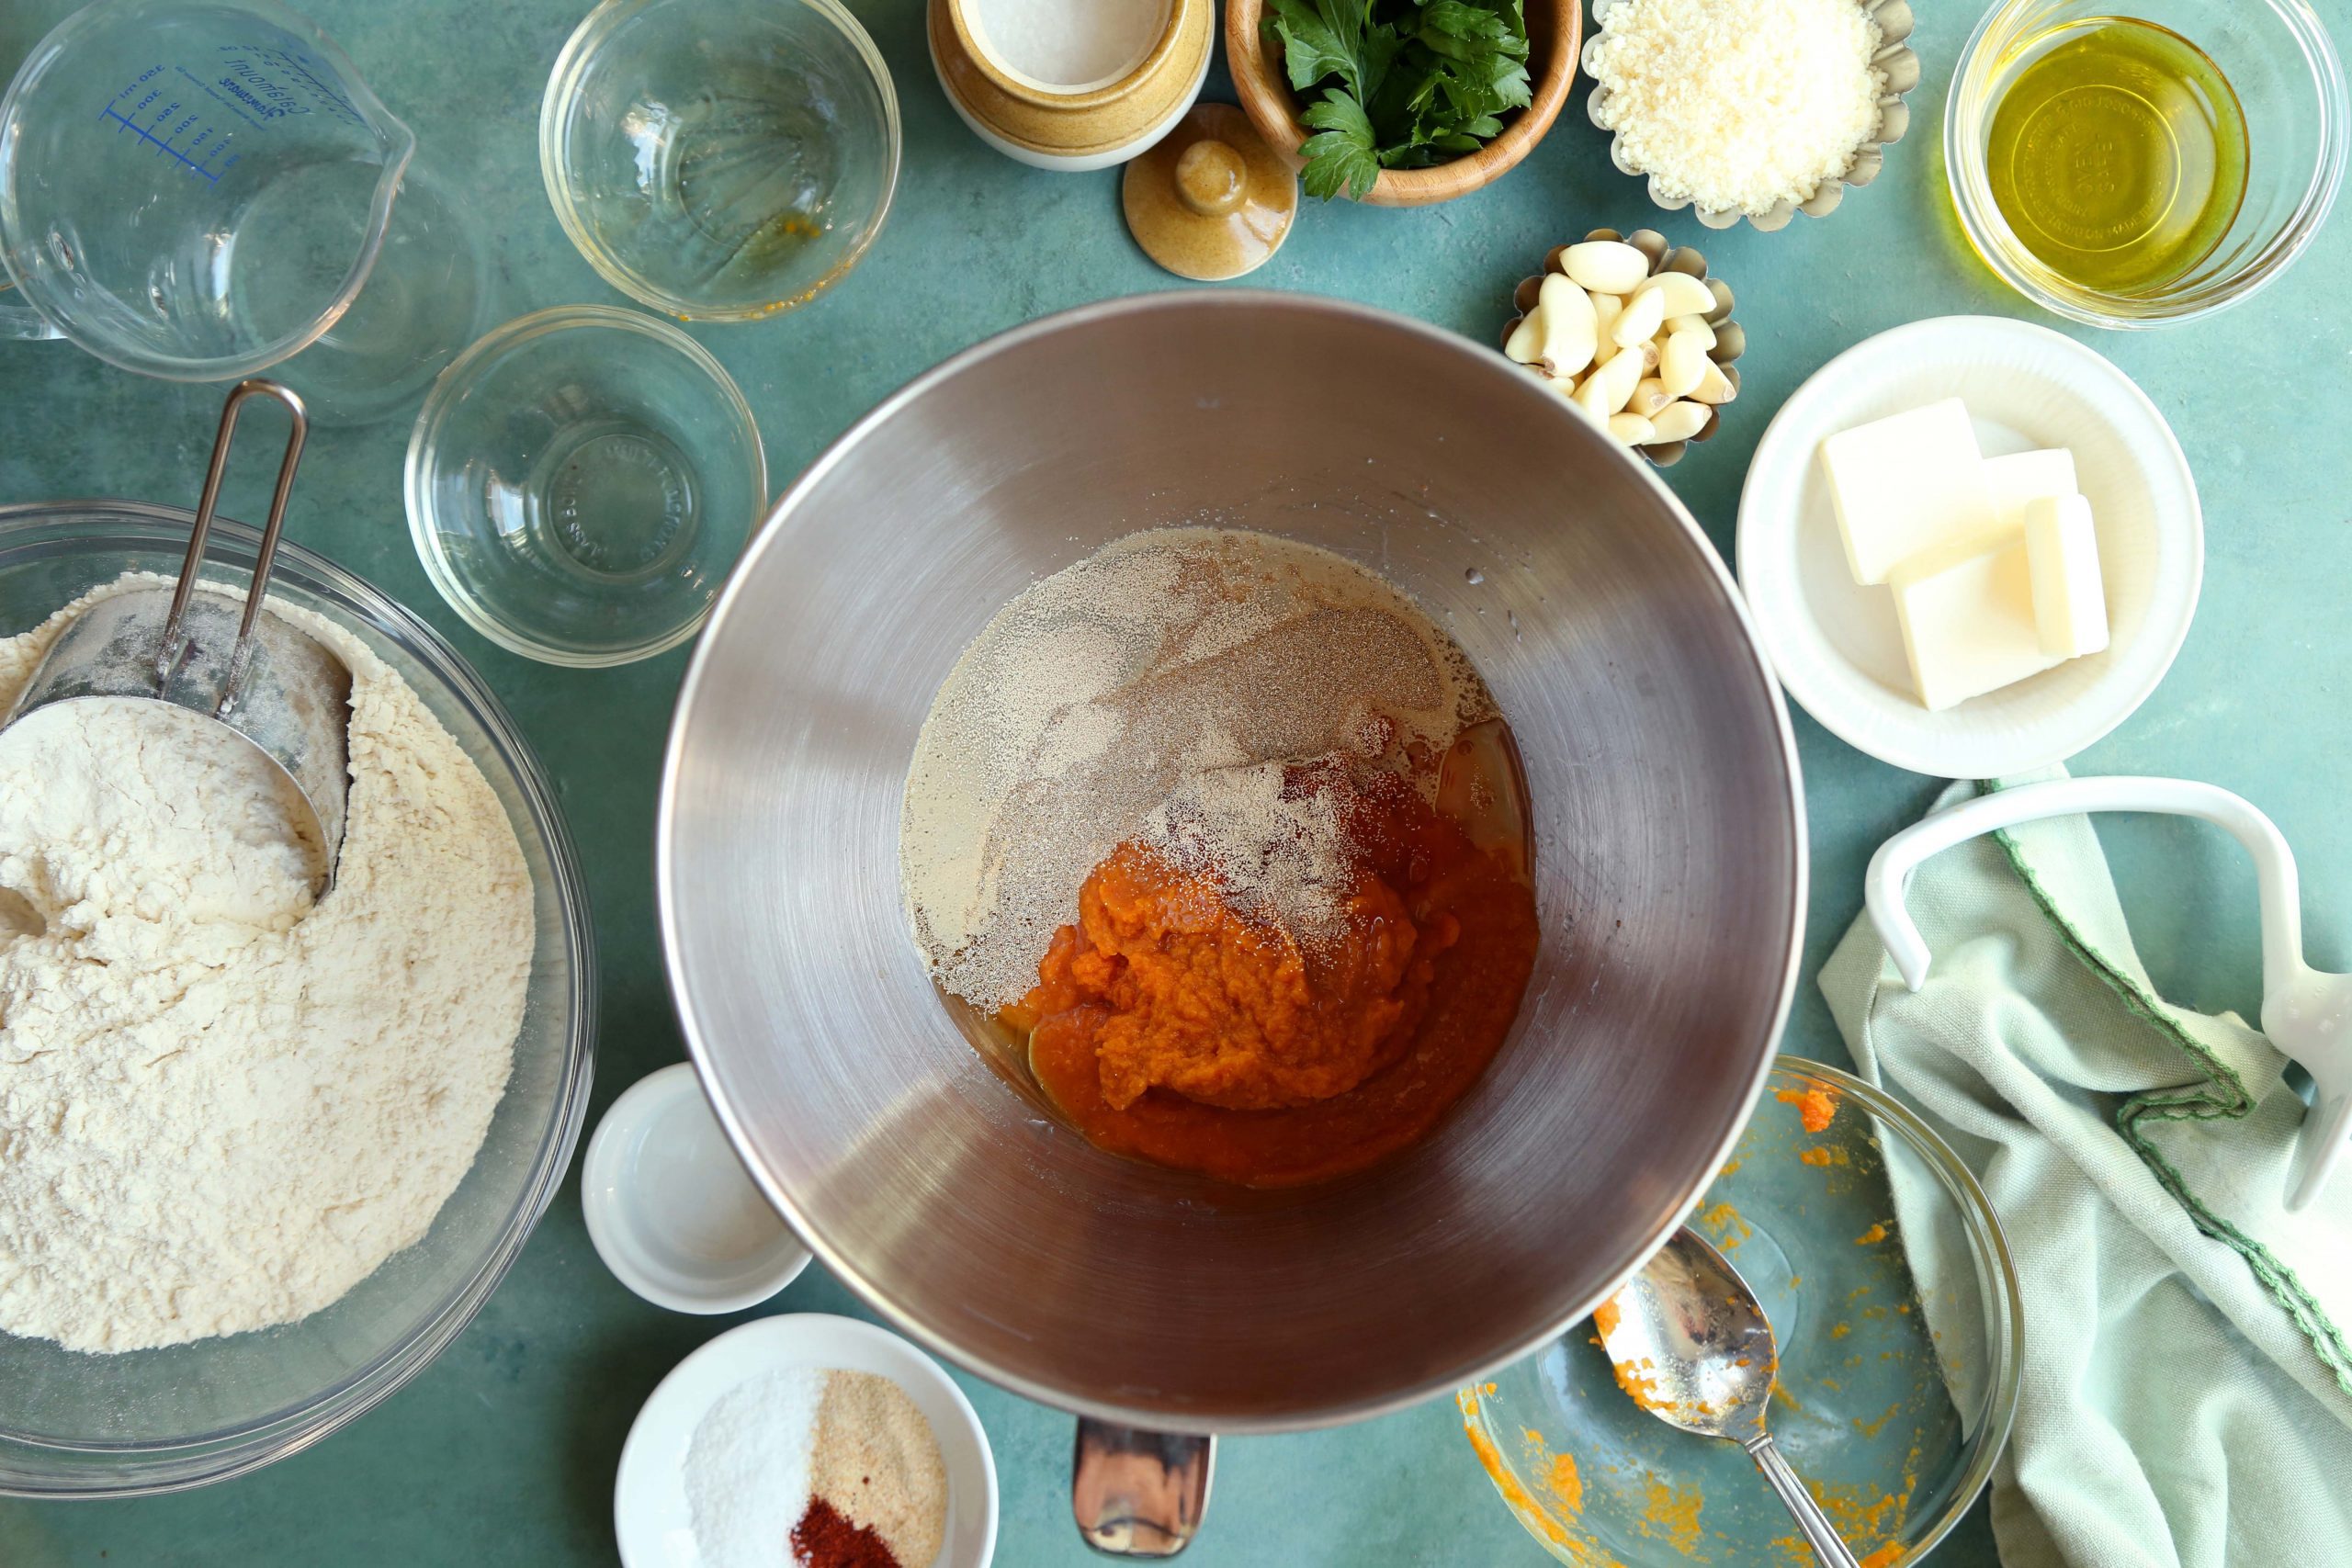 Add 1 cup of flour along with the salt, garlic, onion, and chili powder and stir until combined. While the machine is running, slowly add as much of the remaining flour as needed to create a smooth and soft dough that pulls away from the sides. Knead on high for about 5 to 7 minutes until soft.
**Note: You might need more or less flour as directed. I know that seems sort of sketchy to say, but it all really depends on the different brands of canned pumpkin. Some contain more moisture than others. You want a soft dough that is only slightly sticky.**
 Transfer the dough to a lightly oiled bowl and cover loosely with plastic wrap and a damp kitchen towel. Allow to rise in a warm spot until doubled in size, about 1 hour.
**Tip: If your kitchen is really cold right now, mine is, then I recommend turning on your oven for a few seconds and then shutting it off. That should be enough to create a nice warm atmosphere for your dough to rise.**
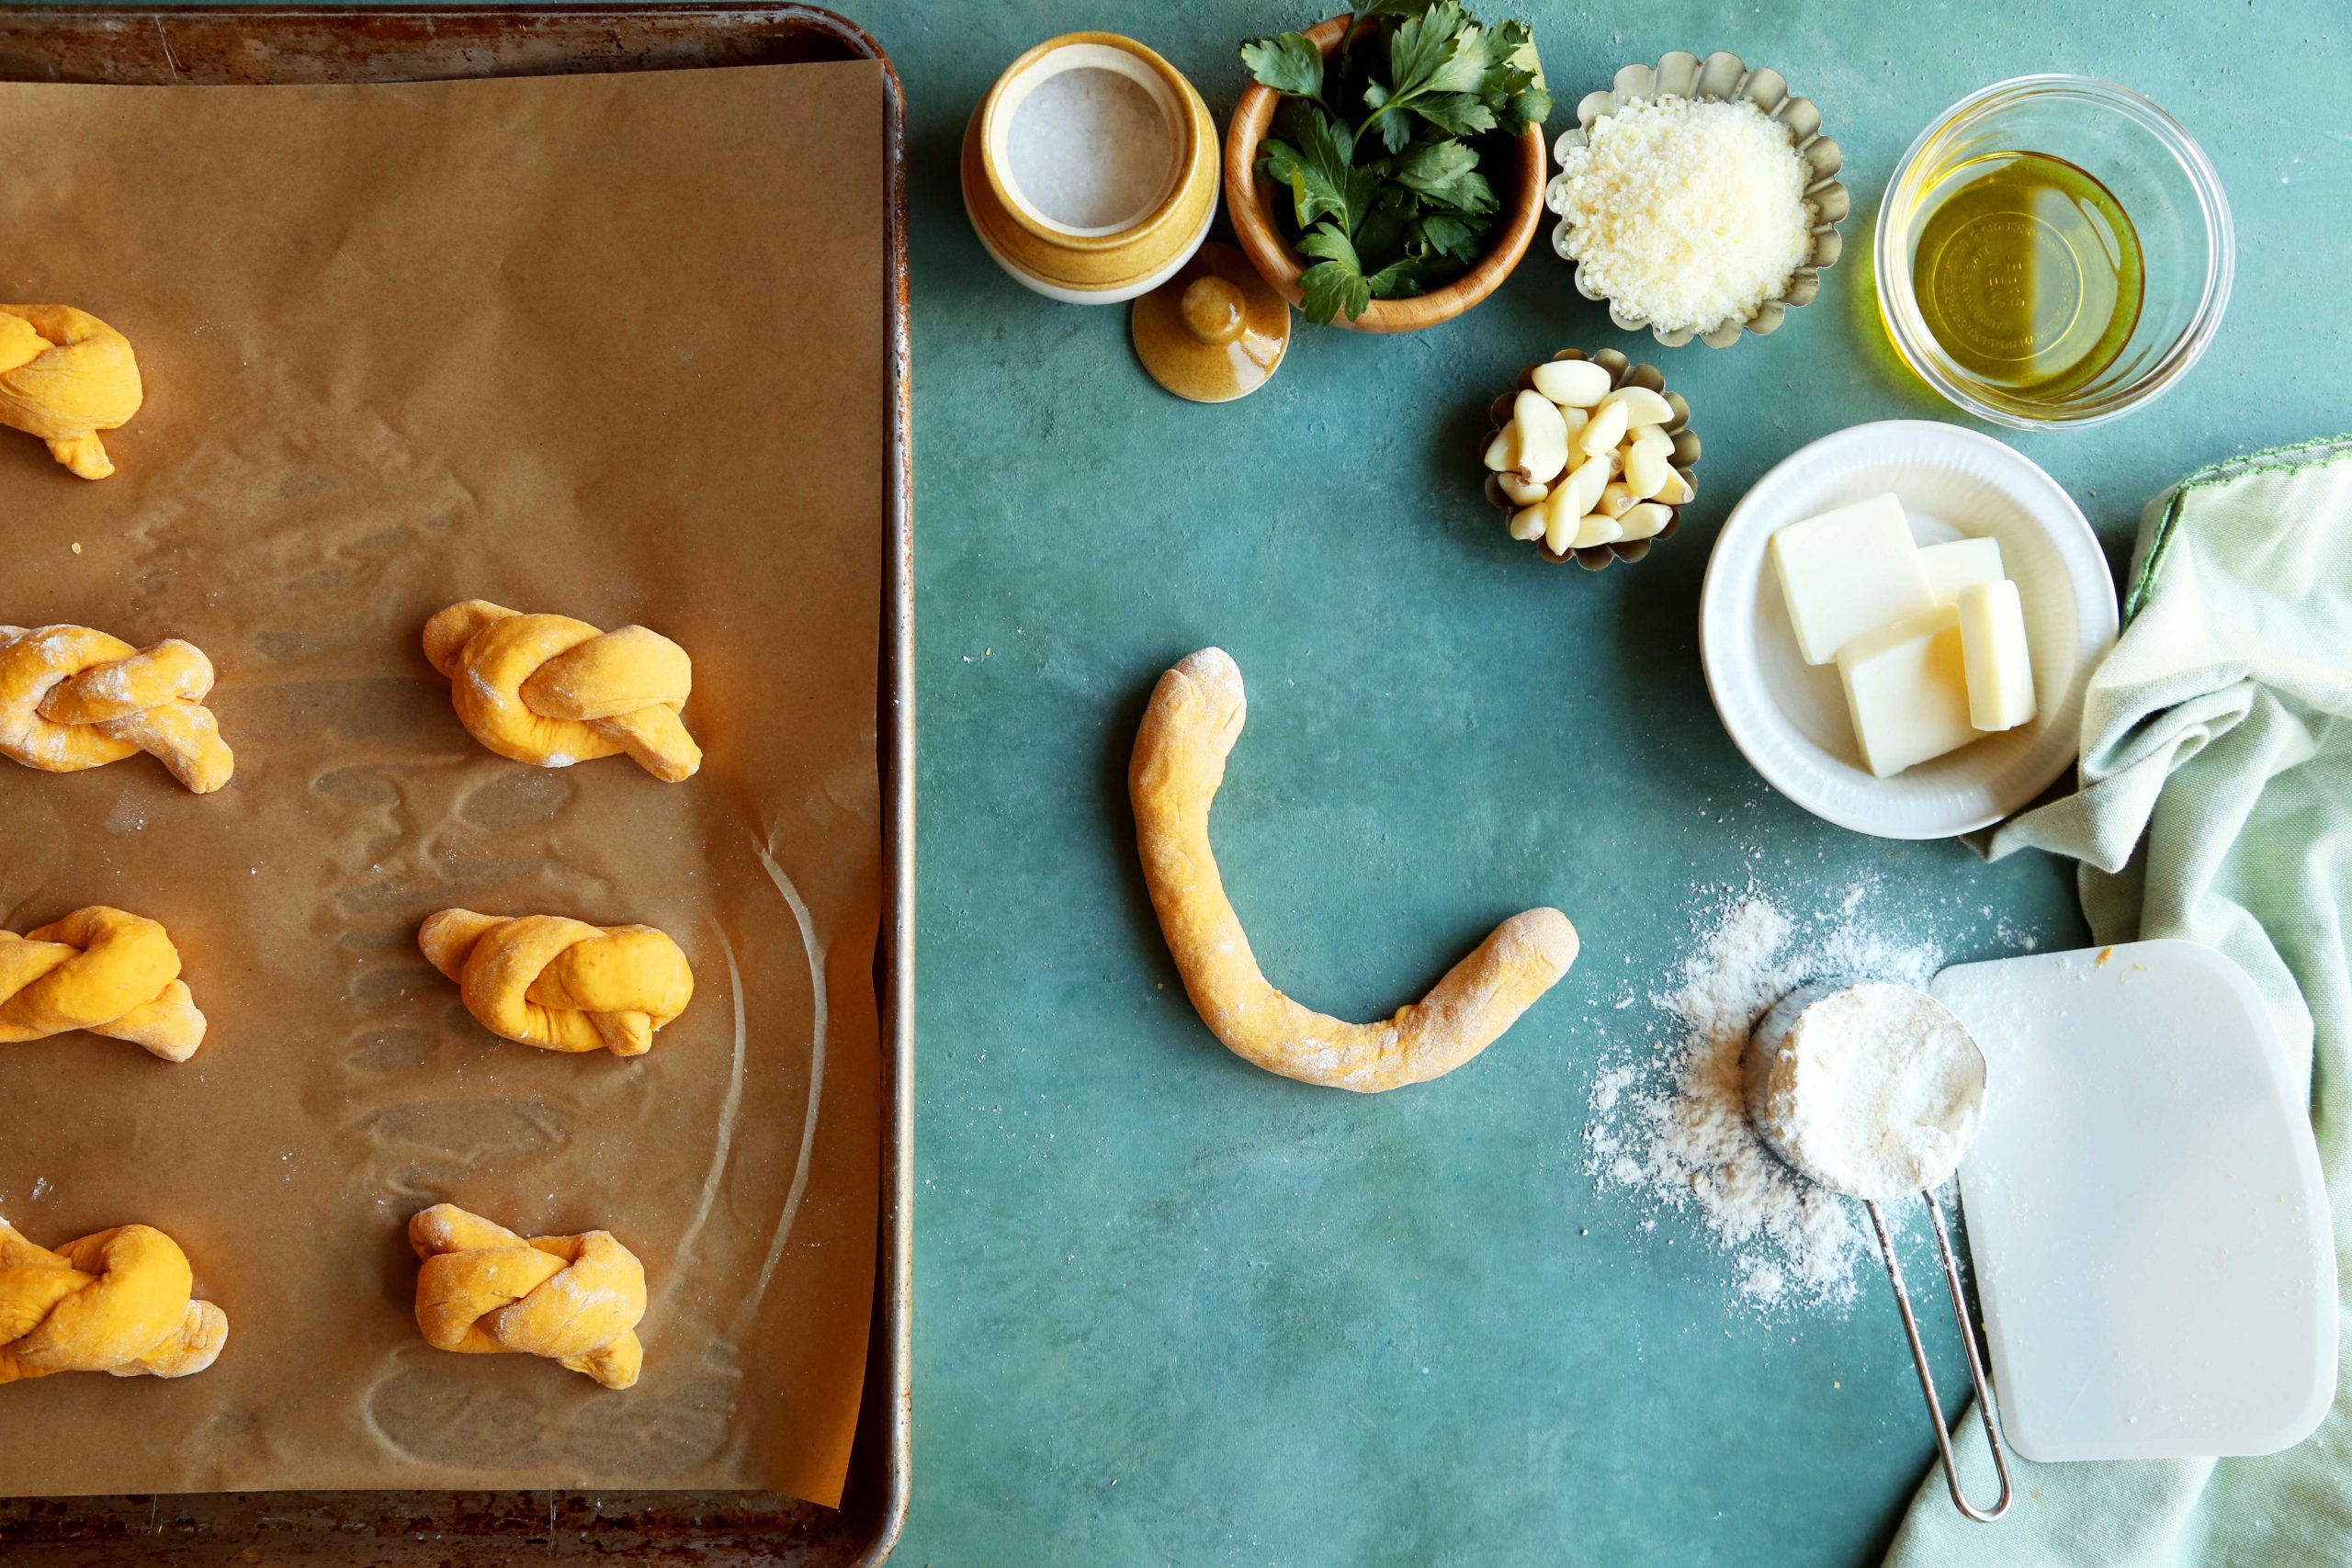
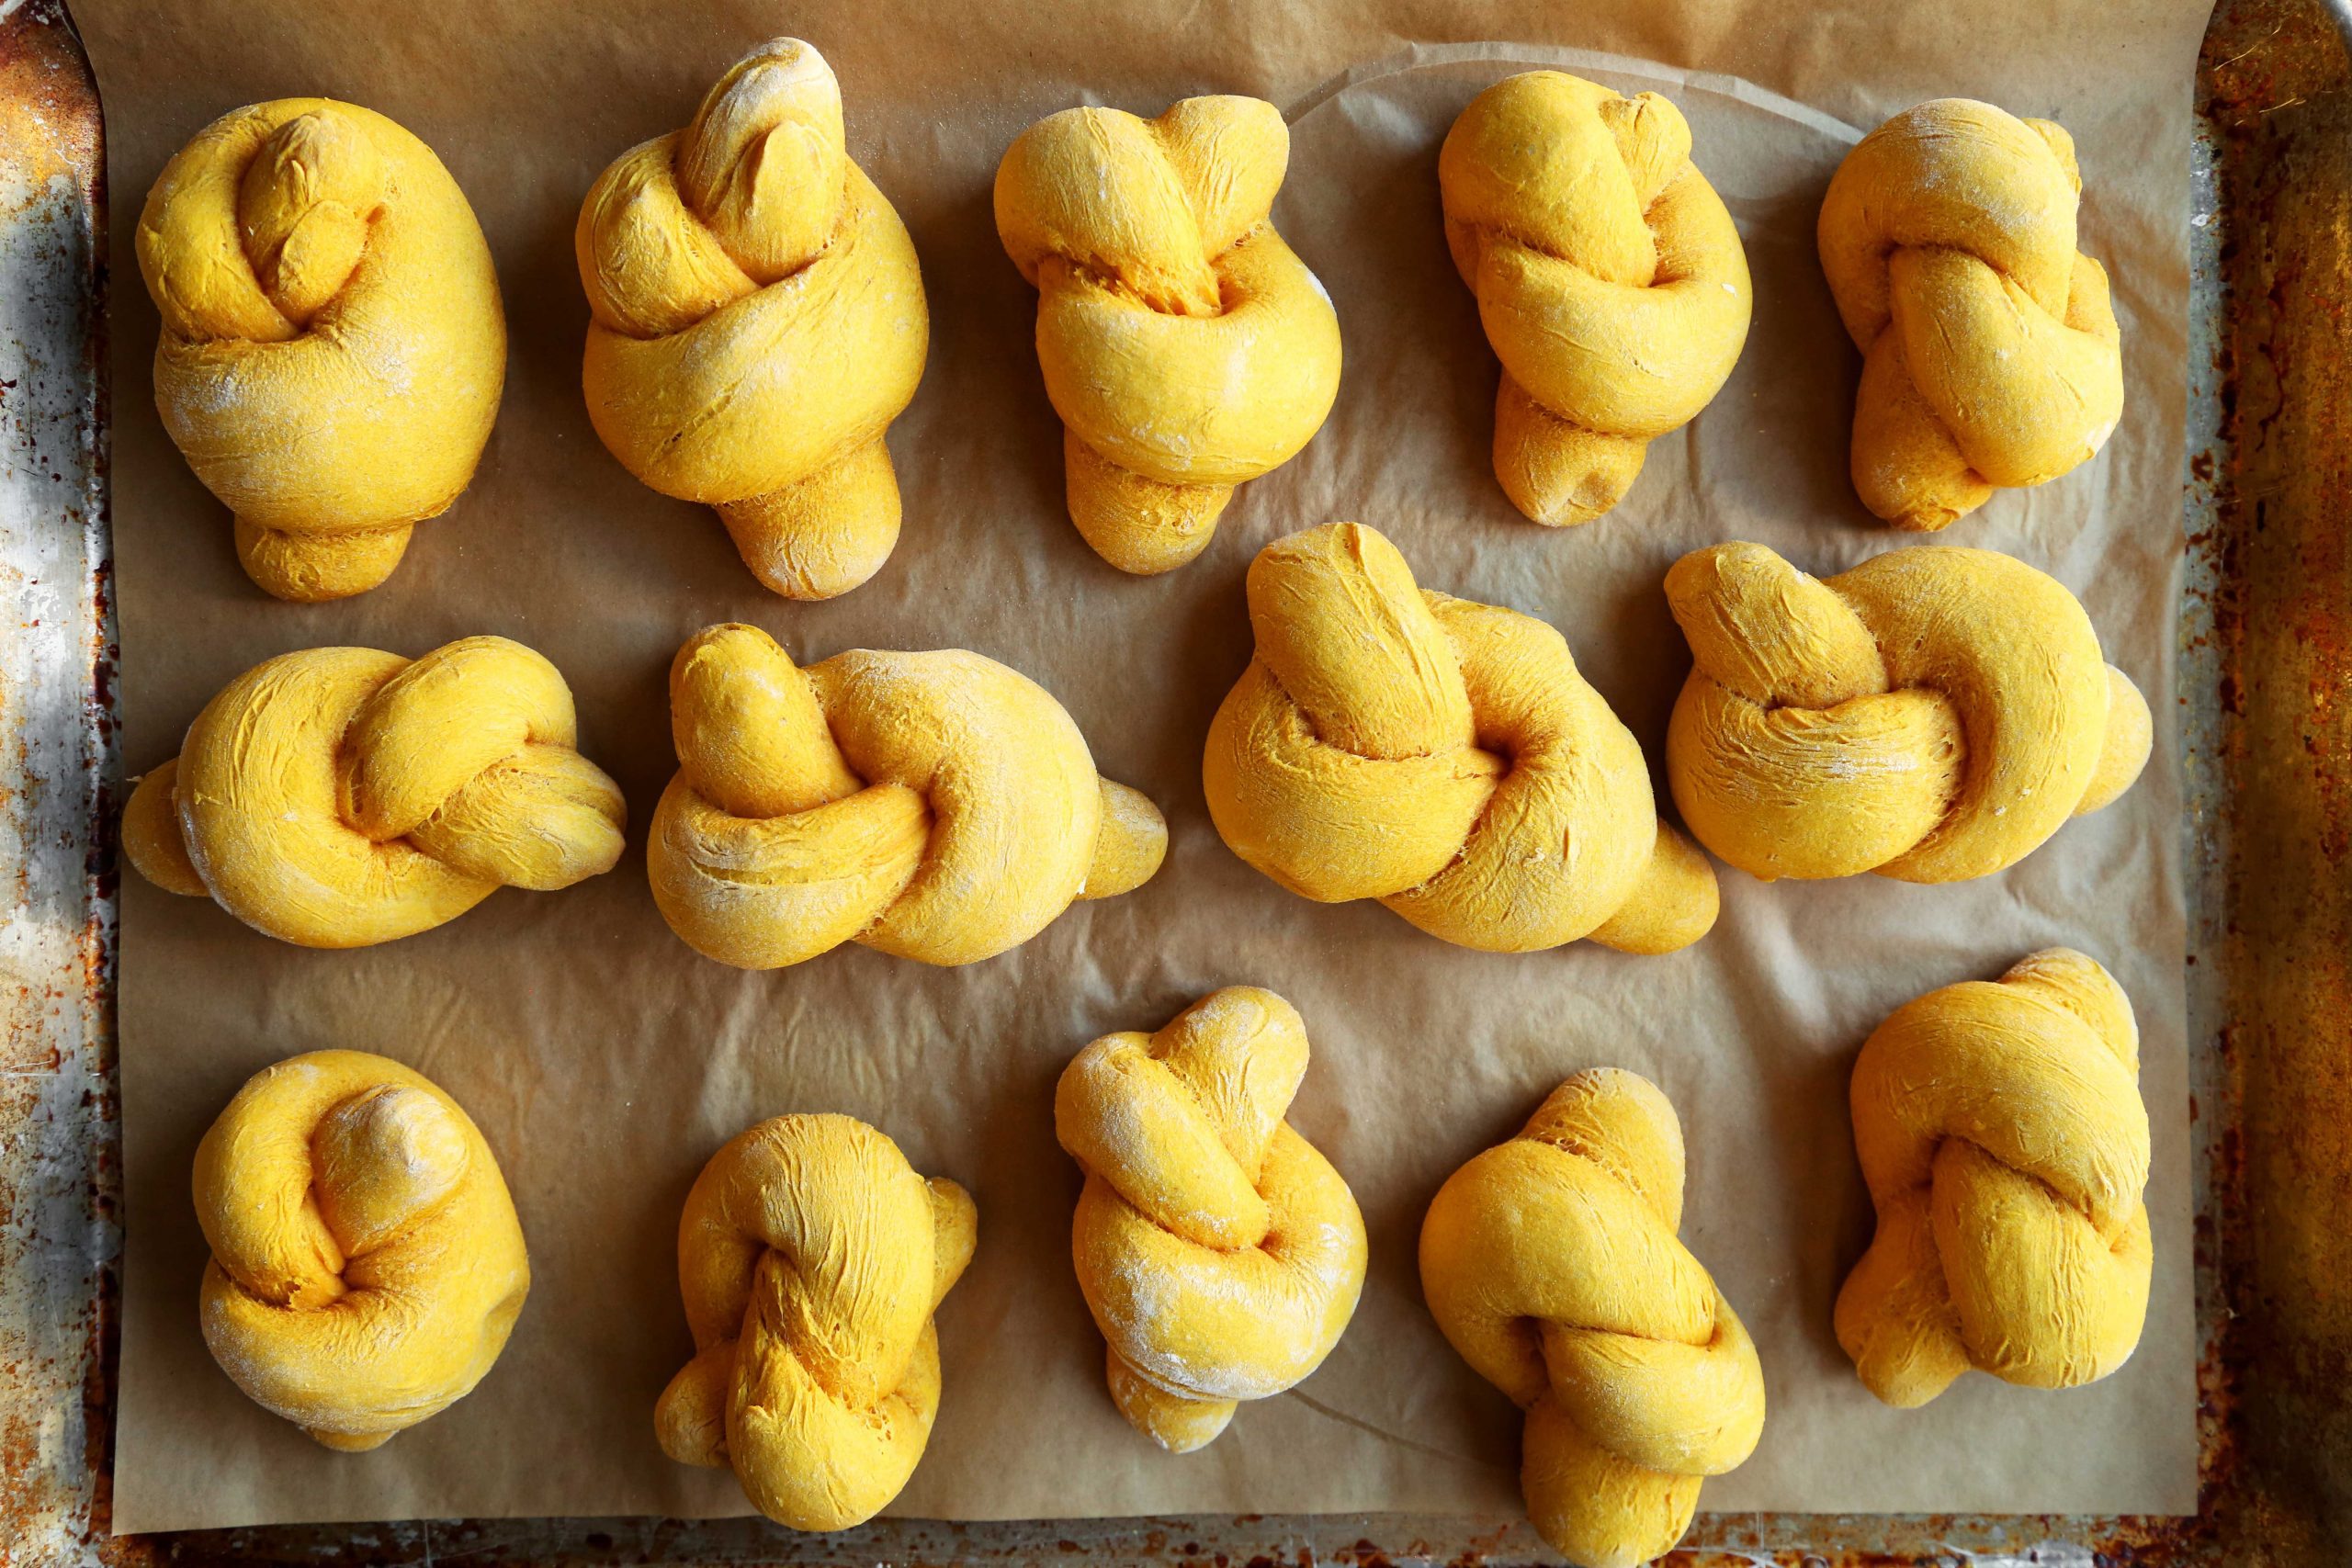
 Transfer the dough to a very lightly floured work surface and cut into about 16 to 20 even pieces, depending on the size of knots you want. Cover the dough portions with a kitchen towel so that it doesn’t dry out. Working with one piece at a time, roll out each into a 6-inch long rope. Carefully form the rope into a knot and place onto two baking sheets, lined with parchment, spaced evenly apart.
**Tip: You only want a very very small amount of flour on the board and your hands. If there is too much flour, the dough will become dry and you won’t be able to roll it out.**
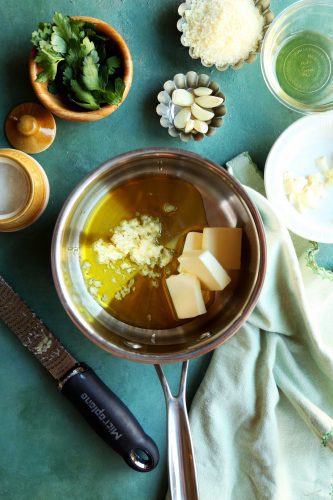
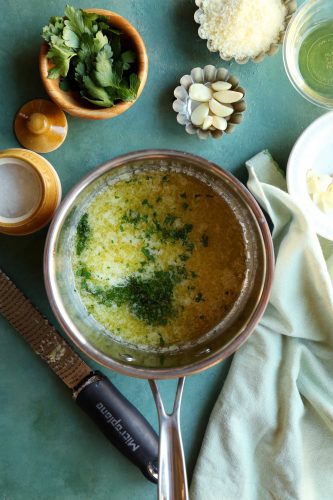
 Once all are formed, cover the pans loosely with plastic wrap and a damp kitchen towel and allow to rise for 30 minutes. Meanwhile, you can make the topping. Place the butter and oil in a small saucepan and set over moderate heat. Once melted, add the garlic and cook, stirring often, until the garlic just begins to brown. Remove from the heat and stir in the parsley.
**Tip: Instead of spending time finely chopping garlic, which happens to be one of my least favorite kitchen tasks, I like to just grate the cloves with a microplane. It also ensures that you’re not biting into a large piece of garlic!**
Once the knots have risen, transfer the baking sheets to the oven and bake in a preheated 400°F oven until puffed up and lightly golden brown around the edges, about 18 to 20 minutes.
**Note: They should be light and sound somewhat hallow when you pick them up. If they feel heavy, they need a bit more time. Return them to the oven and bake for 3 to 5 minutes longer.**
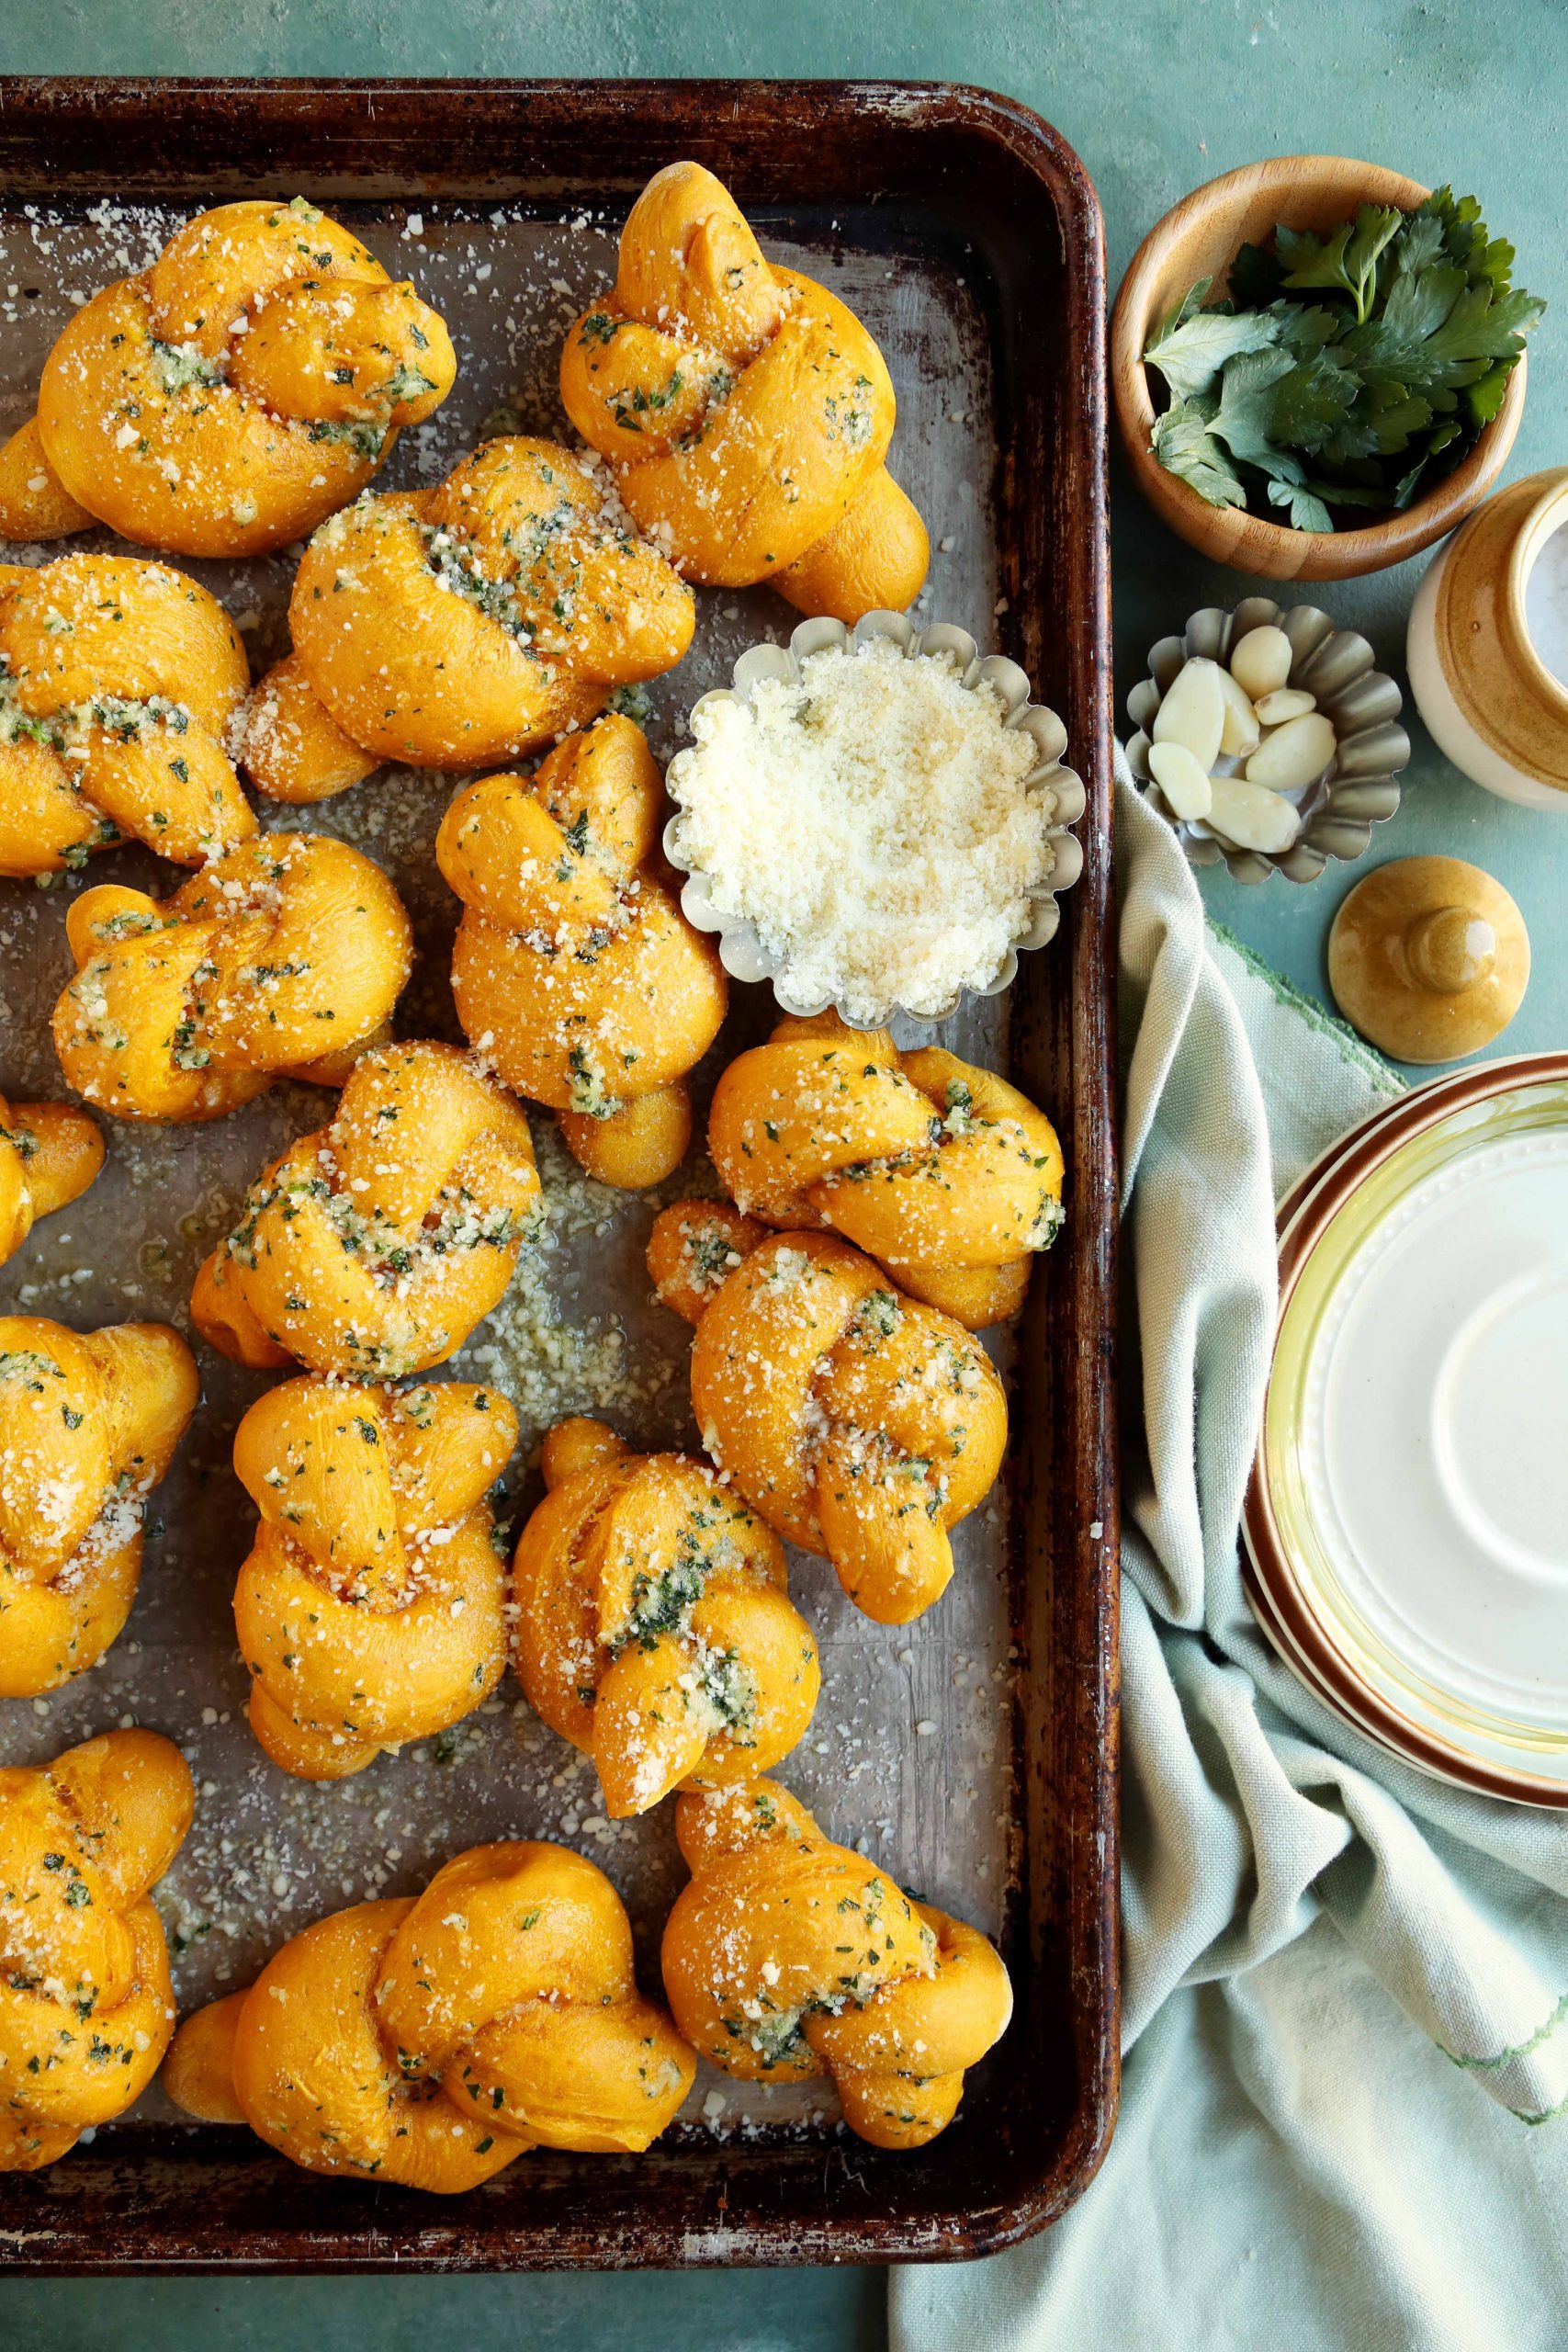
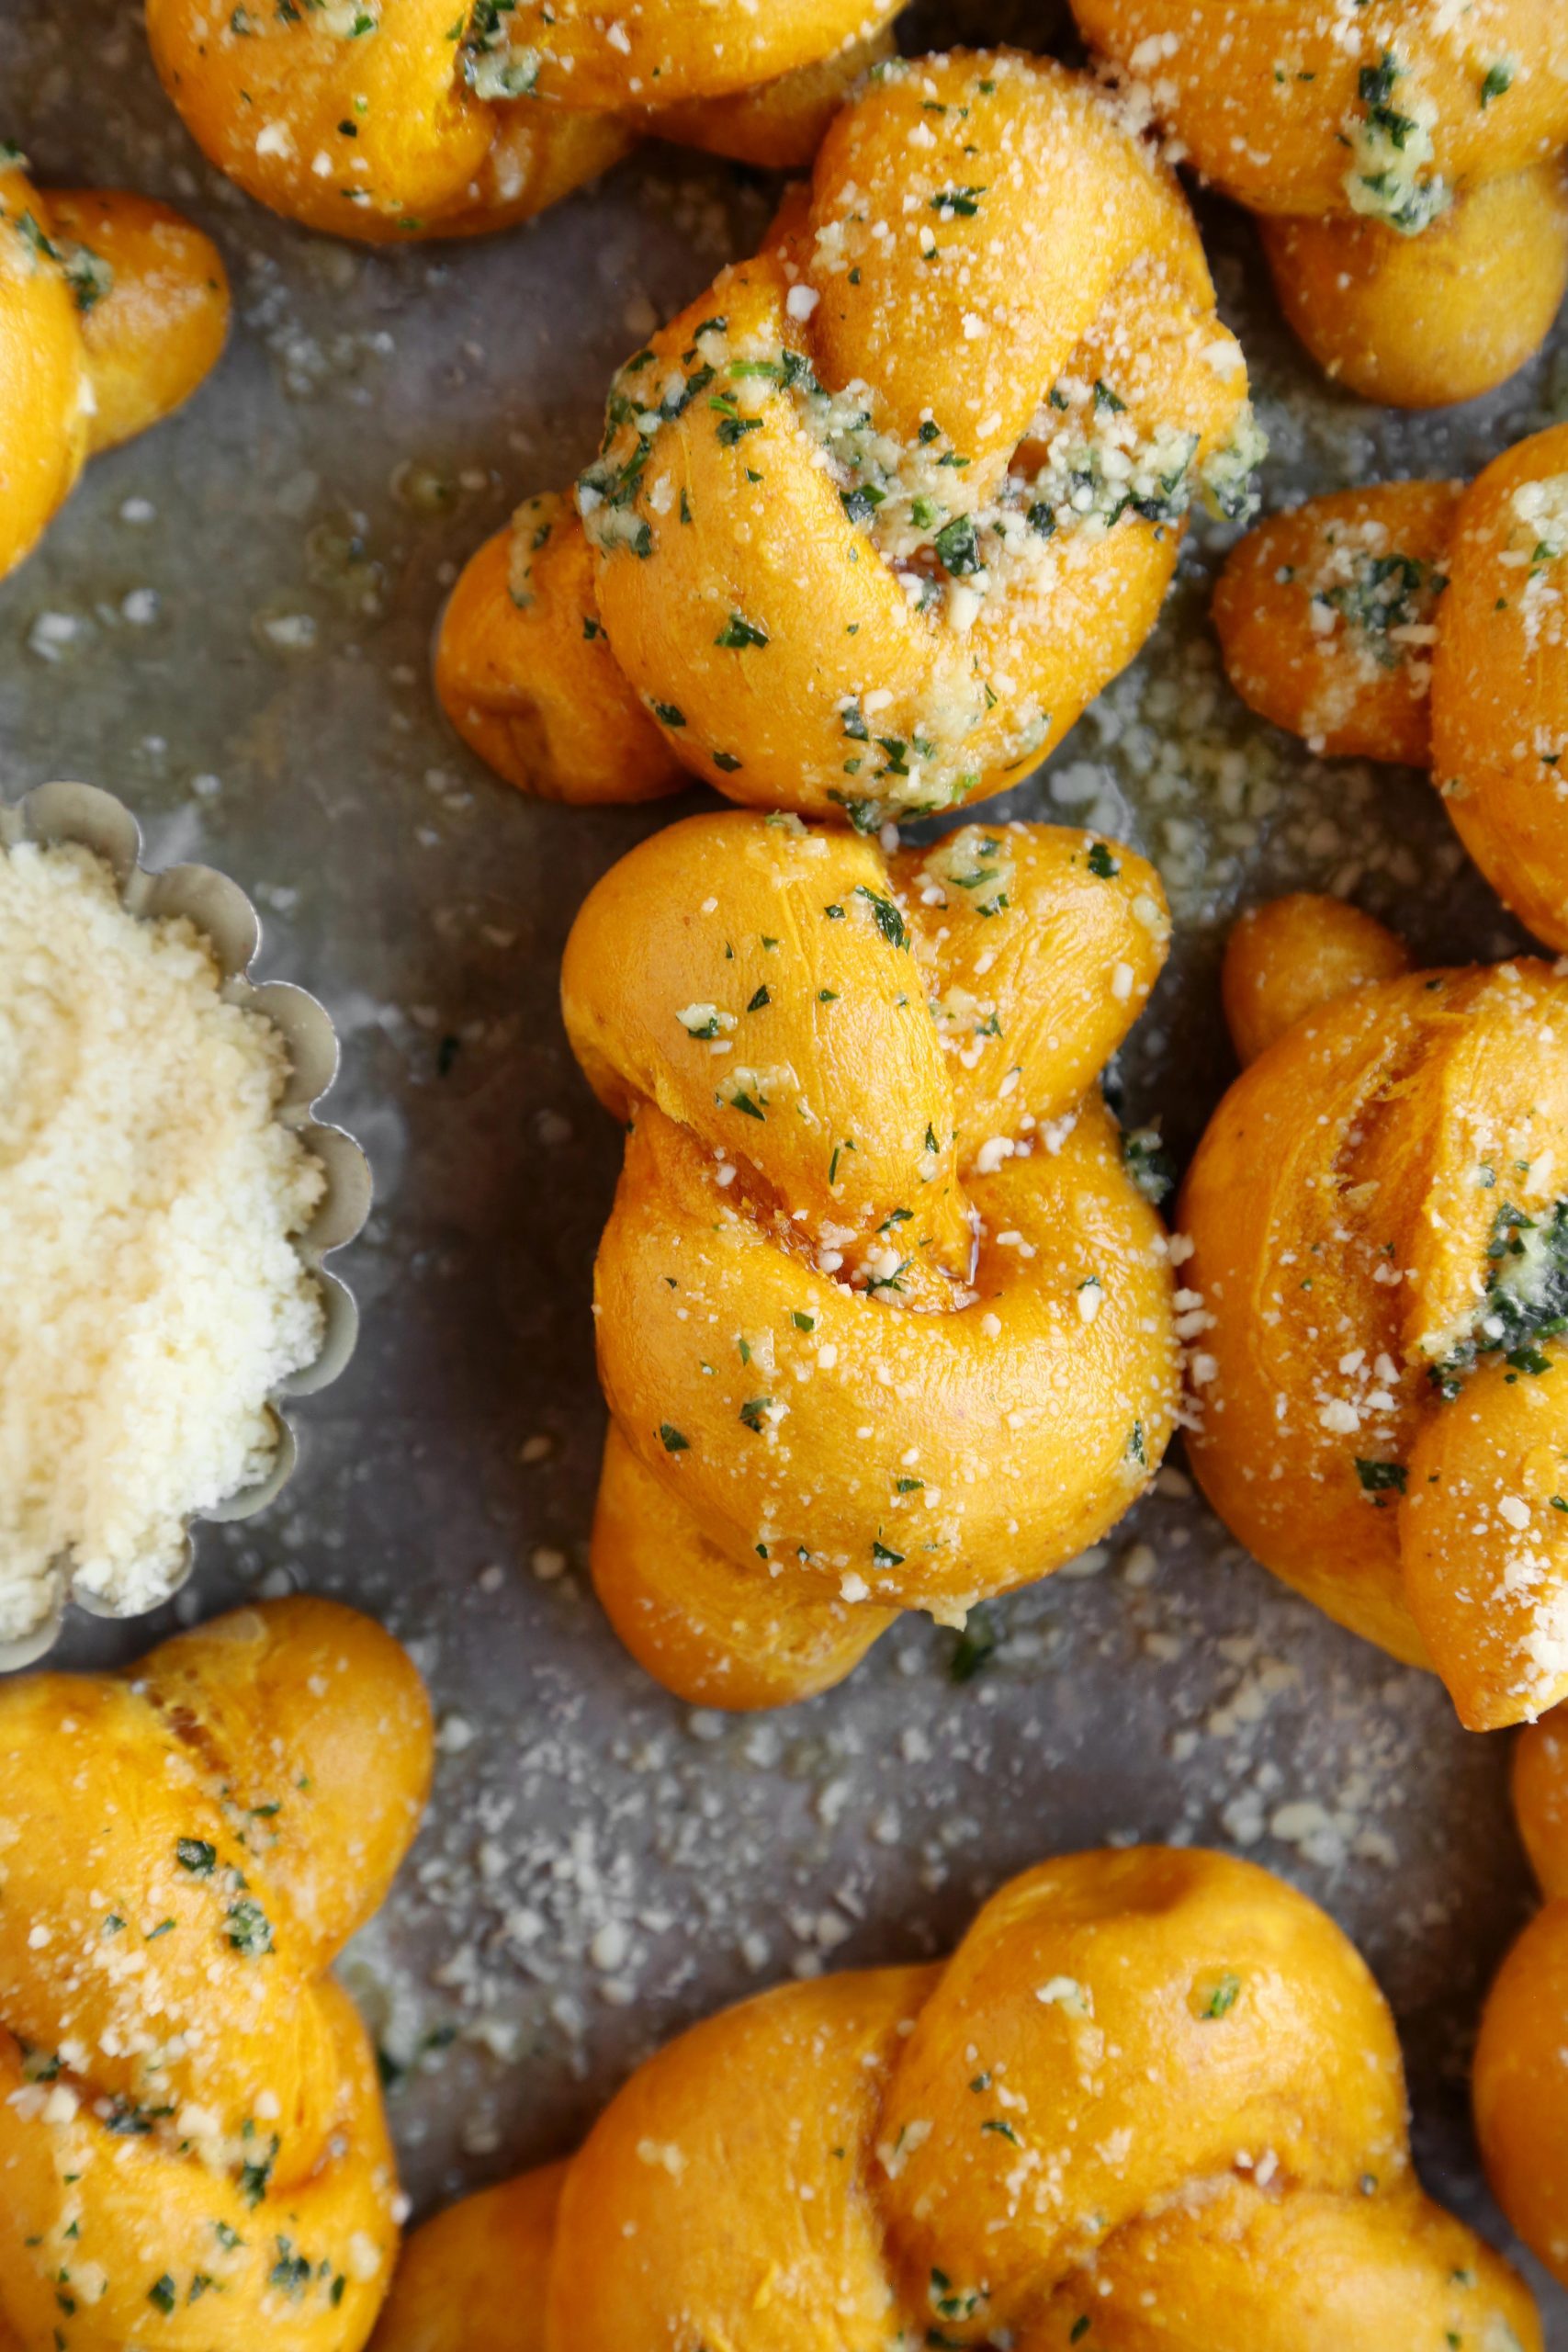
 Once the knots are baked, carefully remove the pans from the oven and brush them liberally with the garlic topping. You can add as much or as little as you’d like. Then sprinkle the tops with lots of grated parmesan.
 If you want to freeze some of the knots. You can allow them to cool to room temperate (without the topping) and then transfer to a freezer storage bag and freeze for up to 3 months. When ready to eat, just rewarm in the oven and make the topping and brush on before serving.
**Tip: If you really want to plan ahead you can make the topping ahead of time and freeze alongside the knots. Then just melt in a saucepan!**
 I like these knots by themselves because the flavor of the bread along with the garlic topping is delicious all on it’s own, but you can also serve them with warmed marinara sauce on the side for dipping. That would be yummy.
 If you’re looking for a more classic garlic knot, I recommend this post which I serve with a beer cheddar sauce that is to die for. Either route you take (either the classic or the pumpkin) garlic knots are a fun way to freshen up regular ol’ dinner rolls. They make for great appetizers as well. If you have any questions or comments make sure to leave them below. Stay safe out there my friends.

Pumpkin Parmesan Garlic Knots
Ingredients
Dough:
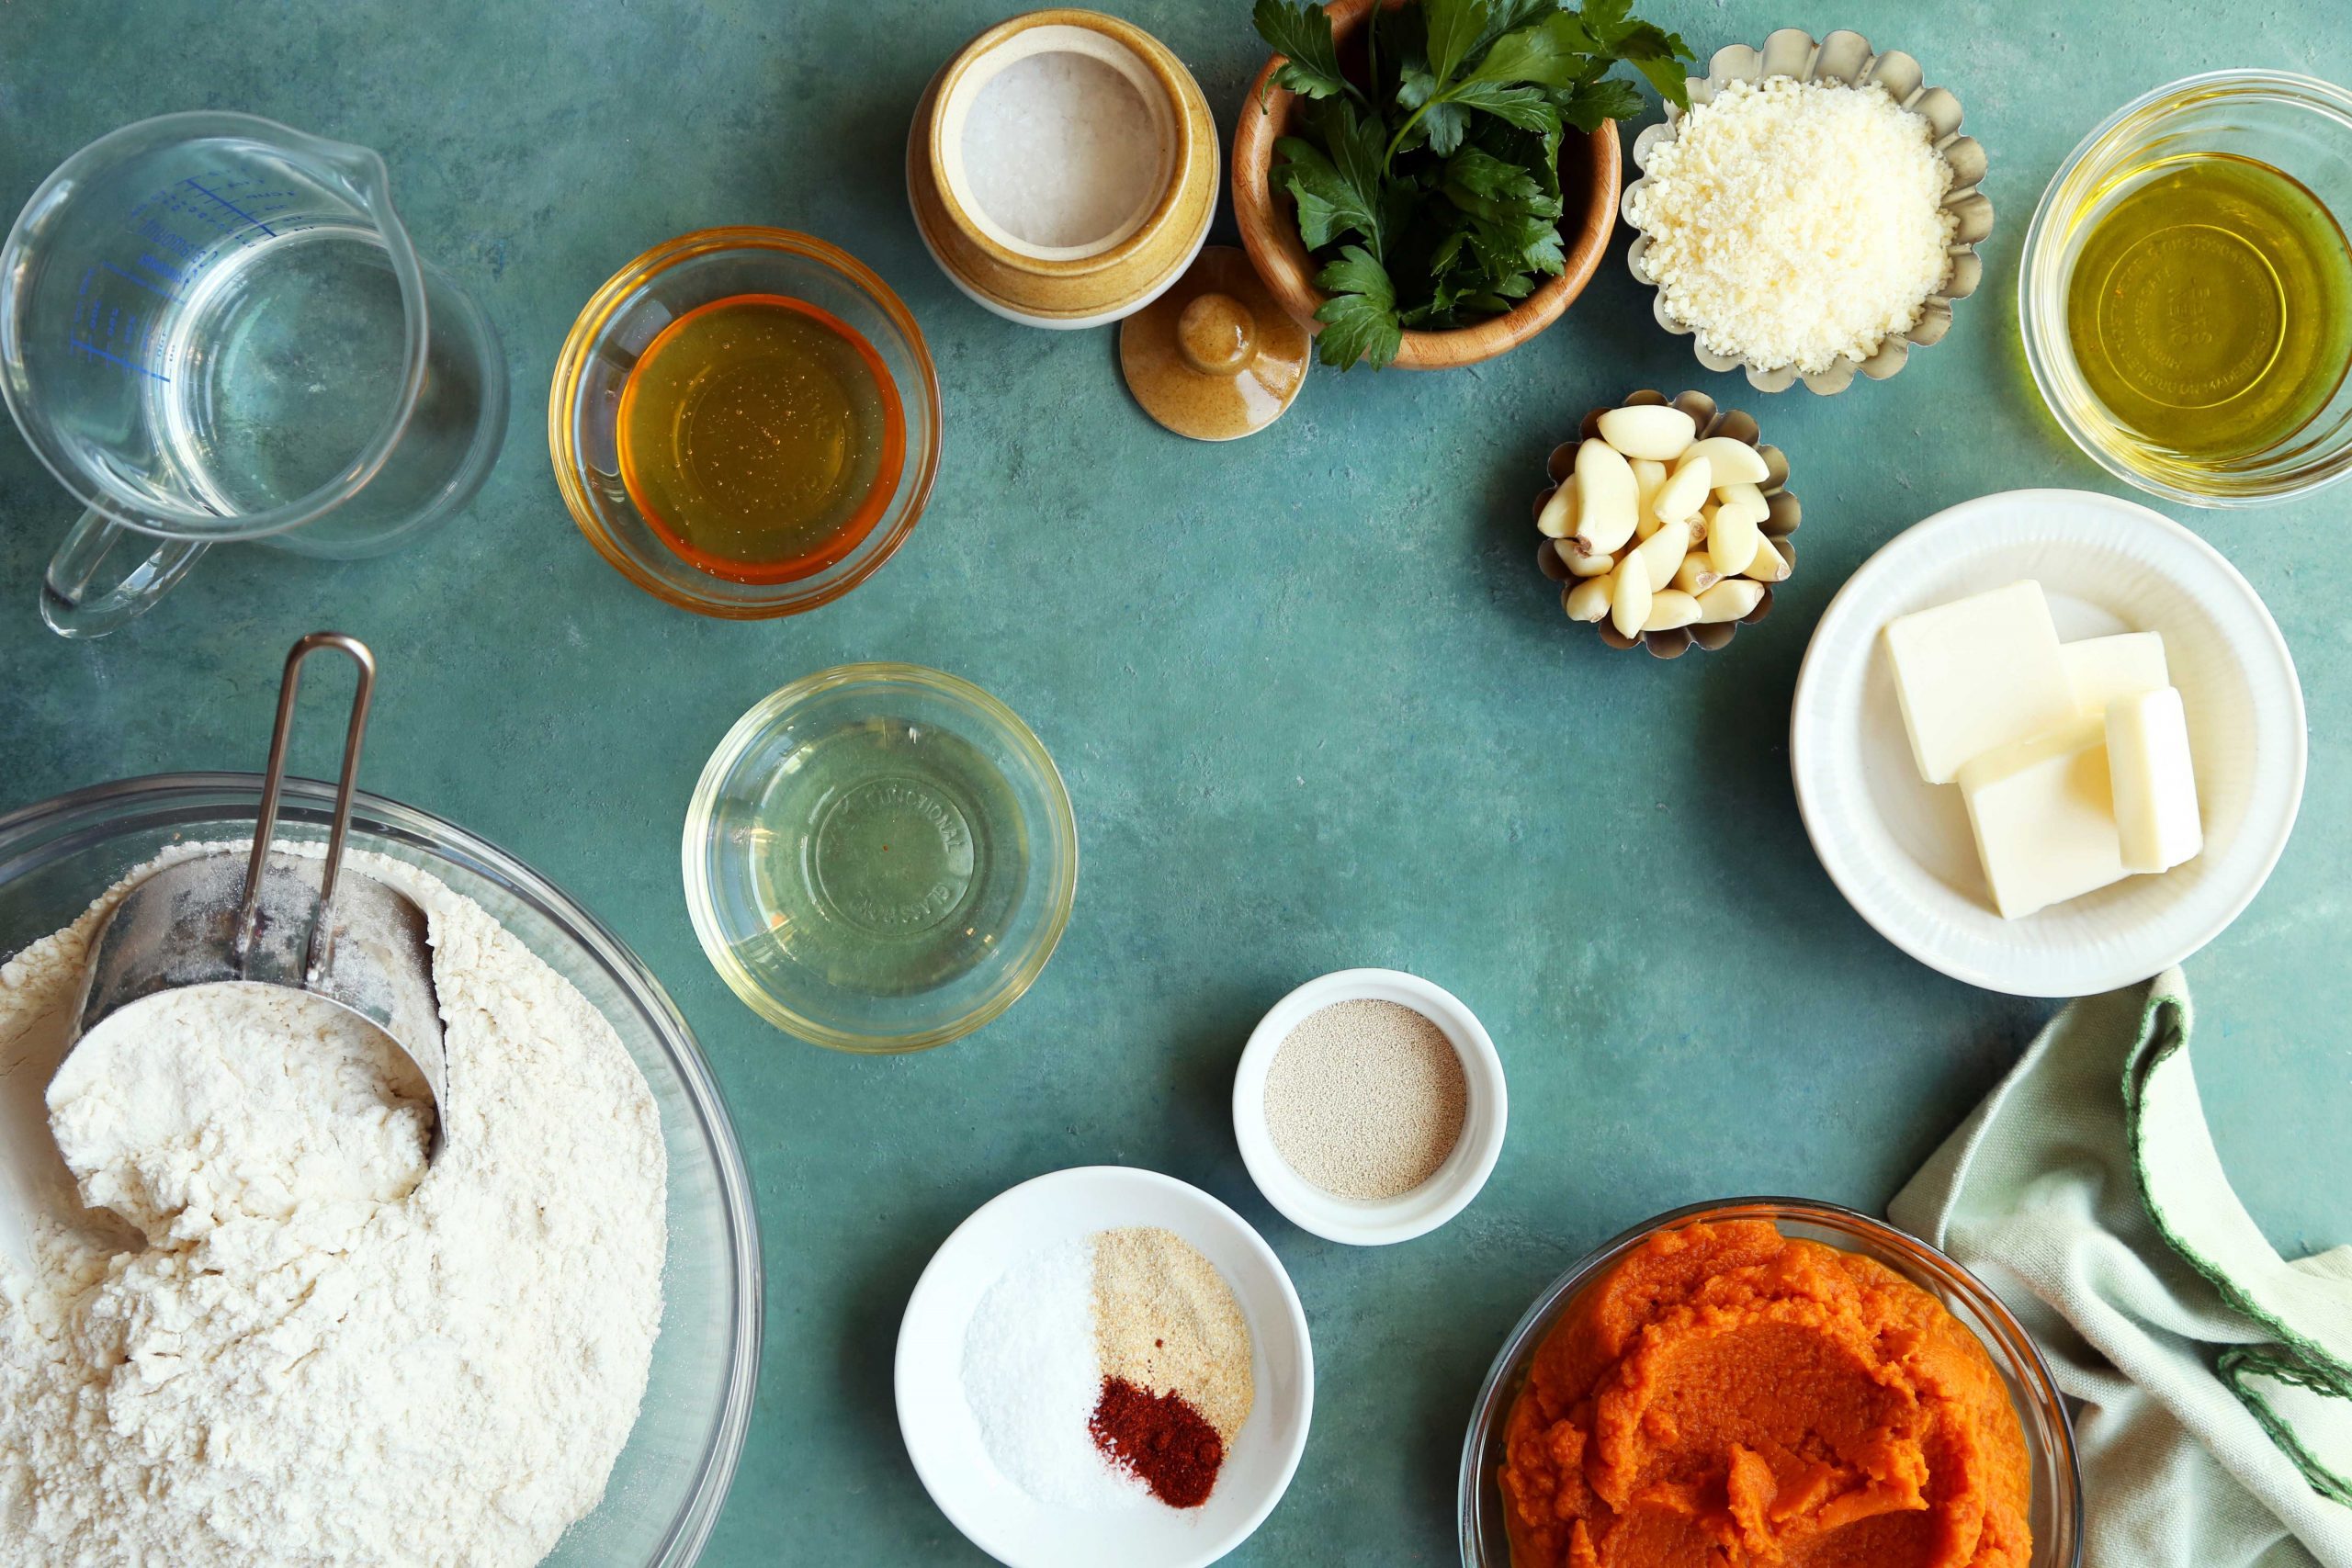
- 1½ cups pumpkin puree
- 2 tablespoons honey
- ½ cup lukewarm water
- 2 tablespoons vegetable oil
- 2 teaspoons instant yeast
- 2 teaspoons salt
- 1 teaspoon granulated garlic
- 1 teaspoon granulated onion
- ½ teaspoon chili or cayenne pepper
- 3½ to 4 cups all-purpose flour
Topping:
- 4 tablespoons unsalted butter
- 2 tablespoons olive oil
- 6 garlic cloves finely chopped
- 1 tablespoon fresh parsley finely chopped
- 2 tablespoons grated parmesan
Instructions
- In the bowl of a stand mixer, fitted with the dough hook, combine the pumpkin, honey, water, oil and yeast until evenly incorporated. Add 1 cup of flour along with the salt, garlic, onion, and chili powder and stir until combined. While the machine is running, slowly add as much of the remaining flour as needed to create a smooth and soft dough that pulls away from the sides. Knead on high for about 5 to 7 minutes until soft. Transfer the dough to a lightly oiled bowl and cover loosely with plastic wrap and a damp kitchen towel. Allow to rise in a warm spot until doubled in size, about 1 hour.
- Line two baking sheets with parchment paper and set aside. Transfer the dough to a very lightly floured work surface and cut into about 16 to 20 even pieces, depending on the size of knots you want. Cover the dough portions with a kitchen towel. Working with one piece at a time, roll out each into a 6-inch long rope. You only want a very very small amount of flour on the board and your hands. If there is too much flour, the dough will become dry and you won't be able to roll it out. Carefully form the rope into a knot and place onto the prepared baking sheets. Continue rolling and knotting all the dough, spacing out the pieces about 2 inches apart from one another on the baking sheets. Cover the pans loosely with plastic wrap and a damp kitchen towel and allow to rise for 30 minutes.
- Meanwhile, preheat oven to 400°F. Once the knots have risen, transfer the baking sheets to the oven and bake until puffed up and lightly golden brown, about 18 to 20 minutes. They should be light and sound somewhat hallow when you pick them up.
- To make the topping, place the butter and oil in a small saucepan and set over moderate heat. Once melted, add the garlic and cook, stirring often, until the garlic just begins to brown. Remove from the heat and stir in the parsley. Brush the topping on top of the warm knots and sprinkle with parmesan. Serve with marinara sauce on the side for dipping. Enjoy!
These look amazing!