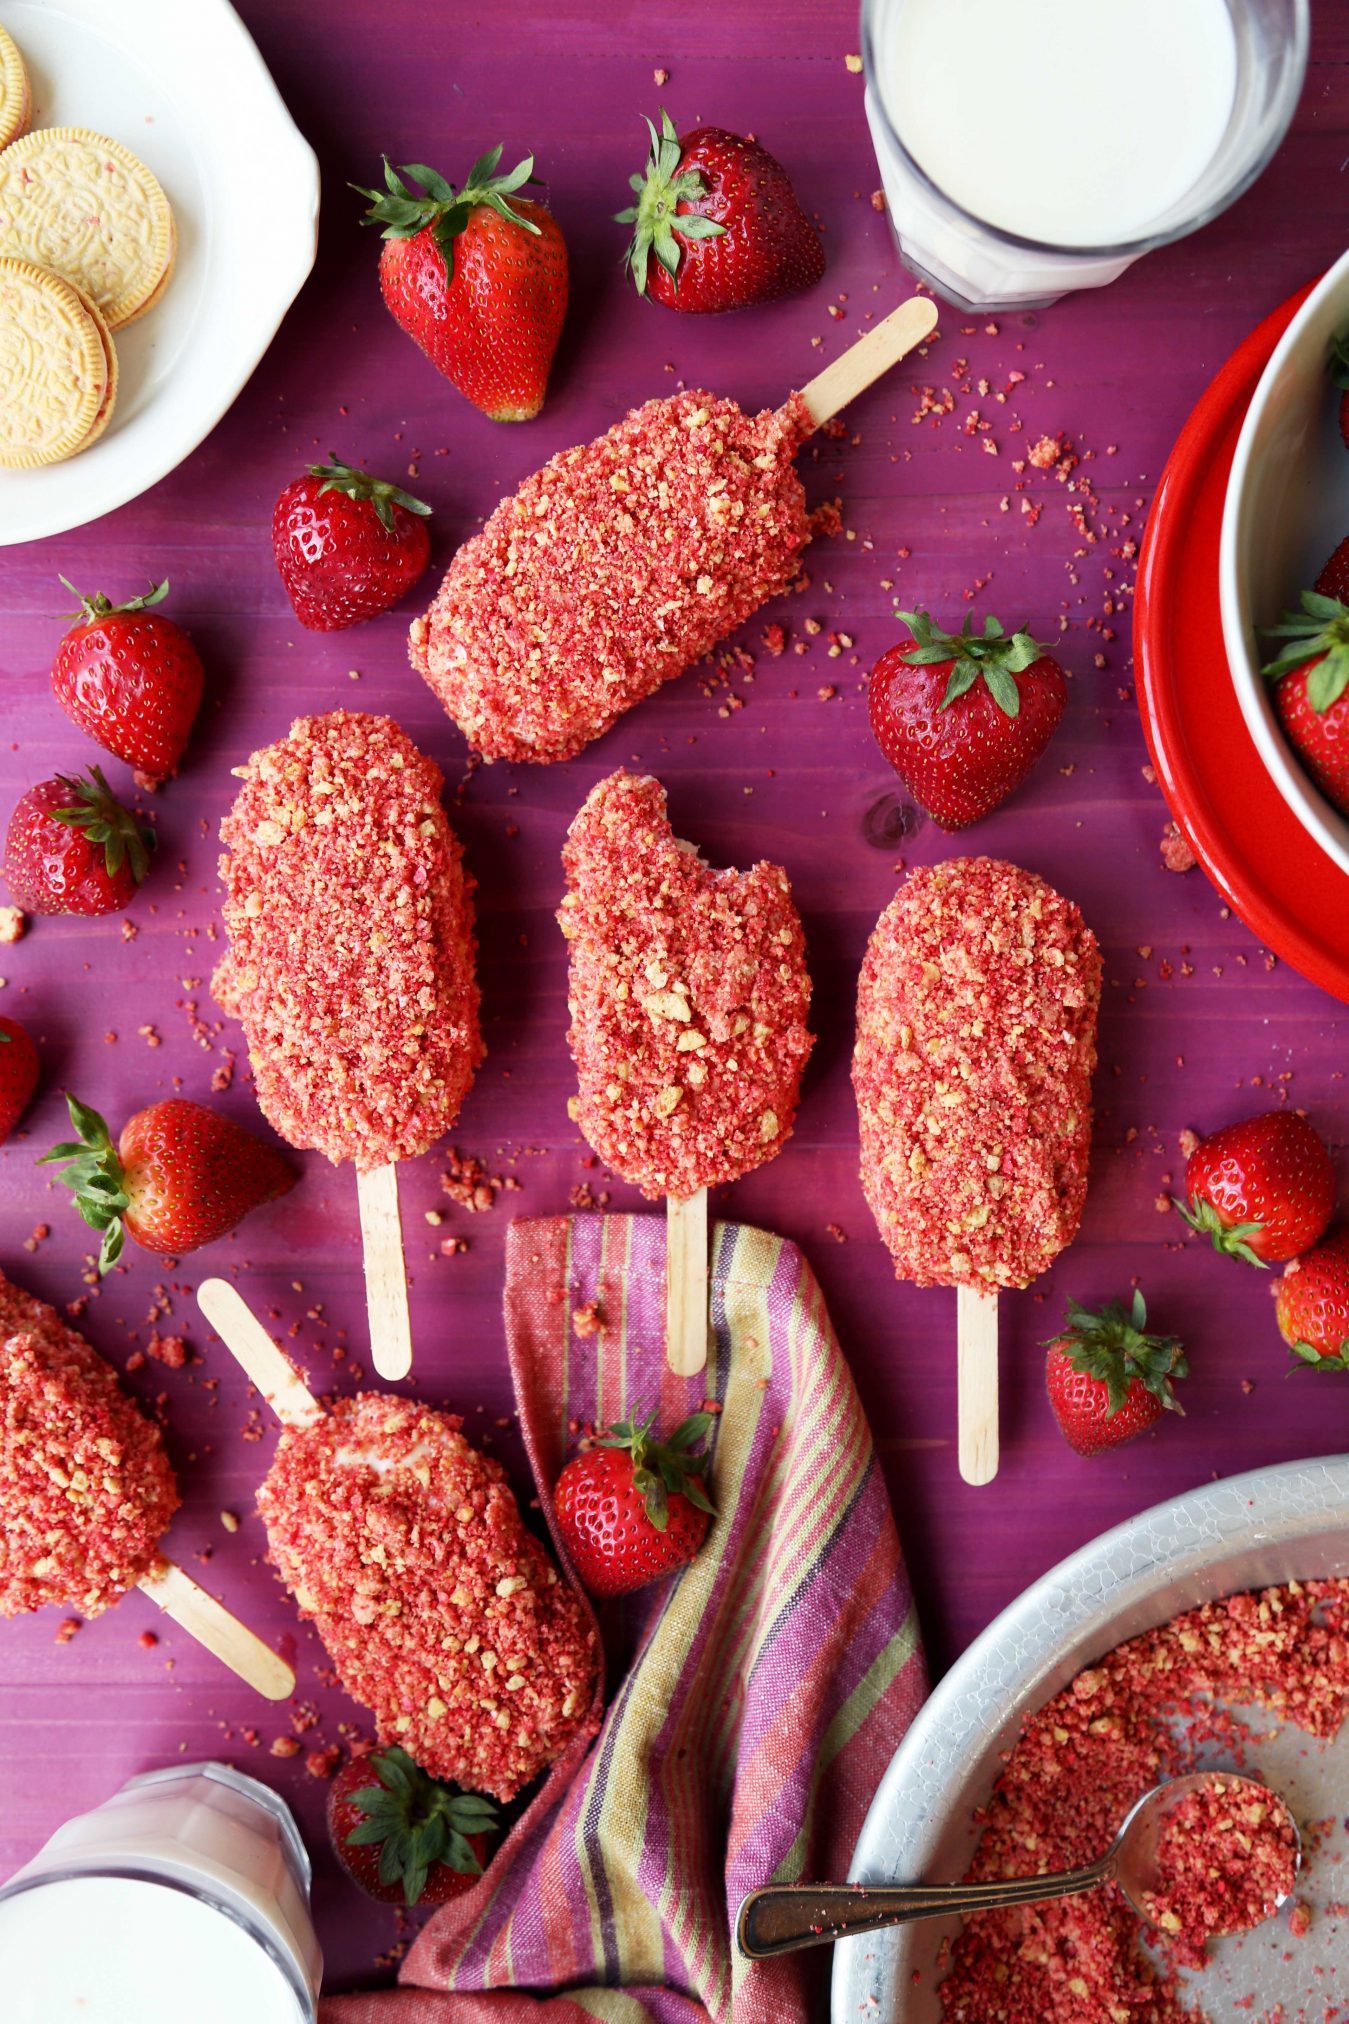
 When I was a kid, I would beg mom for money every time I heard the ice cream truck going around the neighborhood. I can’t tell you how many times I would run down the block so I could catch up with him. It was a constant game of trying to get out the door in time so I wouldn’t miss him. I would alternate the treats I would get from week to week. Sometimes I was in the mood for salty things like jalapeño cheddar popcorn or spicy corn nuts or cool ranch doritos. Sometimes I would want candy like now or laters or the gum with the zebra on it with the flavor didn’t last at all. Then on hot summer days, I would always go for ice cream. If I wasn’t getting a rocket pop, I would definitely get a batman ice cream bar with the bubblegum eyes. As I got older though I stopped getting the batman pops and started obsessing over the good humor strawberry shortcake ice cream bars. I remember eating those all summer long. Now as an adult, I can’t even tell you when was the last time I had one and I’m pretty sure they’d be equally delicious and disappointing. That’s why I wanted to recreate them at home. Now, these aren’t 100% the same. For instance, it doesn’t have a bright red ice cream filling surrounded by vanilla ice cream, BUT I do think they come pretty close in flavor. They’re incredibly easy to make thanks to the no-churn strawberry ice cream. If you’re a fan like me, then you have to give these a try soon!

Let’s start with the strawberry part of these popsicles. Hull and slice in half about half a pound of fresh strawberries and place in a large bowl. Sprinkle with a bit of granulated sugar and mash with a fork.
**Tip: I added only a tablespoon of sugar because it helps bring out the natural juices of the berries, and sweetens them up a bit more. If you find that your berries are already sweet and not tart, you don’t have to add the sugar if you don’t want to!**
 You can give them a mash with a form or potato masher until somewhat chunky, and a lot of the natural juices from the strawberries have released. You can leave it as chunky or as smooth as you’d like. Set to the side while you work on the other parts of the recipe.
 In a large bowl, beat together the heavy cream, sweetened condensed milk and vanilla extract until stiff peaks form.
**Note: Be very careful that you don’t over beat this mixture or else you’ll end up with sweetened butter basically. If you find that you’ve slightly over beaten your cream, you can fold in a bit more heavy cream to loosen it up.**
 Add the mashed strawberries and the juices to the beaten cream and fold gently with a rubber spatula until evenly combined and streaks of strawberries are running throughout the mixture.
**Tip: This is a great 5-ingredient no-churn ice cream recipe that you can keep in mind the next time you want simple homemade strawberry ice cream and don’t have a fancy machine!**
 At this point you can transfer the mixture to a freezer-safe container and freeze until firm and you’ll have delicious strawberry ice cream. We are making popsicles however and so you should divide the mixture evenly into your popsicle molds. Give them a tab on the counter a few times to release air bubbles. Freeze until firm, about 6 hours or overnight.
**Tip: Any popsicle mold will work for this recipe. The traditional kind like this one. Or you can use the ones that I have, which come in a pack of two from Amazon, and I LOVE them!**
 To make the crumb coating, place your strawberry sandwich cookies in a food processor and pulse until finely chopped. Pour out half of the crumbs into a shallow bowl.
**Note: I used the new strawberry shortcake Oreos for this, but feel free to use regular vanilla sandwich cookies if you prefer.**
 Place the dried strawberries into the food processor with the remaining crumbs and pulse until finely chopped as well. Add in the melted butter and pulse once more until the mixture resembles coarse crumbs.
 Pour the strawberry crumbs into the shallow dish as well and stir until well combined.
 Once your popsicles are frozen, carefully remove them from the molds and place on a baking sheet lined with parchment paper. Allow them to sit at room temperature for at least 2 to 3 minutes to warm them up slightly. This will make the coating stick better.
**Tip: If you want to speed things along, you can place the palm of your hand on the popsicles to slightly warm them. Then you’ll be good to go.**
 Place each popsicles into the crumbs and press slightly on each side to makes sure the coating sticks. Return to the baking sheet and continue coating the rest.
 Once all of your popsicles are coated, return them to the freezer and allow to freeze for at least 30 minutes before eating or serving. This will allow the coating to really stick and make sure they firm up once more.


You can eat them right away or keep them in the freezer for up to 2 weeks. If you plan on keeping them in the freezer, I recommend wrapping each one individually in plastic wrap to keep them as fresh as possible!
 If this is all of your childhood dreams come true, then you really need to make these popsicles for yourself as soon as humanely possible! Don’t let summer go by without giving them a shot. I know it might seem complicated, but they’re actually super easy to make. The ice cream is no-churn and the hardest part is really just waiting for the popsicles to freeze. This will be your new favorite summer treat, I guarantee it!

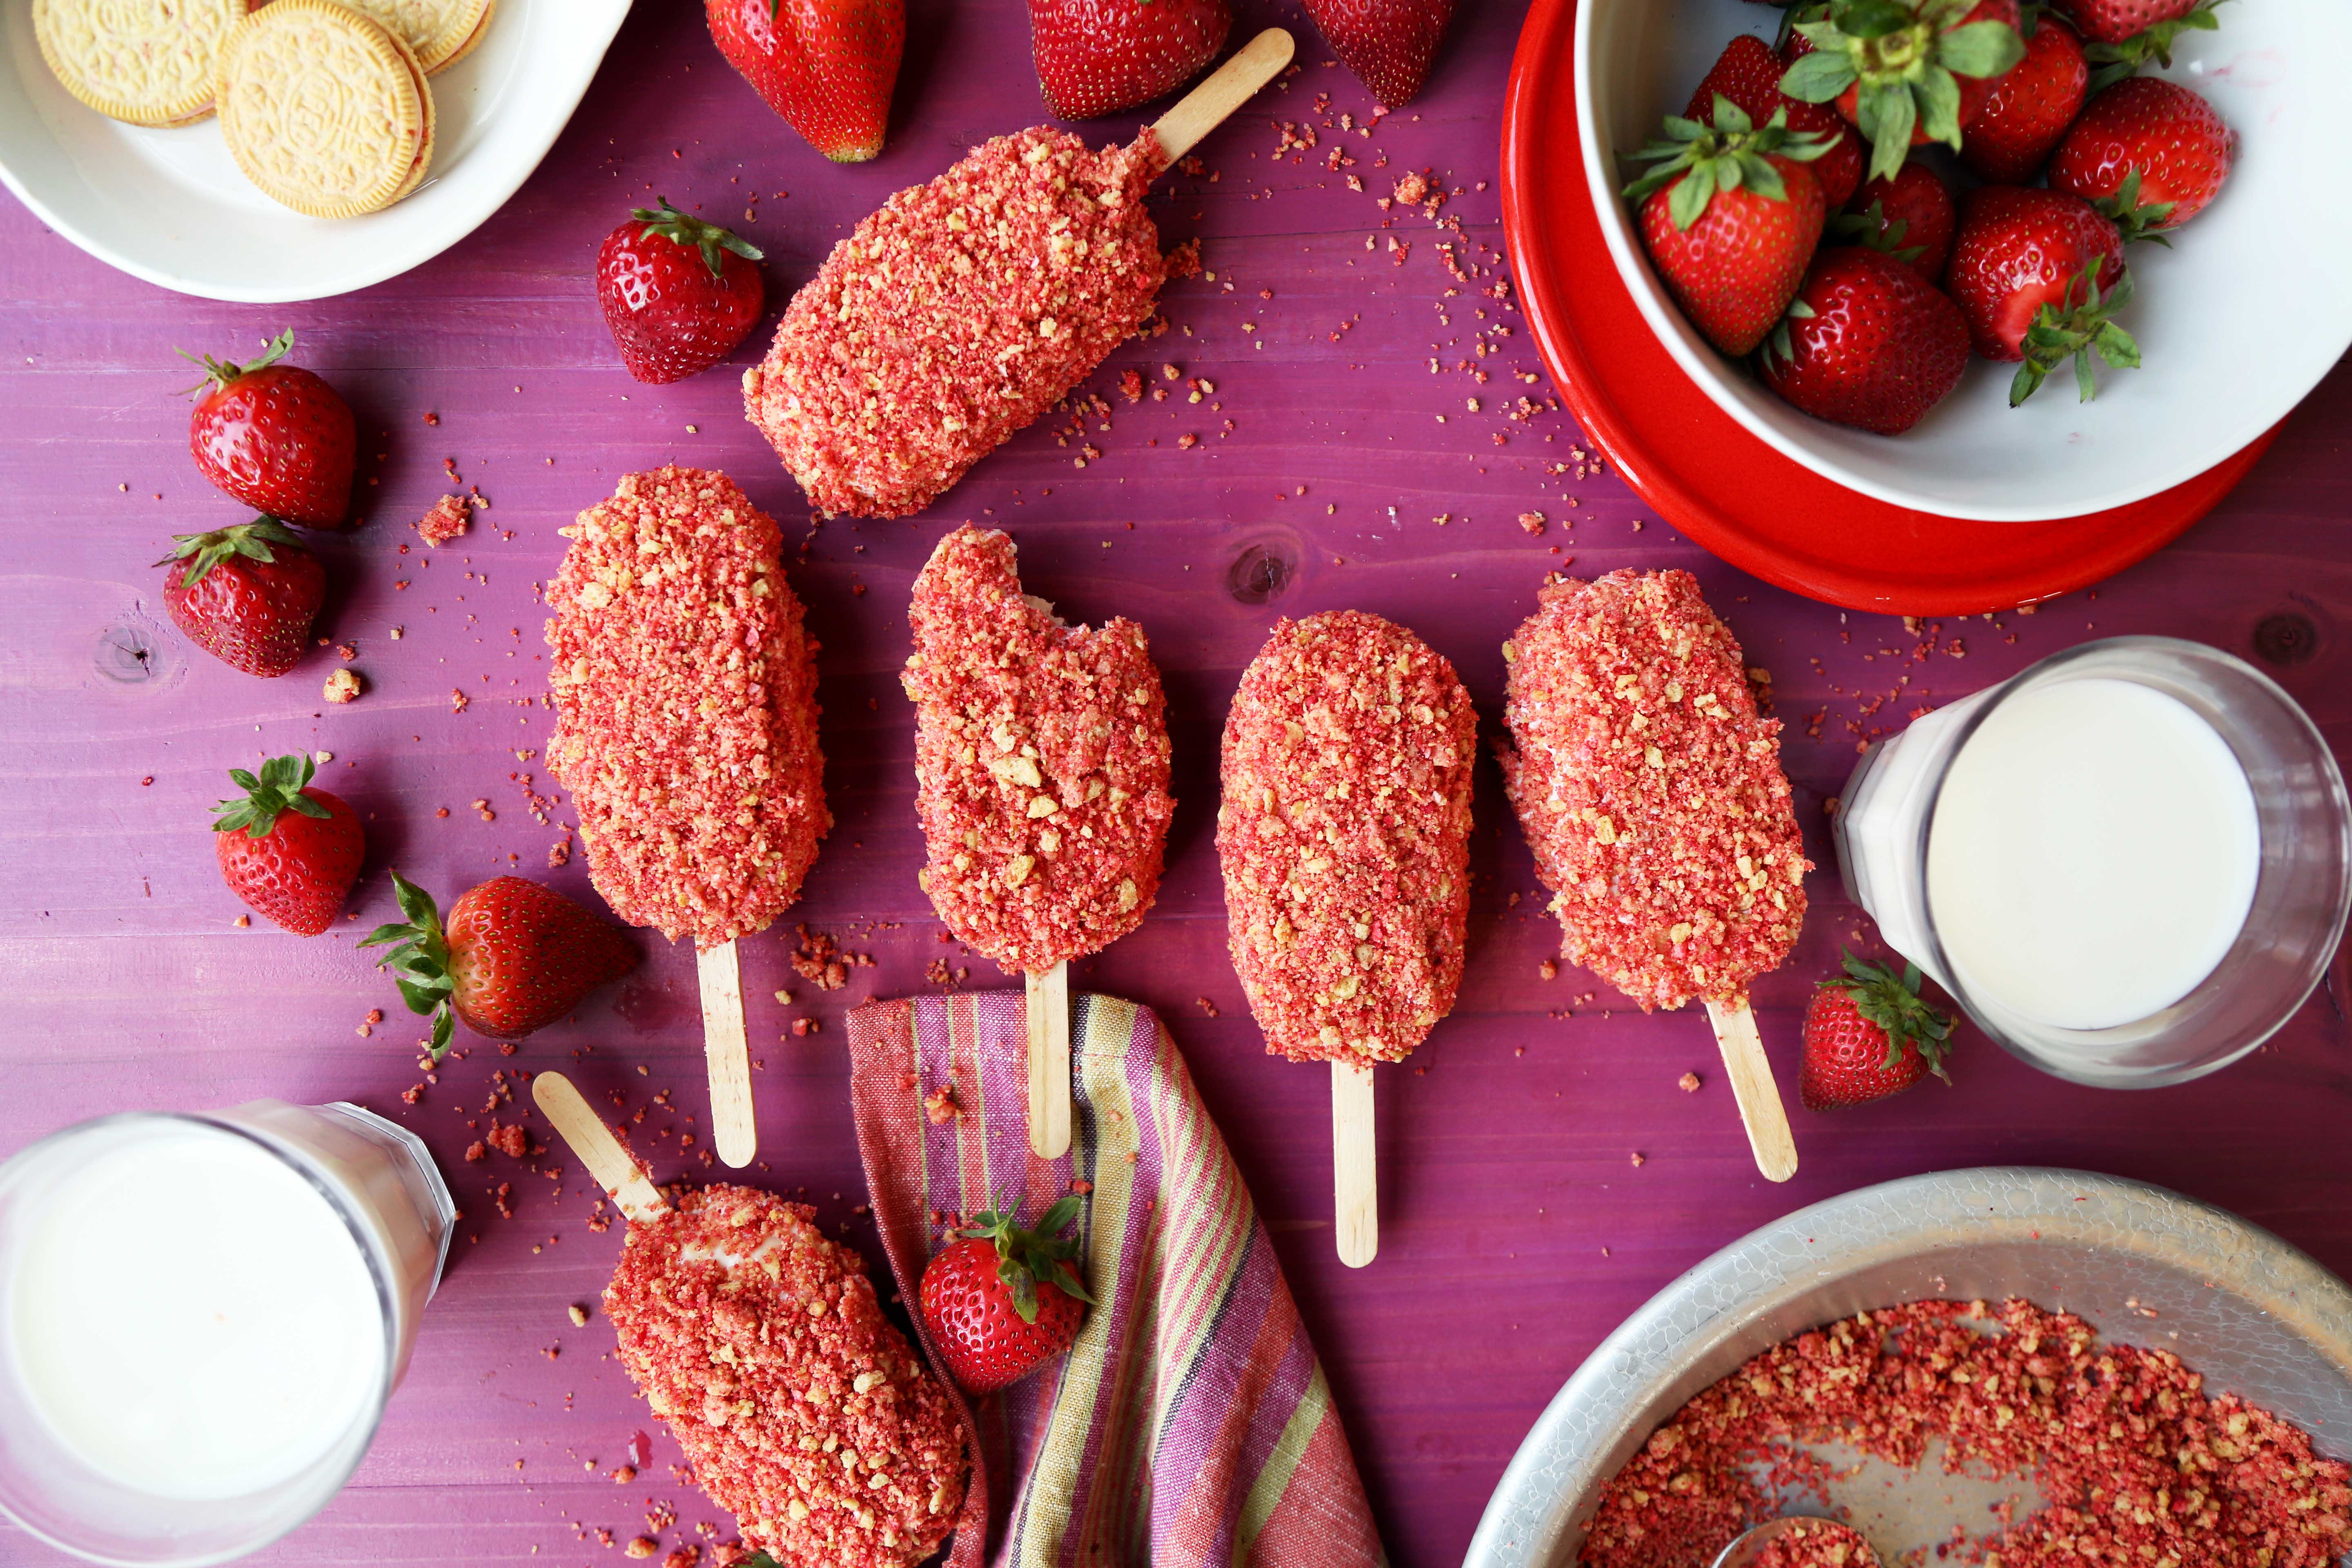
Strawberry Shortcake Ice Cream Bars
Ingredients
- 1/2 pound fresh strawberries hulled
- 1 tablespoon granulated sugar
- 1 cup heavy whipping cream
- 1 teaspoon vanilla extract
- 7 ounces sweetened condensed milk
- 1 10.7 ounce package strawberry shortcake sandwich cookies (or just vanilla sandwich cookies)
- 1 ounce 28-grams freeze dried strawberries
- 1 tablespoon unsalted butter melted
Instructions
- In a large bowl, mash together the strawberries and sugar until somewhat chunky and a lot of the natural juices have come out. Set aside.
- Beat the heavy cream, vanilla and sweetened condensed milk on high until stiff peaks form, about 5 to 8 minutes. Be sure to not over beat the cream or else it'll turn to butter.
- Pour the mashed strawberries, juice included, into the cream and fold until evenly distributed. It doesn't have to be completely mixed together. Some streaks of strawberry throughout is fine.
- Divide the mixture into popsicle molds, insert wooden sticks and freeze until completely firm, about 6 hours or overnight.
- To make the topping, place the cookies in a food processor and pulse until finely chopped. Pour out half of the crumbs into a shallow dish. Add the dried strawberries into the food processor with the remaining crumbs and pulse until the mixture comes together. Pour in the butter and pulse once more until coarse crumbs form. Add the strawberry cookie crumbs to the shallow dish and mix together.
- Remove the popsicles from the molds and place on a baking sheet lined with parchment paper. Allow to sit for about 2 to 3 minutes to warm up the outside of the popsicles, this will allow the coating to stick. If you want to speed it along, you can place the palm of your hand on the popsicles to warm them up slightly. Coat each popsicle evenly and generously with the crumb mixture, pressing the crumbs onto the popsicles as much as possible. Return to the baking sheet and continue coating the rest.
- Return the popsicles to the freezer for at least 30 minutes before serving. They can be kept in the freezer for up to 2 weeks. Enjoy!
YUM! These ice cream bars look fabulous and perfect for the summer! Delicious!
Just curious about the bowl of what looks like white chocolate chips. Was that part of an earlier recipe that didn’t pan out, or was it just for decoration? I’ve seen other shortcake bar dupes that use white chocolate as a glaze to keep the crumbs held tight, but you didn’t appear to need it because you let your pops warm up a touch, a brilliant idea.
It’s from a previous testing of the recipe where I coated them in white chocolate before the crumb coating, but it turned out that the chocolate just slid off, so I remade them without and it worked much better!